Engine Mechanical System
Engine and Transaxle Assembly Repair Procedures
In this manual: Engine Mechanical System
28steps
~168min
4/5difficulty
Done 0 of 28
Removal
- Remove the engine cover.
- Remove the battery and battery tray. (Refer to Engine Electrical System - "Battery")
- Remove the air duct and air cleaner assembly. (Refer to Intake and Exhaust System - "Air Cleaner")
- Remove the engine compartment cover. (Refer to Engine and Transaxle Assembly - "Engine Compartment Under Cover")
- Drain the engine coolant. (Refer to Cooling System - "Engine Coolant")
- Remove the intake hoses and intercooler tube (A). Tightening torque Bolt: 19.6 ~ 26 N·m Clamp: 4.9 ~ 6.8 N·m
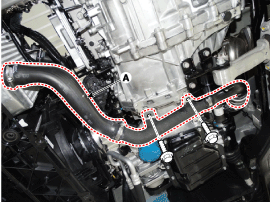
- Disconnect the upper radiator hose (A).
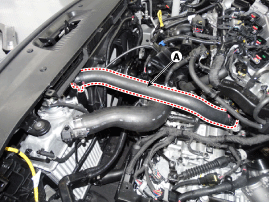
- Disconnect the radiator lower hose (A).

- Remove the intercooler outlet hose (A).
Tightening torque: 4.9 - 6.8 N·m

- Recover the refrigerant, then remove the high-pressure line and the low-pressure line. (Refer to Heating, Ventilation and Air Conditioning - "Compressor")
- Disconnect the transmission wiring harness connectors and the control cable from the transmission. (Refer to Automatic Transmission System - "Automatic Transmission")
- Disconnect the brake booster vacuum hose (A).
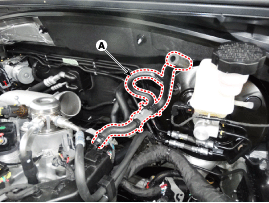
- Disconnect the heater hoses (A).
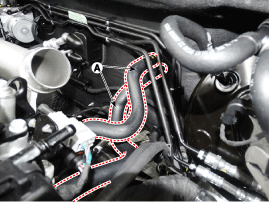
When installing the heater hoses, install them as shown in the illustrations.

- Disconnect the fuel hose (A) and the hose (B) of the purge control solenoid valve (PCSV).
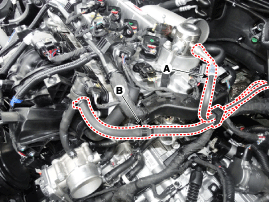
- Disconnect the ECM connectors (A) from the ECM, the fuse block connector (B) from the fuse/relay block, and the engine ground wire (C). Then remove the wiring protector (D).

- Disconnect the vacuum hose (A).
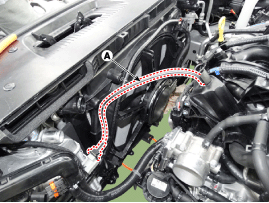
- Disconnect the (+) cable (A) from the fuse and relay box and front connector (B). Then remove the wiring protector (C).
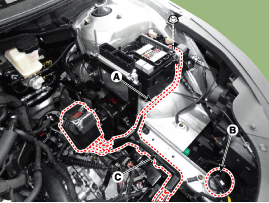
- Remove the front muffler. (Refer to Intake and Exhaust System - "Muffler")
- Remove the steering universal joint mounting bolt. (Refer to Steering System - Electric Power Steering)
- Remove the roll rod bracket (A). Tightening torque Bolt (B): 107.9 ~ 128 N·m Bolts (C): 49.0 ~ 64 N·m
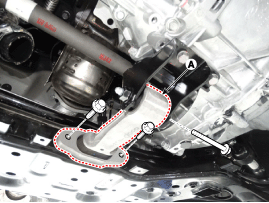
- Remove the roller rod bracket (A).
Tightening torque: 49.0 ~ 69 N·m
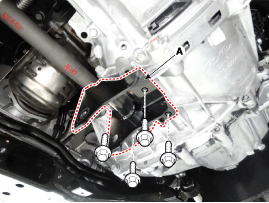
- Remove the suspension member. (Refer to Suspension System - "Suspension Member")
- Support the engine and transaxle assembly with a floor jack.
- Disconnect the ground cable (A) and remove the engine mounting support bracket (B). Tightening torque: Ground cable: 10.8 ~ 13.7 N·m Support bracket: 88.3 ~ 108 N·m
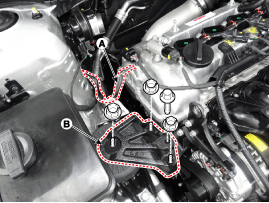
- Disconnect the ground line (A).
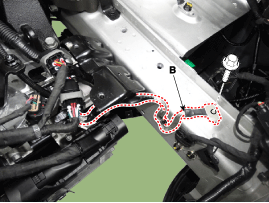
- Remove the service cover (A).

- Remove the transmission mounting bolts (A).
Tightening Torque: 107.9 ~ 128 N·m
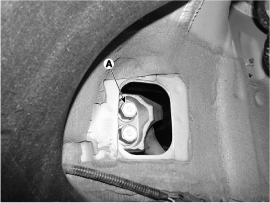
- Remove the engine and transaxle assembly by lifting the vehicle.
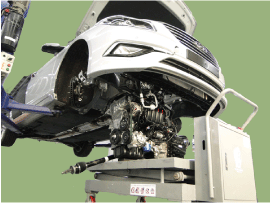
- Before removing the engine and transaxle assembly, make sure that all hoses and wiring connectors are disconnected.
- When removing the engine and transaxle, be careful not to damage surrounding parts or body components.
Installation
Installation is performed in the reverse order of removal. Perform the following:- Adjust the shift cable.
- Adjust the accelerator cable.
- Fill the engine with engine oil.
- Fill the transmission with fluid.
- Fill the power steering fluid.
- Fill the radiator and the coolant reservoir with engine coolant.
- Set the heater control lever to the "HOT" position.
- Clean the battery terminal posts and cable clamps, then assemble.
- Inspect for fuel leaks.
- After assembling the fuel line, turn the ignition switch ON (do not operate the starter) so that the fuel pump operates for about two seconds and pressurizes the fuel line.
- Repeat this procedure two or three times, then check all fuel line connections for leaks.
- Bleed air from the cooling system.
- Start the engine and let it run until warm (until the radiator fan cycles 3 or 4 times).
- Turn the engine off. Check the coolant level in the radiator and add coolant if necessary. This allows trapped air to be removed from the cooling system.
Test yourself
A quick Hyundai Sonata LF quiz: every answer comes with an explanation and a link to the manual page.
Was this page helpful?