Engine Compartment Light Switch
Components
COMPONENTS
ILLUSTRATION
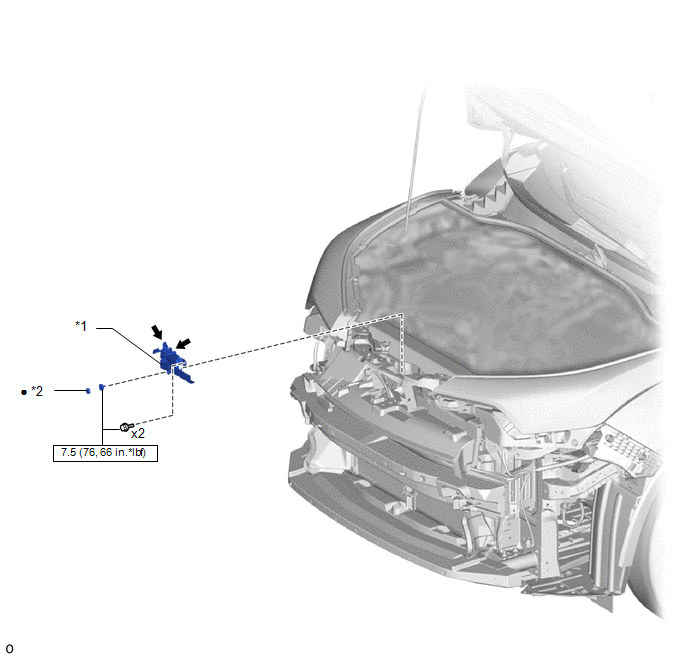
*1 |
ENGINE COMPARTMENT LIGHT SWITCH (HOOD LOCK ASSEMBLY) |
*2 |
HOOD LOCK NUT CAP |
 |
N*m (kgf*cm, lbf*in): Specified torque |
● |
Non-reusable part |
 |
MP grease |
- |
- |
Inspection
INSPECTION
PROCEDURE
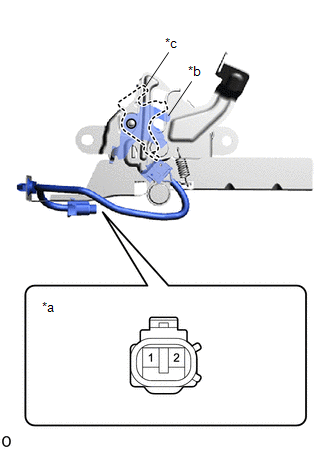
1. INSPECT ENGINE COMPARTMENT LIGHT SWITCH (HOOD LOCK ASSEMBLY)
(a) Check the resistance. (1) Measure the resistance according to the value(s) shown in the table below. Standard resistance:
If the resistance is not as specified, replace the engine compartment light switch (hood lock assembly). |
|
Removal
REMOVAL
PROCEDURE
1. REMOVE FRONT BUMPER ASSEMBLY
Click here
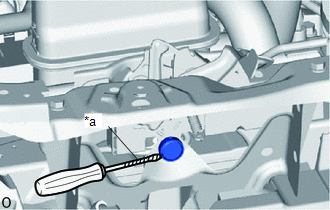
2. REMOVE HOOD LOCK NUT CAP
(a) Using a screwdriver with its tip wrapped in protective tape, remove the hood lock nut cap. |
|
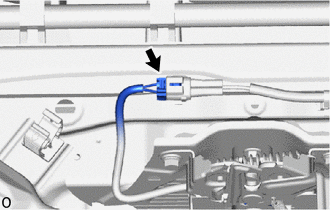
3. REMOVE ENGINE COMPARTMENT LIGHT SWITCH (HOOD LOCK ASSEMBLY)
(a) Disconnect the connector. |
 |
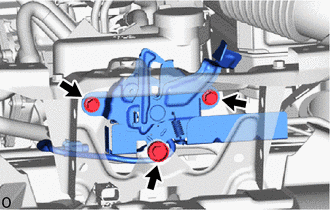
(b) Remove the 2 bolts and the hood lock bolt to detach the engine compartment light switch (hood lock assembly). |
 |
(c) Release the guide. |
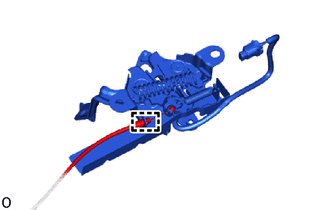 |
(d) Disconnect the hood lock control cable assembly to remove the engine compartment threshold light switch (hood lock assembly).
Installation
INSTALLATION
PROCEDURE
1. INSTALL ENGINE COMPARTMENT THRESHOLD LIGHT SWITCH (HOOD LOCK ASSEMBLY)
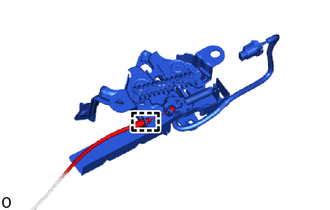
(a) Engage the guide to connect the hood lock control cable assembly. |
 |
(b) Install the engine compartment threshold light switch (hood lock assembly) with the 2 bolts and the hood lock bolt.
Torque:
7.5 N·m {76 kgf·cm, 66 in·lbf}
(c) Connect the connector.
2. INSTALL HOOD LOCK NUT CAP
(a) Install a new hood lock nut cap.
3. INSTALL FRONT BUMPER ASSEMBLY
Click here