Certification ECU
Components
COMPONENTS
ILLUSTRATION
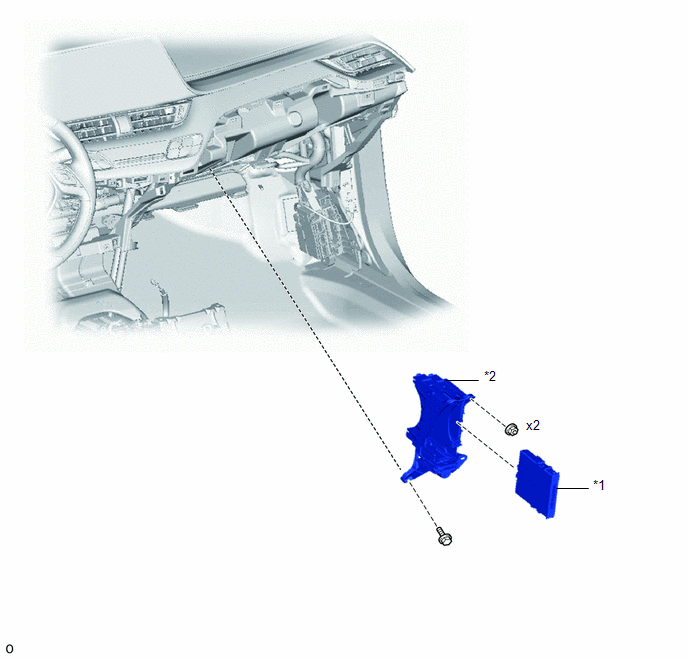
*1 |
CERTIFICATION ECU (SMART KEY ECU ASSEMBLY) |
*2 |
RH ECU INTEGRATION BOX |
Installation
INSTALLATION
PRECAUTION / NOTICE / HINT
NOTICE:
Before replacing the certification ECU (smart key ECU assy), refer to the Registration chapter.
Click here
PROCEDURE
1. INSTALL CERTIFICATION ECU (SMART KEY ECU ASSEMBLY)
(a) Engage the claws to install the certification ECU (smart key ECU assembly) as shown in the illustration.
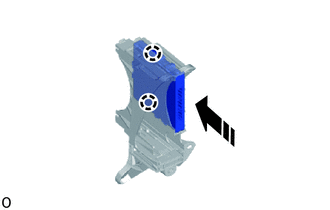
 |
Install in this direction |
2. INSTALL RH ECU INTEGRATION BOX
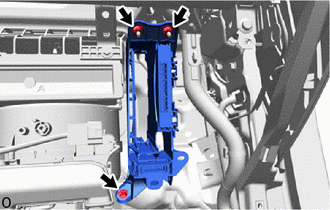
(a) Install the RH ECU integration box with the 2 nuts and the bolt.
(b) Install the wire harness clamp. |
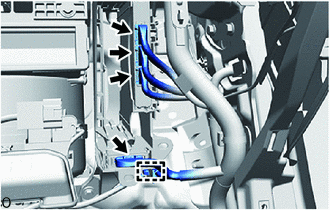 |
(c) Connect the 4 connectors.
3. INSTALL INSTRUMENT PANEL LOWER FINISH PANEL NO. 2
Click here
Removal
REMOVAL
PRECAUTION / NOTICE / HINT
The procedures required (adjustment, calibration, initialization or registration) that must be performed after parts have been removed and installed or replaced during certification ECU (smart key ECU assembly) removal/installation are shown below.
Procedure Required After Replacing / Removing / Installing PartsReplacement part or procedure | Necessary Procedures | Effects / Inoperative Function When Necessary Procedure Not Performed | Link |
|---|---|---|---|
Certification ECU (Smart Key ECU Assy) |
Perform Code Registration (Immobilizer System) |
|
with Smart Key System: |
PROCEDURE
1. REMOVE INSTRUMENT PANEL LOWER FINISH PANEL NO. 2
Click here
2. REMOVE RH ECU INTEGRATION BOX
(a) Disconnect the 4 connectors. |
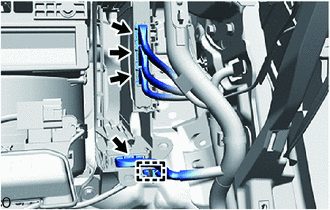 |
(b) Using a clip remover, release the wire harness clamp.
(c) Remove the bolt, the 2 nuts and the RH ECU integration box. |
 |
3. REMOVE CERTIFICATION ECU (SMART KEY ECU ASSEMBLY)
(a) Using a screwdriver with its tip wrapped in protective tape, release the claws to remove the certification ECU (smart key ECU assembly) as shown in the illustration.
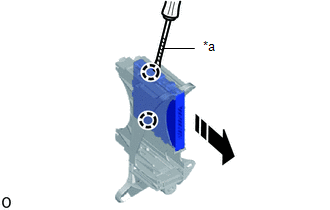
*a |
Protective tape |
 |
Remove in this direction |