Disassembly
DISASSEMBLY
PROCEDURE
1. PRECAUTIONS
NOTICE:
Be sure to perform initialization after replacing the Heater Radiator Damper Servo Sub-assembly. If initialization is not performed, the air conditioning unit assembly will not operate correctly, because the air conditioning amplifier assembly will not be able to recognize the position of the Heater Radiator Damper Sub-assembly.
2. REMOVE AIR DUCT NO. 2
(a) Remove the screw. |
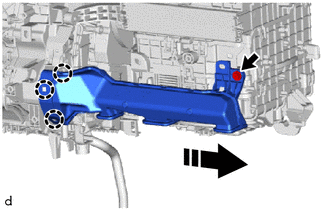 |
(b) Release the claws to remove the Air Duct No. 2.
3. REMOVE AIR CONDITIONING TUBE SUB-ASSEMBLY
(a) Release the claws to remove the Air Conditioning Tube Sub-assembly. |
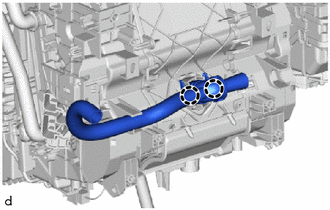 |
4. REMOVE INSTRUMENT PANEL WIRE NO. 3
(a) Disconnect the 2 connectors. |
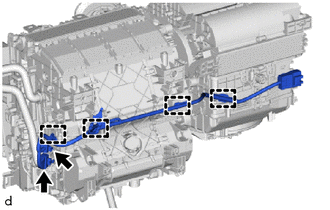 |
(b) Release the clips to remove the Instrument Panel Wire No. 3.
5. REMOVE BLOWER ASSEMBLY
Click here
6. REMOVE HEATER COVER NO. 2
(a) Remove the screw.
(b) Release the claw and guide to remove the Heater Cover No. 2. |
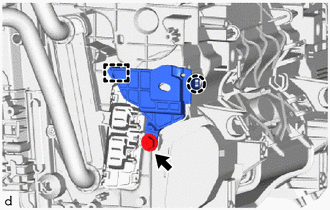 |
7. REMOVE QUICK HEATER ASSEMBLY
(a) Release the guide to remove the quick heater assembly, as shown in the illustration.
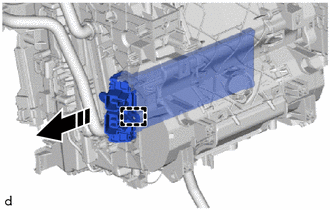
 |
Remove in this direction |
8. REMOVE AIR CONDITIONING AMPLIFIER ASSEMBLY
(a) Disconnect the connector.
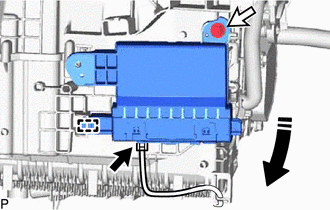
|
Remove in this direction |
(b) Remove the screw.
(c) Release the guide to remove the air conditioning amplifier assembly, as shown in the illustration.
9. REMOVE AIR CONDITIONING WIRE HARNESS ASSEMBLY
(a) Disconnect each connector. |
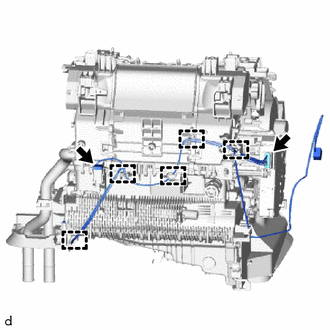 |
(b) Release the clips to remove the air conditioning wire harness assembly.
10. REMOVE COOLER DRAIN HOSE
(a) Remove the cooler drain hose. |
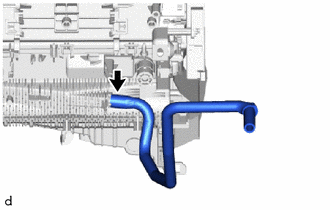 |
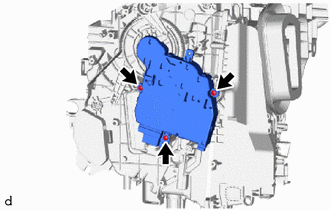
11. REMOVE HEATER RADIATOR DAMPER SERVO SUB-ASSEMBLY NO. 1
(a) Remove the 3 screws and the Heater Radiator Damper Servo Sub-assembly No. 1. |
 |
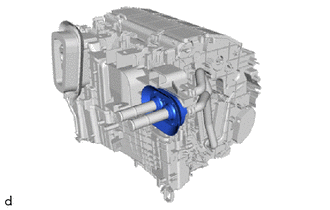
12. REMOVE HEATER PIPE GROMMET
(a) Remove the heater pipe grommet. |
 |
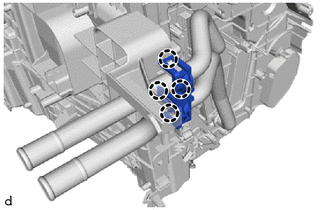
13. REMOVE HEATER CLIP
(a) Release the claws to remove the heater clip. |
 |
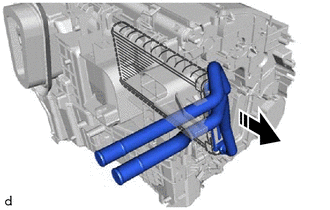
14. REMOVE HEATER UNIT SUB-ASSEMBLY
|
Remove in this direction |
(a) Remove the Heater Unit Sub-assembly, as shown in the illustration.
NOTICE:
Prepare a container or cloth to catch any coolant that leaks out.
15. REMOVE COOLER EXPANSION VALVE
(a) Remove the grommet. |
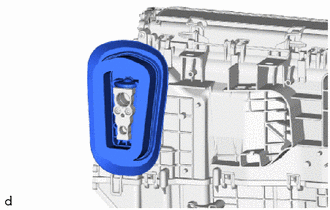 |
(b) Using a 4 mm hexagon wrench, remove the 2 hexagon bolts and the cooler expansion valve. |
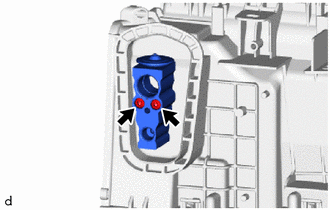 |
(c) Remove the 2 O-rings from the Cooler Evaporator Sub-assembly No. 1.
16. REMOVE COOLER EVAPORATOR SUB-ASSEMBLY NO. 1
(a) Remove the 2 screws.
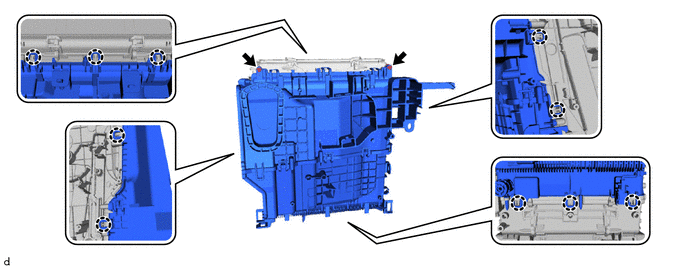
(b) Release the claws to remove the upper heater case with the Cooler Evaporator Sub-assembly No. 1 from the lower heater case.
(c) Release the clip. |
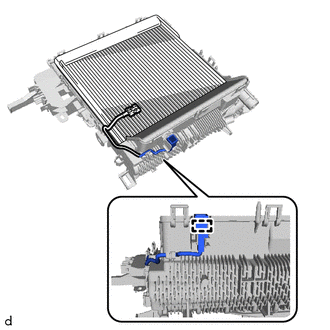 |
(d) Remove the Cooler Evaporator Sub-assembly No. 1 with the Cooler Thermistor No. 1 from the upper heater case.
17. REMOVE COOLER THERMISTOR NO. 1
Click here