Reassembly
REASSEMBLY
PROCEDURE
1. INSTALL NO. 1 COOLER THERMISTOR
Click here
2. INSTALL COOLER EVAPORATOR SUB-ASSEMBLY NO. 1
(a) Install the Cooler Evaporator Sub-assembly No. 1 with the Cooler Thermistor No. 1 to the heater upper case. |
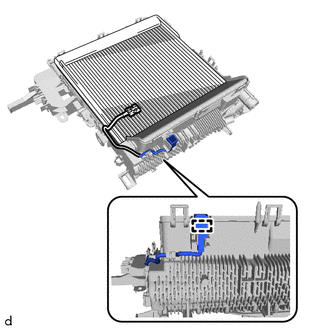 |
(b) Engage the clip.
(c) Engage the claws to install the heater case, using the upper part of the Cooler Evaporator Sub-assembly No. 1, to the lower heater case.
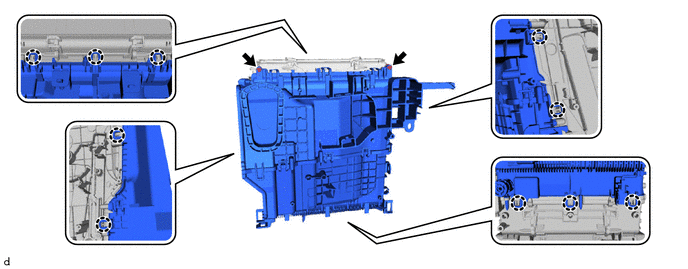
(d) Install the 2 screws.
3. INSTALL COOLER EXPANSION VALVE
(a) Apply enough compressor oil to 2 new O-rings and the mating surfaces of the Cooler Evaporator Sub-assembly No. 1.
Compressor oil:
ND-OIL 12 or equivalent
(b) Install the 2 O-rings to the Cooler Evaporator Sub-assembly No. 1.
NOTICE:
Keep the O-rings and O-ring mating surfaces free of foreign matter.
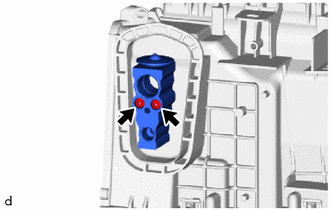
(c) Using a 4 mm hexagon socket wrench, install the cooler expansion valve with the 2 hexagon bolts. Torque: 3.5 N·m {36 kgf·cm, 31 in·lbf} |
 |
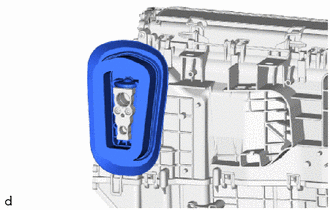
(d) Install the grommet. |
 |
4. INSTALL HEATER UNIT SUB-ASSEMBLY
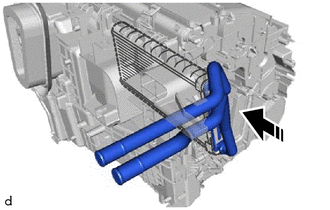
 |
Install in this direction |
(a) Install the Heater Unit Sub-assembly, as shown in the illustration.
5. INSTALL HEATER CLIP
(a) Engage the claws to install the heater clip. |
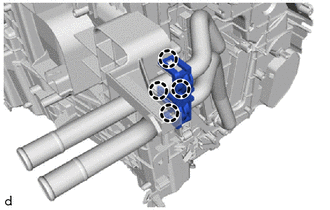 |
6. INSTALL HEATER PIPE GROMMET
(a) Install the heater grommet. |
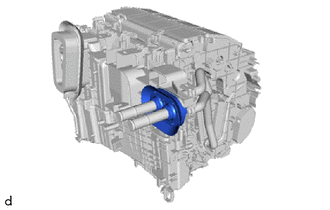 |
7. INSTALL HEATER RADIATOR DAMPER SERVO SUB-ASSEMBLY NO. 1
(a) Align each gear with the Air Conditioning Radiator Assembly as shown in the illustration, then make sure the gears of the Heater Radiator Damper Servo Sub-assembly No. 1 are aligned as shown in the illustration.
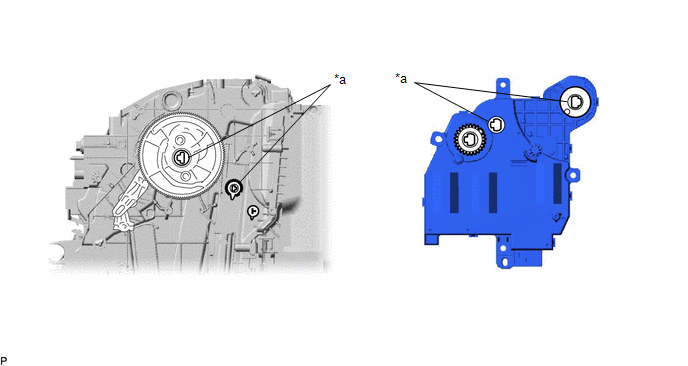
*a |
Reference point |
- |
- |
(b) Using the reference points, install the Heater Radiator Damper Servo Sub-assembly No. 1 with the 3 screws.
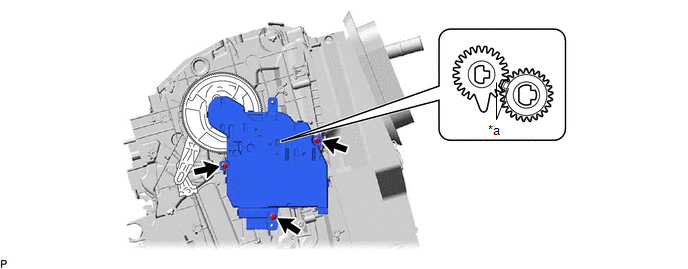
*a |
Reference point |
- |
- |
8. INSTALL COOLER DRAIN HOSE
(a) Align the hose notch with the rib as shown in the illustration, then install the cooler drain hose. |
|
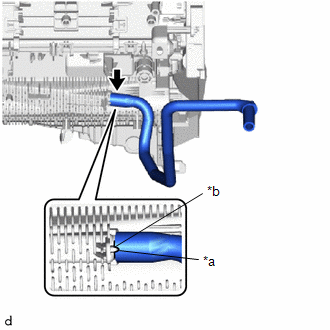
9. INSTALL AIR CONDITIONING WIRE HARNESS ASSEMBLY
(a) Engage the clips. |
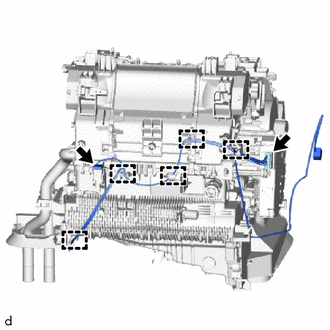 |
(b) Connect each connector to install the air conditioning wire harness assembly.
10. INSTALL AIR CONDITIONING AMPLIFIER ASSEMBLY
(a) Engage the guide to temporarily install the air conditioning amplifier assembly, as shown in the illustration.
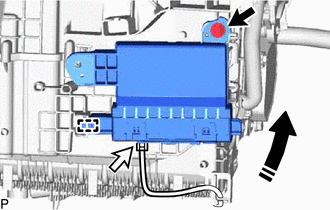
|
Install in this direction |
(b) Install the air conditioning amplifier assembly with the screw.
(c) Connect the connector.
11. INSTALL QUICK HEATER ASSEMBLY
(a) Engage the guide to install the quick heater assembly as shown in the illustration.
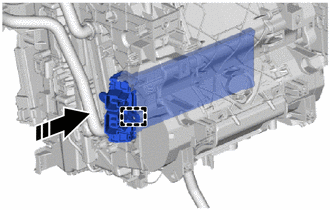
|
Install in this direction |
12. INSTALL HEATER COVER NO. 2
(a) Engage the claw and guide to install the Heater Cover No. 2. |
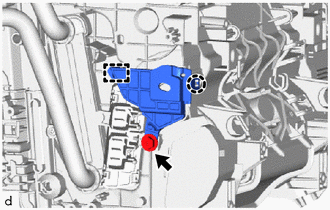 |
(b) Install the screw.
13. INSTALL BLOWER ASSEMBLY
Click here
14. INSTALL INSTRUMENT PANEL WIRE NO. 3
(a) Engage the clips to install the Instrument Panel Wire No. 3. |
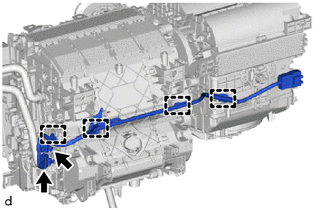 |
(b) Connect the 2 connectors.
15. INSTALL AIR CONDITIONING TUBE SUB-ASSEMBLY
(a) Engage the claws to install the Air Conditioning Tube Sub-assembly. |
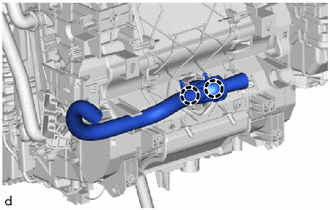 |
16. INSTALL AIR DUCT NO. 2
(a) Engage the claws to remove the Air Duct No. 2. |
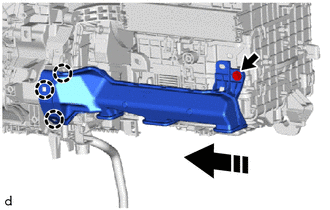 |
(b) Install the screw.