Removal
REMOVAL
PRECAUTION / NOTICE / HINT
The necessary procedures (adjustment, calibration, initialization or registration) that must be performed once parts have been removed, installed or replaced during removal/installation of the air conditioning unit assembly are shown below.
Procedure Required After Replacing / Removing / Installing PartsReplacement part or procedure | Necessary Procedures | Effects / Inoperative Function When Necessary Procedure Not Performed | Link |
|---|---|---|---|
Disconnect the cable from the negative (-) battery terminal. |
Memorize Steering Angle Neutral Point |
Lane Departure Alert System (with Steering Control) |
 |
Pre-Collision System |
|||
Initialize Back Door Lock |
Door Lock Control System |
|
|
|
Initialize Servo Motor (Air Conditioning System) |
DTCs are stored |
|
PROCEDURE
1. RECOVER REFRIGERANT FROM REFRIGERANT SYSTEM (for HFC-134a (R134a))
Click here
2. RECOVER REFRIGERANT FROM REFRIGERANT SYSTEM (for HFO-1234yf (R1234yf))
Click here
3. DRAIN ENGINE COOLANT
Click here
4. REMOVE FRONT WIPER MOTOR AND LINK ASSEMBLY
Click here
5. REMOVE HEATER AIR DUCT SPLASH SHIELD SEAL NO. 1
Click here
6. REMOVE LH WATERPROOF PROTECTIVE PLATE
Click here
7. REMOVE LH COWL BODY MOUNTING REINFORCEMENT
Click here
8. REMOVE RH COWL BODY MOUNTING REINFORCEMENT
Click here
9. REMOVE COWL TOP OUTER PANEL SUB-ASSEMBLY
Click here
10. DISCONNECT HEATER WATER OUTLET HOSE
(a) Slide the clip to disconnect the heater water outlet hose. NOTICE:
|
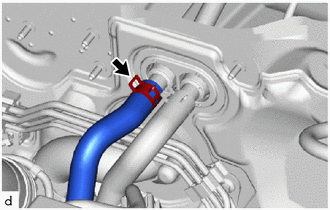 |
11. DISCONNECT HEATER WATER INLET HOSE
(a) Slide the hose clip to disconnect the heater water inlet hose. NOTICE:
|
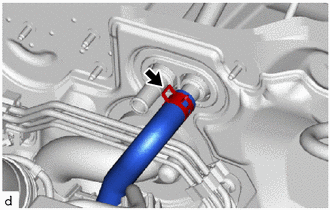 |
12. DISCONNECT SUCTION TUBE SUB-ASSEMBLY
(a) Remove the bolt. |
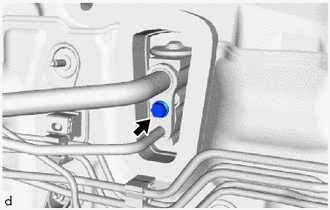 |
(b) Disconnect the suction tube sub-assembly and the cooler A liquid tube as shown in the illustration. |
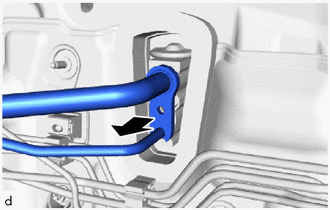 |
(c) Remove the 2 O-rings from the suction tube sub-assembly and the cooler A liquid tube.
NOTICE:
Using vinyl tape, seal the openings of the disconnected parts to prevent moisture or foreign matter from entering.
13. REMOVE FRONT SEAT ASSEMBLY LH
Click here
14. REMOVE FRONT SEAT ASSEMBLY RH
HINT:
Perform the same procedure as for the left side.
15. REMOVE INSTRUMENT PANEL SAFETY PAD SUB-ASSEMBLY
Click here
16. REMOVE STEERING COLUMN ASSEMBLY
Click here
17. REMOVE FRONT WIPER RELAY ASSEMBLY
Click here
18. REMOVE RH ECU INTEGRATION BOX
Click here
19. REMOVE COOLER THERMISTOR (INTERIOR TEMPERATURE SENSOR)
(a) Disconnect the connector and remove the cooler thermistor (interior temperature sensor) aspiration assembly. |
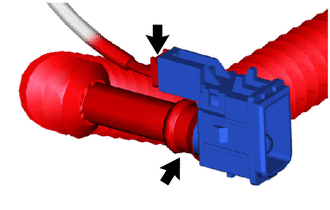 |
20. REMOVE INSTRUMENT PANEL INSULATOR NO. 3
(a) Release the clips to remove the instrument panel insulator No. 3. |
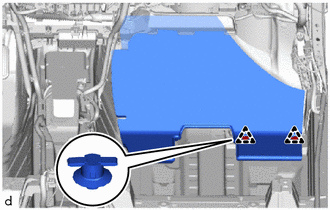 |
(b) Remove the 2 front carpet clips. |
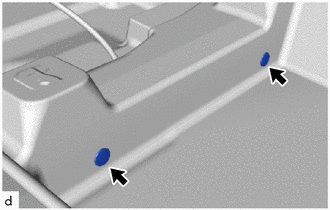 |
(c) Remove the clip.
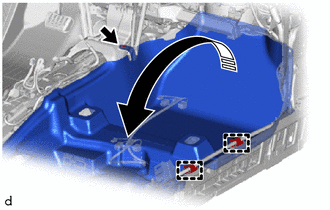
 |
Remove in this direction |
(d) Release the fasteners to turn back the front carpet assembly as shown in the illustration.
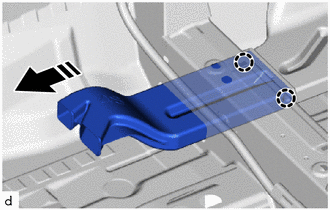
21. REMOVE REAR AIR DUCT NO. 6 (with rear air duct)
(a) Release the claws to remove the rear air duct No. 6 as shown in the illustration.
|
Remove in this direction |
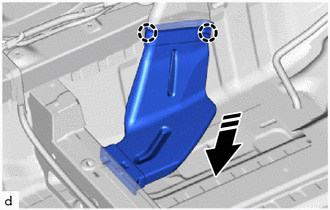
22. REMOVE REAR AIR DUCT NO. 5 (with rear air duct)
|
Remove in this direction |
(a) Release the claws to remove the rear air duct No. 5 as shown in the illustration.
23. REMOVE REAR AIR DUCT NO. 4 (with rear air duct)
(a) Remove the 2 front carpet clips. |
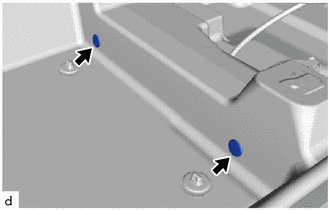 |
(b) Remove the clip.
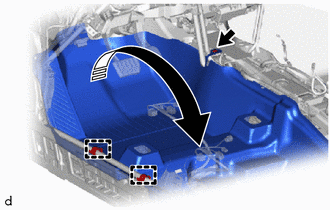
|
Remove in this direction |
(c) Release the clips to turn back the front carpet assembly, as shown in the illustration.
(d) Release the claws to remove rear air duct No. 4, as shown in the illustration.
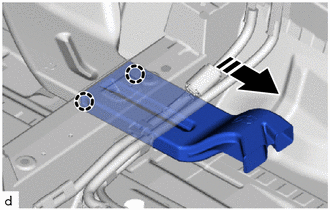
|
Remove in this direction |
24. REMOVE REAR AIR DUCT NO. 3 (with rear air duct)
(a) Release the claws to remove rear air duct No. 3, as shown in the illustration.
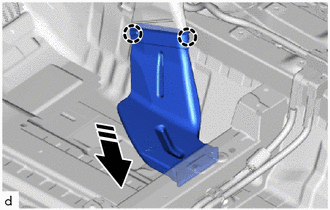
|
Remove in this direction |
25. REMOVE REAR AIR DUCT NO. 2 (with rear air duct)
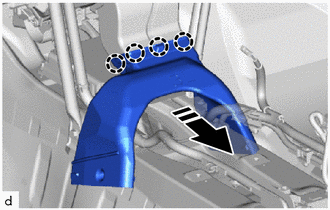
|
Remove in this direction |
(a) Release the claws to remove rear air duct No. 2.
26. REMOVE REAR AIR DUCT NO. 1 (with rear air duct)
(a) Release the claws to remove rear air duct No. 1, as shown in the illustration.
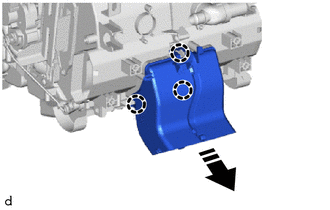
|
Remove in this direction |
27. DISCONNECT INSTRUMENT PANEL REINFORCEMENT SUB-ASSEMBLY NO. 1
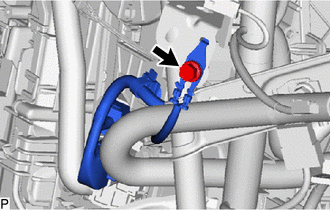
(a) With PTC heater:
(1) Remove the bolt to disconnect the ground cable. |
 |
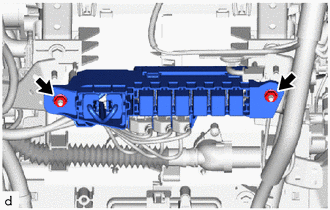
(b) Remove the 2 nuts and detach the relay block assembly. |
 |
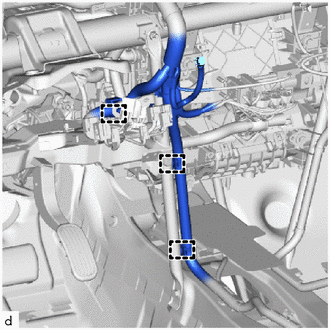
(c) Release the clamps to disconnect the wire harness. |
 |
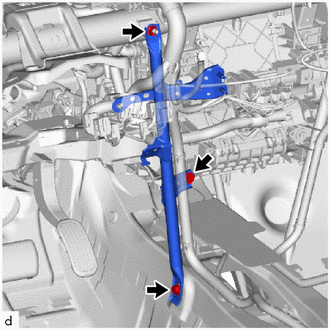
(d) Remove the bolt, screw, nut and instrument panel reinforcement sub-assembly No. 1. |
 |
28. REMOVE INSTRUMENT PANEL REINFORCEMENT SUB-ASSEMBLY NO. 2
(a) Remove the bolt to disconnect the ground cable. |
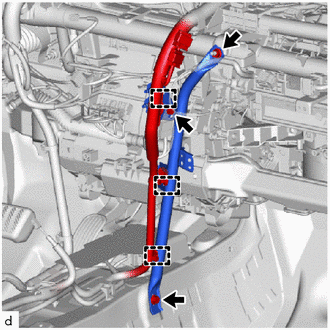 |
(b) Release the clamps to disconnect the wire harness.
(c) Remove the bolt, screw, nut and instrument panel reinforcement sub-assembly No. 2.
29. REMOVE INSTRUMENT PANEL NO. 3 COWL BRACE SUB-ASSEMBLY (for cold region vehicles)
(a) Release the clip and claws. |
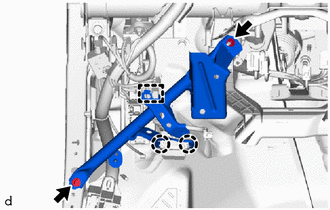 |
(b) Remove the bolt, nut and instrument panel to cowl brace No. 3 sub-assembly.
30. REMOVE INSTRUMENT PANEL NO. 3 COWL BRACE SUB-ASSEMBLY (except cold region vehicles)
(a) Release the clip and claws. |
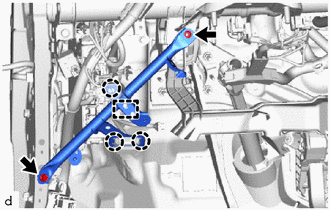 |
(b) Remove the bolt, nut and instrument panel to cowl brace No. 3 sub-assembly.
31. DETACH COOLER DRAIN HOSE
(a) Disconnect the cooler drain hose. NOTICE: If the drain hose grommet of the cooling unit is disconnected from the vehicle body when disconnecting the cooler drain hose, be sure to replace it with a new one. Failure to do so may result in water leakage. |
|
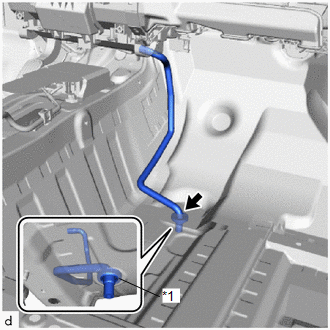
32. DISCONNECT INSTRUMENT PANEL WIRE
(a) Disconnect each connector.
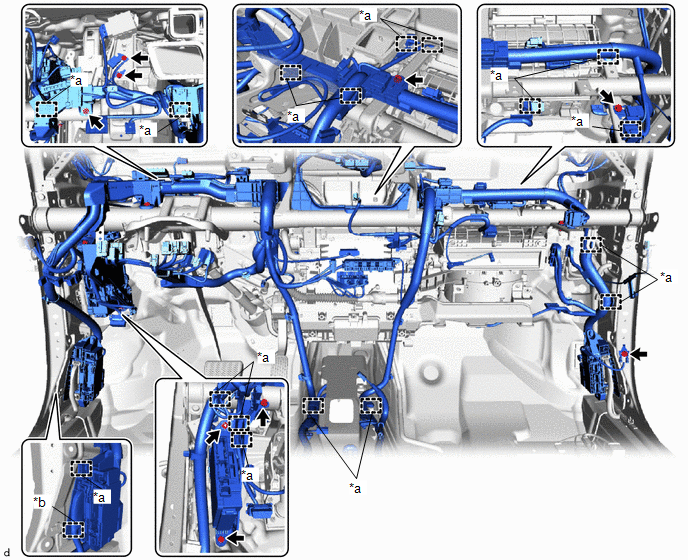
*a |
Clip |
*b |
Hook |
(b) Remove the bolt and screw.
(c) Remove the 4 bolts to disconnect the 4 ground cables.
(d) Remove the bolt and nut to detach the instrument panel junction block with main body ECU assembly.
(e) Release the clips and hook to disconnect the instrument panel wire.
33. REMOVE INSTRUMENT PANEL REINFORCEMENT SUB-ASSEMBLY WITH AIR CONDITIONING UNIT ASSEMBLY
NOTICE:
- Be sure to support the air conditioning unit assembly when removing it. Failure to do so may cause the air conditioning unit assembly bracket to break.
- When disassembling the air conditioning unit assembly, discharge static electricity by touching the vehicle body to prevent damage to components.
(a) Remove the 2 bolts. |
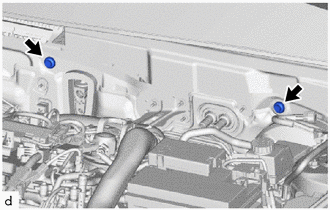 |
(b) Remove the 5 bolts.
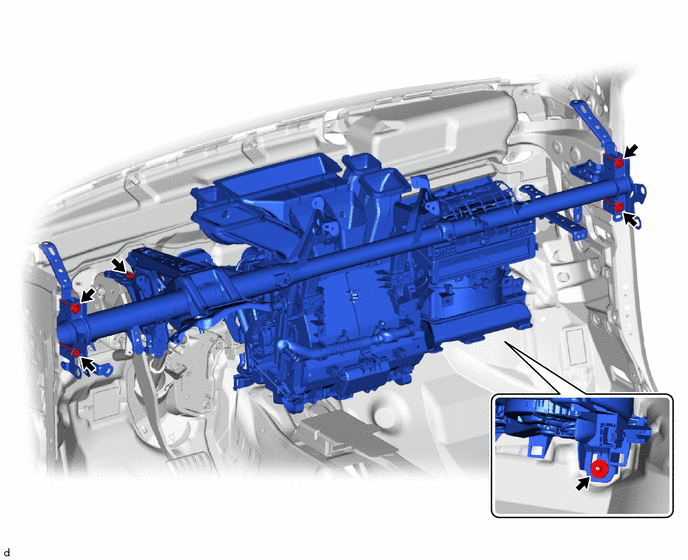
(c) Remove the nut.
(d) Release the clips. |
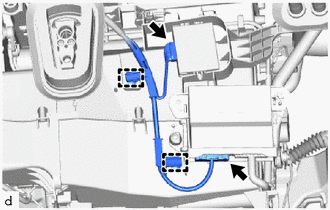 |
(e) Disconnect the 2 connectors.
(f) Release the guides to remove the instrument panel reinforcement sub-assembly with air conditioning unit assembly, as shown in the illustration.
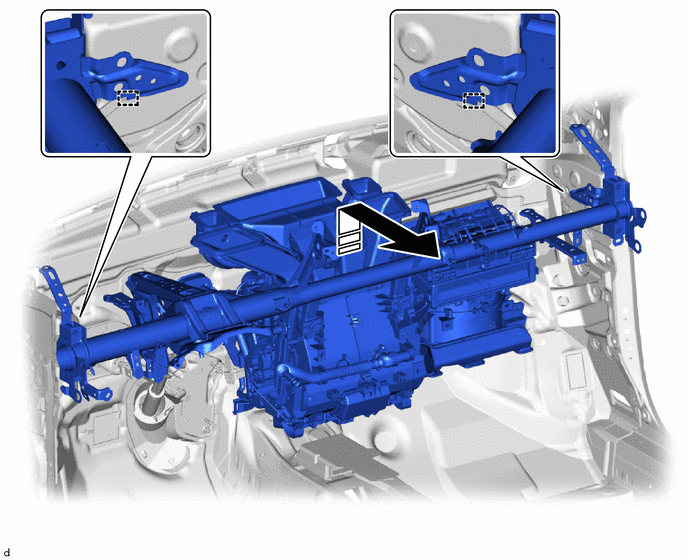
|
Remove in this direction |
- |
- |
34. REMOVE AIR CONDITIONING UNIT ASSEMBLY
(a) Remove the 3 bolts and the air conditioning unit assembly from the instrument panel reinforcement sub-assembly.
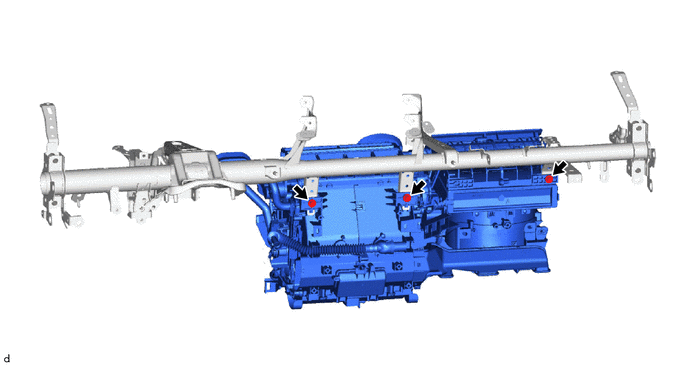
35. REMOVE LOWER DEFROSTER NOZZLE ASSEMBLY
(a) Release the claws to remove the lower defroster nozzle assembly. |
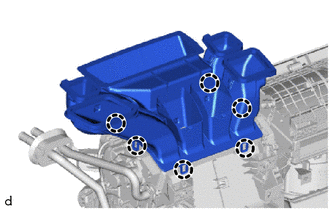 |