Reassembly
REASSEMBLY
PROCEDURE
1. INSTALL NO. 1 COOLER THERMISTOR
Click here
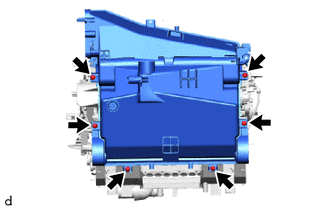
2. REINSTALL RADIATOR CASE SUB-ASSEMBLY NO. 2
(a) Reinstall the radiator case sub-assembly No. 2 with the 6 screws. |
 |
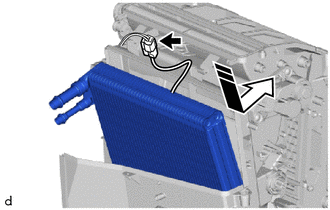
3. REINSTALL COOLER EVAPORATOR SUB-ASSEMBLY NO. 1
 |
Install in this direction |
(a) Reinstall the cooler evaporator No. 1 sub-assembly with the No. 1 cooler thermistor, as shown in the illustration.
(b) Connect the connector.
4. REINSTALL RADIATOR CASE SUB-ASSEMBLY
(a) Engage the claws to reinstall the radiator case sub-assembly.
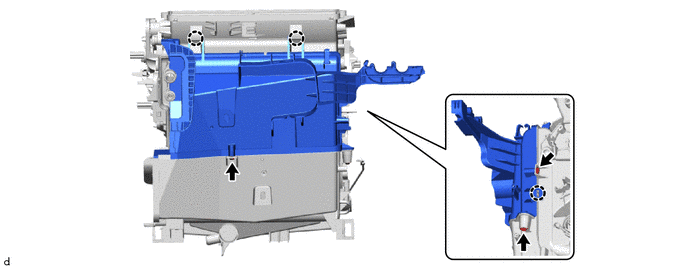
(b) Install the 3 screws.
5. REINSTALL HEAT EXCHANGER CASE
(a) Engage the 2 claws and the guide, then reinstall the heat exchanger case using the screw. |
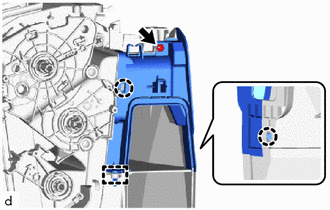 |
(b) Reinstall the bracket with the 2 screws. |
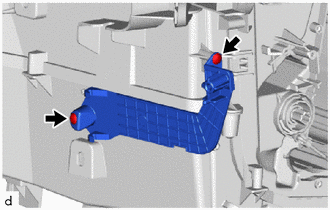 |
6. REINSTALL COOLER EXPANSION VALVE
(a) Reinstall the grommet. |
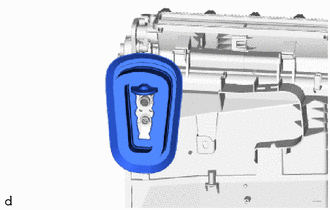 |
(b) Apply sufficient compressor oil to 2 new O-rings and the mating surfaces of the cooler evaporator No. 1 sub-assembly.
Compressor oil:
VC100YF or equivalent
(c) Reinstall the 2 O-rings on the cooler evaporator No. 1 sub-assembly.
NOTICE:
Keep the O-rings and O-ring mating surfaces free of foreign matter.
(d) Using a 4 mm hexagon socket wrench, reinstall the cooler expansion valve using the 2 hexagon bolts. Torque: 4.5 N·m {46 kgf·cm, 40 in·lbf} |
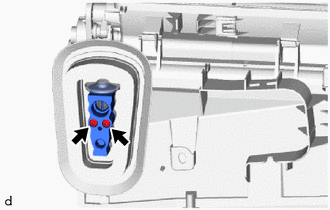 |
7. REINSTALL HEATER UNIT SUB-ASSEMBLY
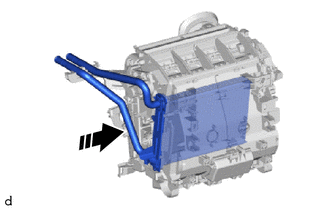
|
Install in this direction |
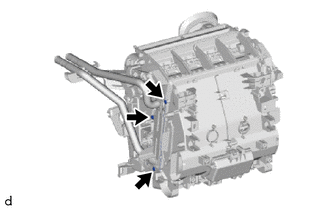
(a) Install the Heater Unit Sub-assembly, as shown in the illustration.
(b) Install the 3 screws. |
 |
8. REINSTALL HEATER BRACKET
(a) Engage the claws to install the heater clip. |
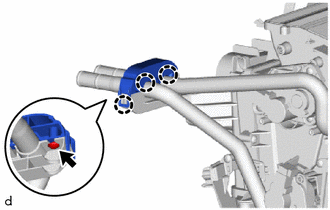 |
(b) Install the screw.
9. REINSTALL HEATER PIPE GROMMET
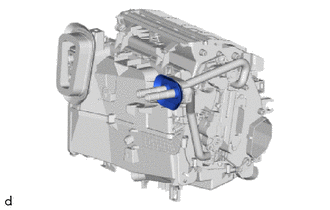
(a) Reinstall the heater pipe grommet. |
 |
10. REINSTALL AIR CONDITIONING RADIATOR DAMPER SERVO SUB-ASSEMBLY NO. 2
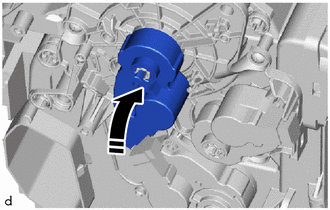
(a) Reinstall the air conditioning radiator damper servo sub-assembly No. 2 as shown in the illustration.
|
Install in this direction |
(b) Turn the air conditioning radiator damper servo sub-assembly No. 2 to engage the claw as shown in the illustration.
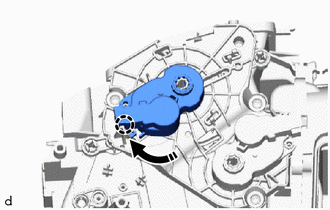
|
Install in this direction |
11. REINSTALL AIR CONDITIONING RADIATOR DAMPER SERVO SUB-ASSEMBLY NO. 1
(a) for lower right side:
(1) Reinstall the air conditioning radiator damper servo sub-assembly No. 1 as shown in the illustration.
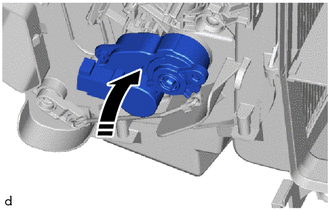
|
Install in this direction |
(2) Turn the air conditioning radiator damper servo sub-assembly No. 1 to engage the claw as shown in the illustration.
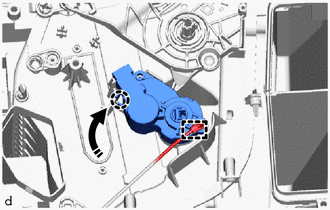
|
Install in this direction |
(3) Engage the ring.
(b) for upper right side:
(1) Reinstall the air conditioning radiator damper servo sub-assembly No. 1 as shown in the illustration.
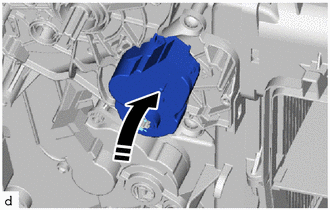
|
Install in this direction |
(2) Turn the air conditioning radiator damper servo sub-assembly No. 1 to engage the claw as shown in the illustration.
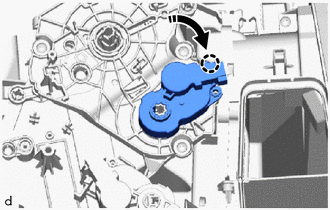
|
Install in this direction |
(c) for lower left side:
(1) Reinstall the air conditioning radiator damper servo sub-assembly No. 1 as shown in the illustration.
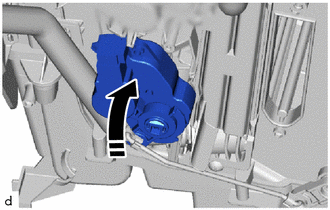
|
Install in this direction |
(2) Turn the air conditioning radiator damper servo sub-assembly No. 1 to engage the claw as shown in the illustration.
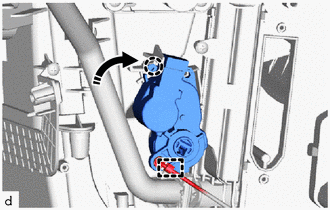
|
Install in this direction |
(3) Engage the ring.
(d) for upper left side:
(1) Reinstall the air conditioning radiator damper servo sub-assembly No. 1 as shown in the illustration.
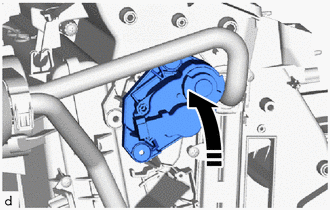
|
Install in this direction |
(2) Turn the air conditioning radiator damper servo sub-assembly No. 1 to engage the claw as shown in the illustration.
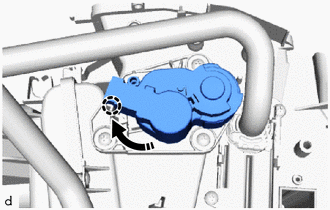
|
Install in this direction |
12. REINSTALL COOLING UNIT DRAIN HOSE NO. 2
(a) Reinstall the No. 2 cooling unit drain hose. |
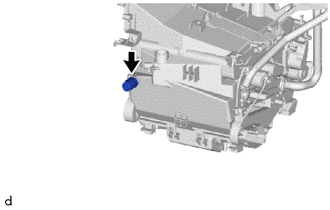 |
13. REINSTALL COOLER DRAIN HOSE
(a) Reinstall the cooler drain hose. |
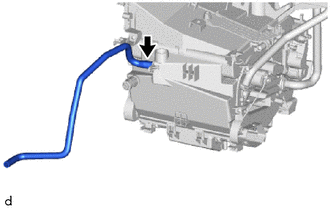 |
14. REINSTALL AIR CONDITIONING WIRE HARNESS ASSEMBLY
(a) Engage the clamps to reinstall the air conditioning wire harness assembly.
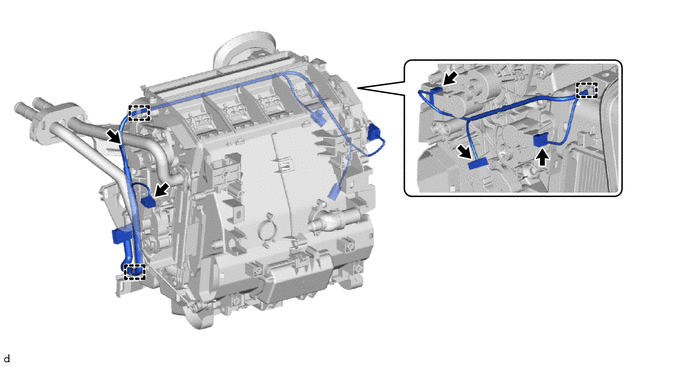
(b) Connect the 5 connectors.
15. REINSTALL AIR CONDITIONING AMPLIFIER ASSEMBLY
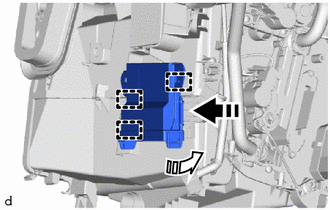
(a) Engage the guides to temporarily reinstall the air conditioning amplifier assembly, as shown in the illustration.
|
Install in this direction (1) |
 |
Install in this direction (2) |
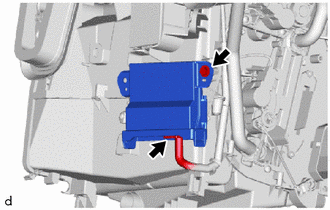
(b) Install the air conditioning amplifier assembly with the screw. |
 |
(c) Connect the connector.
16. REINSTALL HEATER COVER (without PTC heater)
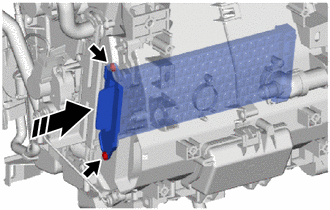
(a) Reinstall the heater cover with the 2 screws, as shown in the illustration.
|
Install in this direction |
17. REINSTALL QUICK HEATER ASSEMBLY (with PTC heater)
|
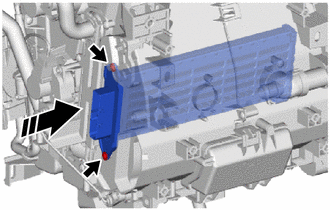
Install in this direction |
(a) Reinstall the quick heater assembly using the 2 screws, as shown in the illustration.
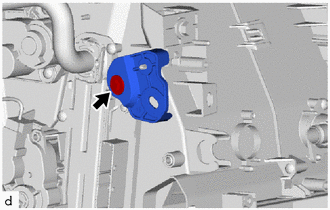
18. REINSTALL HEATER COVER NO. 2 (with PTC heater)
(a) Reinstall the No. 2 heater cover using the screw. |
 |
19. REINSTALL BLOWER ASSEMBLY
Click here
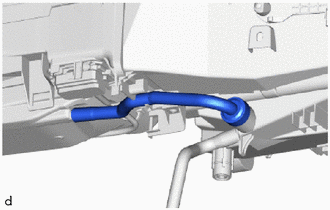
20. REINSTALL COOLING UNIT DRAIN HOSE NO. 3
(a) Reinstall the No. 3 cooling unit drain hose. |
 |
21. REINSTALL INSTRUMENT PANEL WIRE NO. 3 (with PTC heater)
(a) Engage the clips to install the Instrument Panel Wire No. 3. |
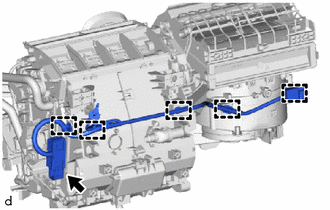 |
(b) Connect the connector.
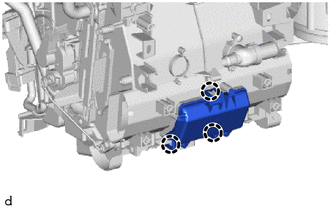
22. REINSTALL COVER (except vehicles for cold regions)
(a) Engage the claws to reinstall the cover. |
 |
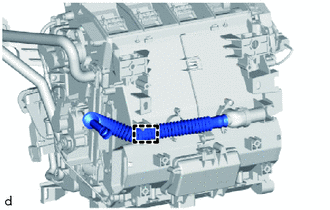
23. REINSTALL AIR CONDITIONING TUBE SUB-ASSEMBLY
(a) Engage the guide to reinstall the air conditioning tube sub-assembly. |
 |
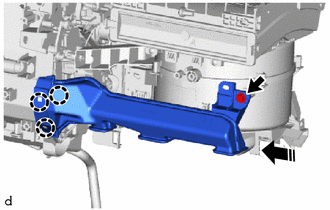
24. REINSTALL AIR TUBE NO. 2
(a) Engage the claws to reinstall the No. 2 air tube, as shown in the illustration.
|
Install in this direction |
(b) Install the screw.
25. REINSTALL ID CODE BOX (ENGINE IMMOBILISER ECU)
Click here