Reassembly
REASSEMBLY
PROCEDURE
1. INSTALL RADIATOR SIDE AIR GUIDE NO. 1 LH
(a) Engage the guide and claw to install the No. 1 radiator side air guide LH, as shown in the illustration.
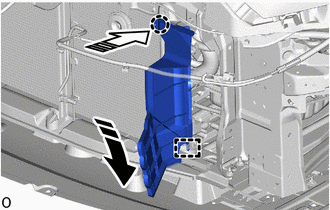
 |
Install in this direction (1) |
 |
Install in this direction (2) |
2. INSTALL RADIATOR SIDE AIR GUIDE NO. 1 RH
(a) Engage the guide and claw to install the No. 1 radiator side air guide RH, as shown in the illustration.
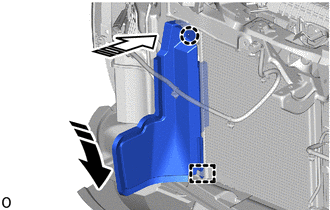
|
Install in this direction (1) |
|
Install in this direction (2) |
3. INSTALL FRONT BUMPER BRACKET LH
(a) Install the front bumper bracket LH with the 4 bolts. Torque: 12 N·m {122 kgf·cm, 9 ft·lbf} |
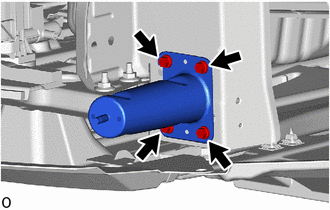 |
4. INSTALL FRONT BUMPER BRACKET RH
HINT:
Perform the same procedure as for the left side.
5. INSTALL FRONT BUMPER REINFORCEMENT NO. 2
(a) Install the front bumper reinforcement No. 2 using the 2 nuts. Torque: 30 N·m {306 kgf·cm, 22 ft·lbf} |
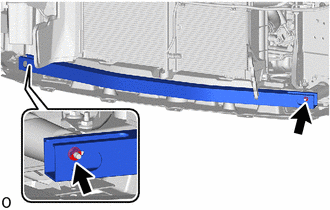 |
6. INSTALL FRONT SIDE MEMBER BRACKET SUB-ASSEMBLY LH
(a) for USA and Canada:
(1) Engage the guides to install the left side member bracket sub-assembly. |
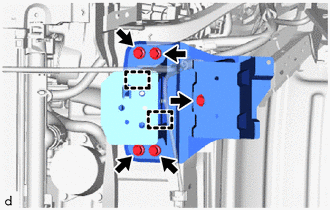 |
(2) Install the 5 bolts.
Torque:
50 N·m {510 kgf·cm, 37 ft·lbf}
(b) except USA and Canada:
(1) Engage the guides to install the left side member bracket sub-assembly. |
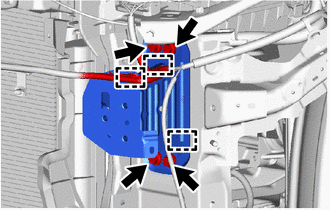 |
(2) Install the 4 bolts.
Torque:
50 N·m {510 kgf·cm, 37 ft·lbf}
(3) Position the wire harness clamp.
7. INSTALL FRONT SIDE MEMBER BRACKET SUB-ASSEMBLY RH
(a) for USA and Canada:
(1) Engage the guides to install the right side member bracket sub-assembly. |
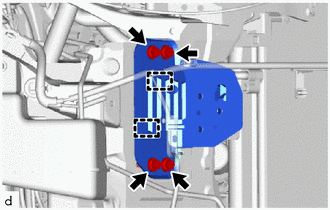 |
(2) Install the 4 bolts.
Torque:
50 N·m {510 kgf·cm, 37 ft·lbf}
(b) except USA and Canada:
HINT:
Perform the same procedure as for the left side.
8. INSTALL FRONT BUMPER REINFORCEMENT
(a) for USA and Canada:
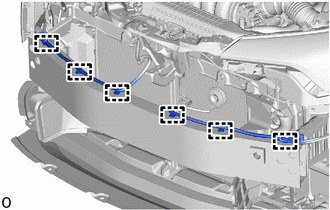
(1) Engage the claws to install the front bumper reinforcement. |
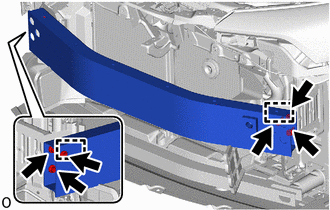 |
(2) Install the 6 bolts.
Torque:
50 N·m {510 kgf·cm, 37 ft·lbf}
(3) Engage the wire harness clamps. |
 |
(b) except USA and Canada:
(1) Engage the claws to install the front bumper reinforcement. |
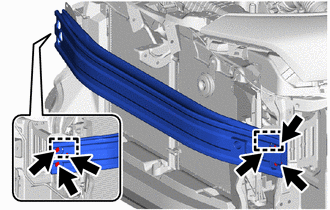 |
(2) Install the 6 bolts.
Torque:
50 N·m {510 kgf·cm, 37 ft·lbf}
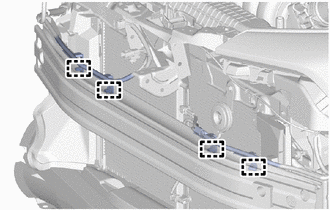
(3) Engage the wire harness clamps. |
 |
9. INSTALL FRONT BUMPER LOWER ABSORBER
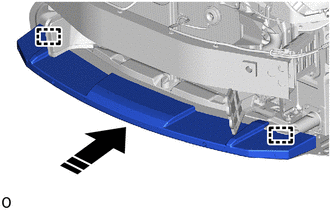
(a) for USA and Canada:
|
Install in this direction |
(1) Engage the guides to install the front bumper lower energy absorber, as shown in the illustration.
(b) except USA and Canada:
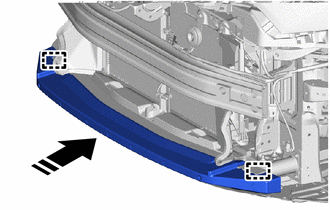
|
Install in this direction |
(1) Engage the guides to install the front bumper lower energy absorber, as shown in the illustration.
10. INSTALL FRONT ENERGY ABSORBER REINFORCEMENT BRACKET (for USA and Canada)
(a) Engage the claws to install the front energy absorber bracket reinforcement. |
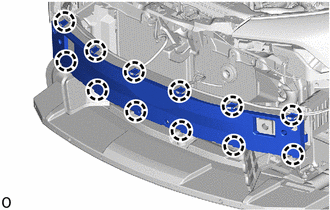 |
11. INSTALL FRONT BUMPER ENERGY ABSORBER
(a) for USA and Canada:
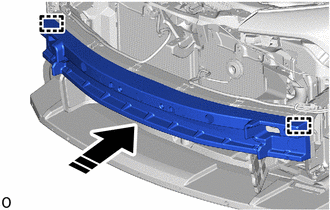
|
Install in this direction |
(1) Engage the guides to install the front bumper energy absorber, as shown in the illustration.
(b) except USA and Canada:
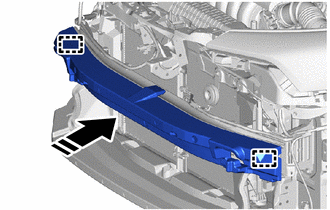
|
Install in this direction |
(1) Engage the guides to install the front bumper energy absorber, as shown in the illustration.
12. INSTALL RADIATOR SUPPORT SEAL NO. 1
(a) Install the No. 1 radiator support seal, as shown in the illustration.
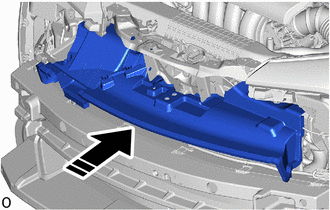
|
Install in this direction |
(b) Install the 2 clips. |
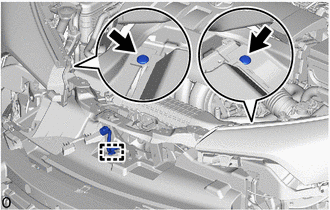 |
(c) Install the wire harness clamp.
13. INSTALL RADIATOR GRILLE RETAINER NO. 1
(a) Engage the claws to install the No. 1 radiator grille retainer, as shown in the illustration.
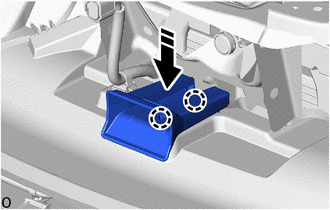
|
Install in this direction |
14. INSTALL FRONT BUMPER SIDE RETAINER LH
(a) Engage the claw to install the front bumper side retainer LH, as shown in the illustration.
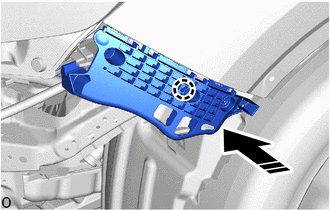
|
Install in this direction |
(b) Install the screw. |
|
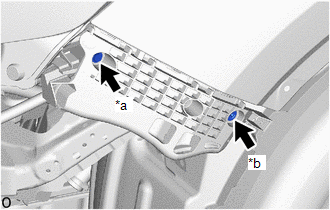
(c) Install the bolt.
Torque:
5.4 N·m {55 kgf·cm, 48 in·lbf}
15. INSTALL FRONT BUMPER SIDE RETAINER RH
HINT:
Perform the same procedure as for the left side.
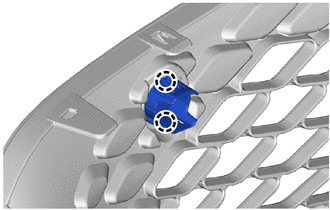
16. INSTALL RADIATOR GRILLE MOULDING NO. 1 (except USA and Canada)
(a) Engage the claws to install the No. 1 radiator grille moulding. HINT: Perform the same procedure on the opposite side. |
 |
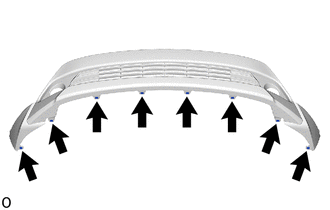
17. INSTALL FRONT BUMPER UNDER COVER
(a) for USA and Canada:
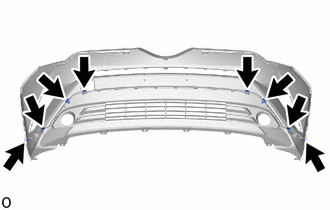
(1) Install the 8 grommets. |
 |
(2) Engage the claws and guides to install the front bumper under cover. |
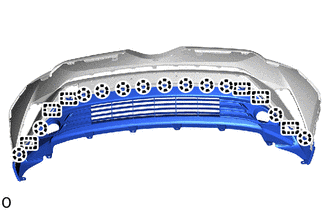 |
(3) Install the 2 clips and 6 outer moulding retainers. |
 |
(b) except USA and Canada:
(1) Install the 8 grommets. |
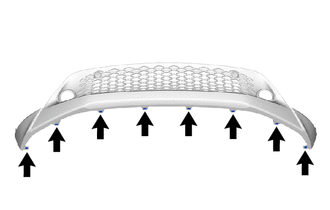 |
(2) Engage the claws and guides to install the front bumper under cover. |
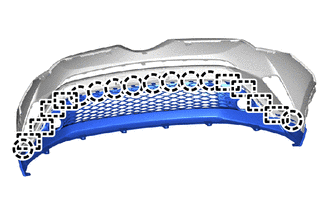 |
(3) Install the 2 clips and 8 outer moulding retainers. |
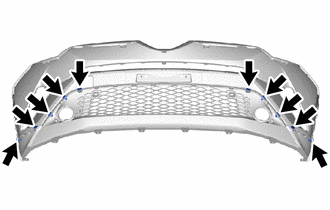 |
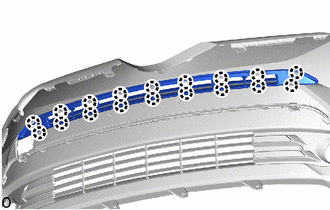
18. INSTALL RADIATOR GRILLE INNER
(a) Engage the claws to install the radiator grille inner. |
 |
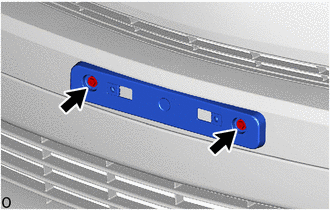
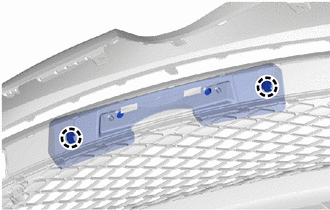
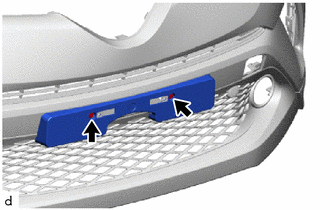
19. INSTALL FRONT BUMPER EXTENSION MOUNTING BRACKET
(a) for USA and Canada:
(1) Install the front bumper extension mounting bracket with the 2 screws. |
 |
(b) except USA and Canada:
(1) Engage the claws to install the front bumper extension mounting bracket. |
 |
(2) Install the 2 screws. |
 |
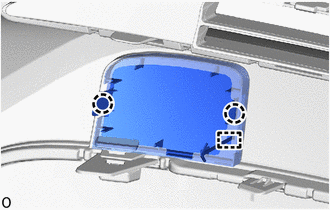
20. INSTALL LH FRONT BUMPER HOLE COVER
(a) Engage the hook and claws to install the LH front bumper hole cover. |
 |
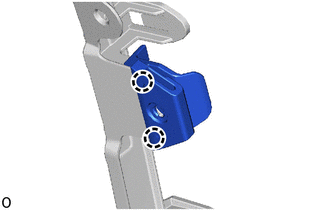
21. INSTALL FRONT FENDER LINER RETAINER
(a) Engage the claws to install the front fender liner retainer. HINT: Perform the same procedure on the opposite side. |
 |
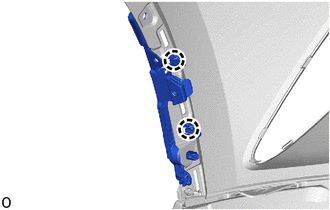
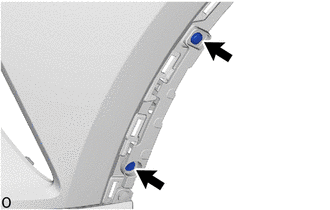
22. INSTALL LH FRONT BUMPER SIDE MOUNTING BRACKET
(a) Engage the claws to install the LH front bumper side mounting bracket. |
 |
(b) Install the clip. |
 |
(c) Install the screw.
23. INSTALL RH FRONT BUMPER SIDE MOUNTING BRACKET
HINT:
Perform the same procedure as for the left side.
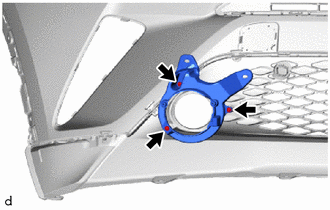
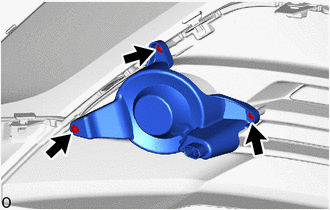
24. INSTALL LH FOG LIGHT COVER
(a) with fog lights: (1) Install the LH fog light cover with the 3 screws. |
 |
(b) without fog lights:
(1) Install the LH fog light cover with the 3 screws. |
 |
25. INSTALL RH FOG LIGHT COVER
HINT:
Perform the same procedure as for the left side.
26. INSTALL LH FOG LIGHT ASSEMBLY (with fog light)
(a) Engage the guide to install the LH fog light assembly. |
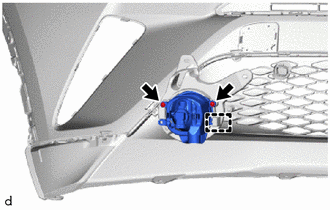 |
(b) Reinstall the 2 screws.
27. INSTALL RH FOG LIGHT ASSEMBLY (with fog light)
HINT:
Perform the same procedure as for the left side.
28. INSTALL LH FRONT BUMPER EXTENSION
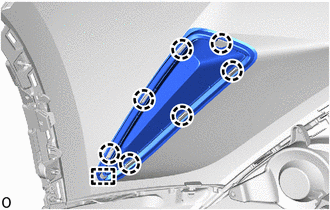
(a) Engage the claws and guide to install the LH front bumper extension.
29. INSTALL RH FRONT BUMPER EXTENSION
HINT:
Perform the same procedure as for the left side.
30. INSTALL RADIATOR GRILLE
Click here