Possible Malfunctions
If engine does not crank and starter does not turn
If vehicle has automatic transmission, make sure the selector lever is in Park or Neutral.
Open the hood and make sure the battery terminals are clean and the clamps are secure.
Turn on the headlights and try to start the engine. If the headlights are very dim when cranking, the discharged battery is the main cause of the no-start condition.
Start the engine using jumper cables from another vehicle, following the emergency starting procedure.
If engine does not start with starter working normally
Is there fuel in the tank?
Is there moisture on the engine electrical parts and components?
Turn off the ignition and wipe off moisture from affected areas with a dry cloth. Apply water-displacing aerosol (WD-40 or equivalent) to the connectors.
Inspection
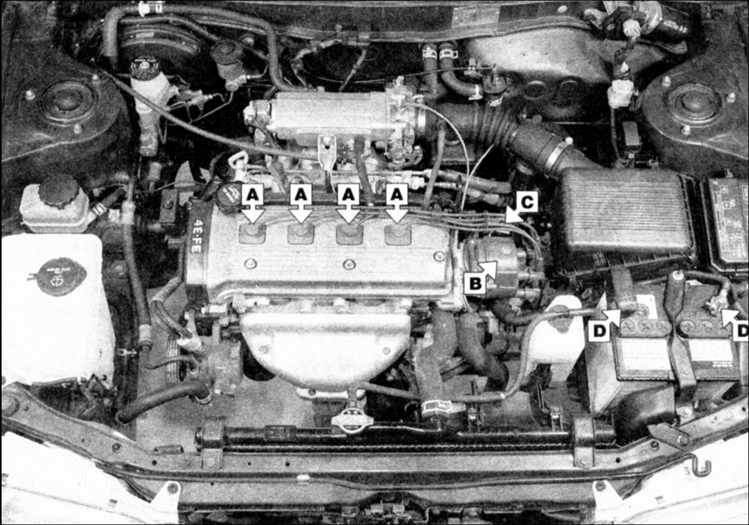
Location of fuel system and ignition system connectors
PROCEDURE
1. Check that connectors A, B, C, D are securely connected with the ignition off (see figure Location of fuel system and ignition system connectors). If moisture is suspected, treat the connectors with WD-40 water-displacing aerosol.
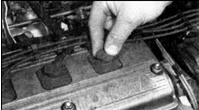
2. Check that the high-voltage cables (A) are securely connected to the spark plugs.
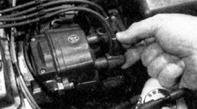
3. Check that the high-voltage cables (B) are securely connected to the distributor cap.
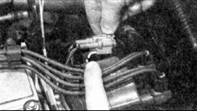
4. Make sure all ignition system connectors (for example, the connector on the distributor (C)) are dry. If necessary, apply water-repellent agent.
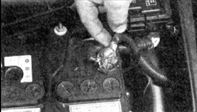
5. Check that the battery terminals are clean and the clamps (D) are securely tightened.
6. Pay special attention to the ignition coil low-voltage connector and the high-voltage cables.
Starting the Engine in Extreme Conditions
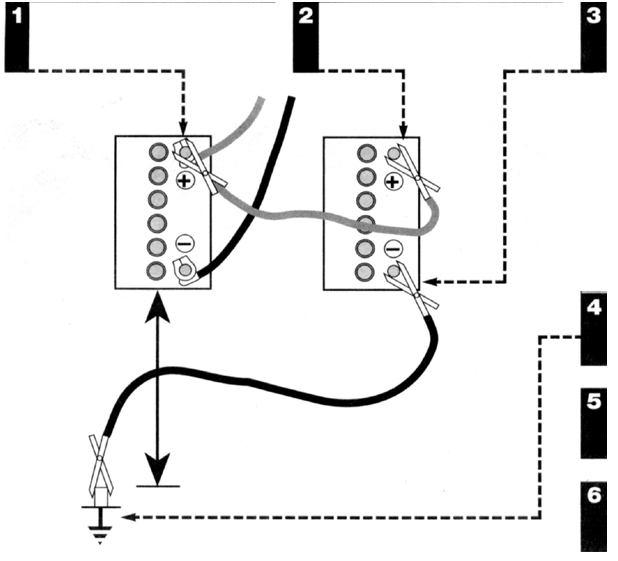
1. Connect the positive (red) jumper cable clamp to the positive terminal of the discharged battery.
2. Connect the other positive (red) jumper cable clamp to the positive terminal of the booster (auxiliary) battery.
3. Connect the negative (black) jumper cable clamp to the negative terminal of the booster battery.
4. Connect the other negative (black) jumper cable clamp to a bolt or bracket on the engine block of the vehicle being started, away from the battery.
5. Make sure the jumper cables are routed well away from the fan, belts and other moving engine parts, and cannot come into contact with them.
6. Start the engine using the booster battery, let it run at idle, then disconnect the cables in reverse order.
When starting the engine with a booster battery, observe the following precautions.
1. Before connecting the booster battery, make sure the ignition is OFF.
2. Make sure all electrical loads (headlights, heater, wipers, etc.) are switched off.
3. Read the precautions printed on the battery case.
4. Make sure the nominal voltage of the booster battery is the same as that of the battery in your vehicle.
5. If the engine is started from another vehicle's battery, the vehicle bodies must not touch.
6. Make sure the shift lever is in Neutral (or in Park on vehicles with automatic transmission).
Wheel replacement
GENERAL INFORMATION
Some wheel replacement procedures may differ depending on the vehicle model. For example, the locations of the spare tire and jack differ between models. However, the general procedure is the same for all vehicles.
Preparation
PROCEDURE
1. If a tire goes flat, stop the vehicle immediately, taking traffic conditions into account.
2. Park the vehicle on a level, firm surface well away from the traffic lane.
3. If necessary, turn on the hazard warning flashers.
4. If you have a warning triangle, place it to warn other drivers.
5. Apply the parking brake and shift into first or reverse gear (Park on vehicles with automatic transmission).
6. Chock the wheel diagonally opposite the wheel being replaced, for example with two large stones.
7. If the ground is soft, place a board under the jack to prevent it from sinking.
Replacement
PROCEDURE
1. Remove the decorative trim panel from the inside of the luggage compartment and take out the jack.
2. Lift the cargo floor cover and unscrew the spare tire holder. Take out the spare tire, the tool bag and the wheel nut wrench. Place the wheel chocks from the tool kit under the wheel diagonally opposite the wheel being replaced.
3. Remove the wheel cover using the flat tool from the tool kit. Then, using the wheel wrench, loosen the wheel nuts of the wheel being replaced by half a turn.
4. Place the jack on firm ground under the reinforced section of the body sill (lift the vehicle only at this point).
5. Turn the jack handle clockwise until the wheel is raised off the ground. Unscrew the wheel nuts and remove the wheel.
6. Install the spare wheel, screw on the nuts and tighten them. Lower the vehicle and tighten the wheel nuts in the specified sequence.
7. Install the wheel cover.
8. Remove the wheel chocks.
9. Place the jack and tools in the luggage compartment in their correct positions. Check the tire pressure of the installed wheel. If the pressure is low, or if you do not have a pressure gauge, drive at low speed to the nearest garage and inflate the tire to the correct pressure.
10. Have the damaged wheel (or tire) repaired immediately.
Test yourself
A quick Toyota Corolla quiz: every answer comes with an explanation and a link to the manual page.