Disassembly
1. REMOVE REAR MAT SET PLATE
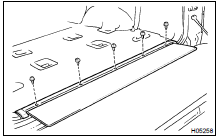
(b) Using a screwdriver, remove the rear mat set plate.
HINT: Tape the screwdriver tip before use.
2. REMOVE BACK DOOR TRIM

(a) Insert a screwdriver between the door and door trim to pry out.
HINT: Tape the screwdriver tip before use.
(b) Remove the back door trim.
3. REMOVE LOWER TORSION BAR

(c) Remove the torsion bar guide.
4. REMOVE BACK DOOR INSIDE HANDLE
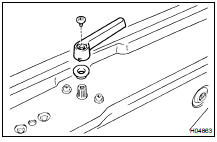
(b) Remove the spacer.
5. REMOVE BACK DOOR LOCK CONTROL
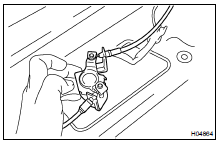
(a) Remove the 2 screws.
Torque: 5 N·m
(b) Disconnect the back door lock control cables, then remove the back door control.
6. REMOVE SERVICE HOLE COVERS
NOTICE: Do not tear the service hole cover.
7. REMOVE KEY CYLINDER
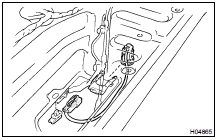
(b) Remove the clip and key cylinder
8. REMOVE BACK DOOR LOCK
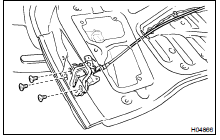
(b) Using a torx wrench, remove the 3 screws and back door lock.
Torx wrench: T30 (Part No. 09042-00010 or locally manufactured tool)
Torque: 5 N·m
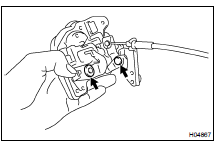
HINT: At the time of reassembly, please refer to the following item.
Apply MP grease to the rotating parts of the door lock.
(c) Employ the same manner described above to the other side.
9. REMOVE REAR LIGHT ASSEMBLY

(c) Using a screwdriver, remove the rear light assembly.
HINT: Tape the screwdriver tip before use.
(d) Employ the same manner described above to the other side.
10. REMOVE TAIL GATE STAY
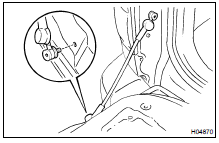
(a) Using a torx wrench, remove the 2 screws and tail gate stay.
Torx wretch: T30 (Part No. 09042-00010 or locally manufactured tool)
Torque: 18,5 N·m
(b) Employ the same manner described above to the other side.
REASSEMBLY
Reassembly is in the reverse order of disassembly
Test yourself
A quick Toyota Land Cruiser quiz: every answer comes with an explanation and a link to the manual page.