Removal
- Disconnect cable from negative battery terminal
- Remove radiator support opening cover
- Remove front wheel rh
- Remove no. 1 Engine under cover
- Remove front fender apron rh
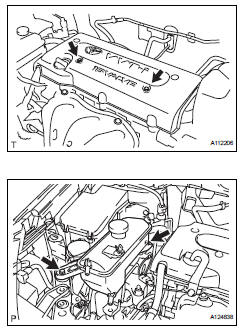
- Remove no. 1 Engine cover
- Remove the 2 nuts and cover
- Drain engine oil (see page lu-4)
- Remove front exhaust pipe (see page ex-3)
- Remove front suspension member reinforcement rh (see page em-6)
- Remove fan and generator v belt (see page em-6)
- Remove generator assembly (see page ch-9)
- Remove radiator reservoir
- Remove the 2 bolts and radiator reservoir.
- Remove engine mounting insulator rh
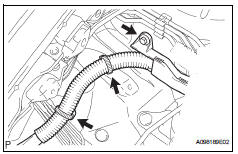
- Remove the bolt of the wire harness protector.
- Disconnect the 2 clamps of the engine wire.
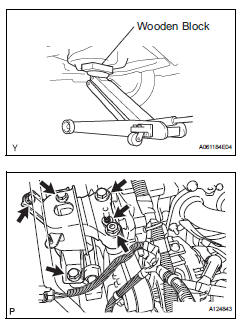
- Place a transmission jack underneath the engine, then put a wooden block on the jack.
- Remove the 4 bolts, 2 nuts and engine mounting insulator rh.
Notice:
Do not apply excessive force to the return tube when removing the engine mounting insulator rh.
Hint:Keep clearance by lowering the engine using the transmission jack when removing the engine mounting insulator fr.
- Remove engine mounting insulator fr

- Remove the through bolt and nut.
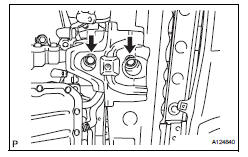
- Remove the 2 bolts and engine mounting insulator fr.
Hint:
Keep clearance by lowering the engine using the transmission jack when removing the engine mounting insulator fr.
- Remove idler pulley
- Loosen the 2 bolts and remove the idler pulley with the 2 bolts.
- Remove ignition coil assembly (see page ig-9)
- Remove spark plug (see page em-8)
- Remove cylinder head cover sub-assembly
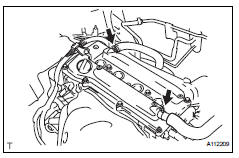
- Disconnect the 2 ventilation hoses form the cylinder head cover.
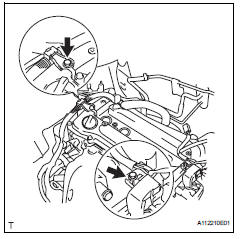
- Remove the 2 bolts and disconnect the 2 engine wires.
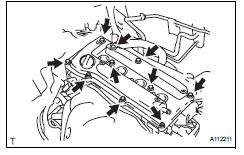
- Remove the 8 bolts, 2 nuts and cylinder head cover.
- Remove oil pan sub-assembly
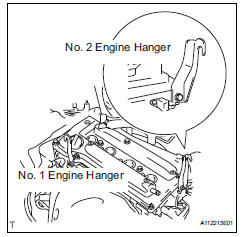
- Install the no. 1 And no. 2 Engine hangers with the bolts.
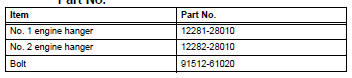
- Attach the sling device to the engine hangers and chain block.
- Remove the 12 bolts and 2 nuts.
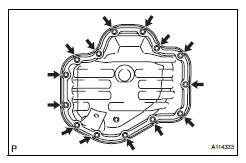
- Insert the blade of sst between the crankcase, chain cover and oil pan, then cut off the applied sealer and remove the oil pan.
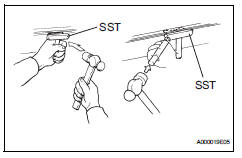
Sst 09032-00100 Notice:
Be careful not to damage the contact surface of the crankcase, chain cover and oil pan.
- Set no. 1 Cylinder to tdc/compression

- Turn the crankshaft pulley until its groove and the timing mark "0" of the timing chain cover are aligned.
- Check that each timing mark of the camshaft timing gear and sprocket is aligned with each timing mark located on the no. 1 And no. 2 Bearing caps as shown in the illustration.
- Remove crankshaft pulley
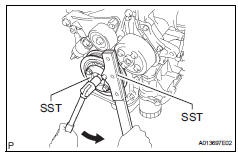
- Using sst, fix the pulley in place and loosen the pulley bolt.
- Remove the crankshaft pulley.
If necessary, remove the pulley and pulley bolt using sst.
Sst 09950-50013 (09951-05010, 09952-05010, 09953-05020, 09954-05021), 09950-40011 (09957-04010)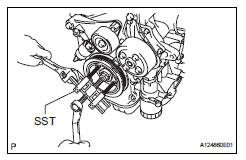
- Remove no. 1 Chain tensioner assembly
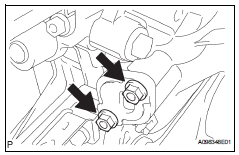
- Remove the 2 nuts, chain tensioner and gasket.
Do not turn the crankshaft without the chain tensioner.
- Remove engine mounting bracket rh
- Remove the 3 bolts and engine mounting bracket rh.
- Remove v-ribbed belt tensioner assembly
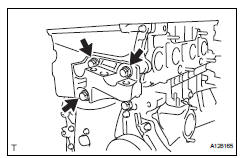
- Lift the engine upward using the transmission jack.
Do not lift the engine more than necessary.
- Remove the bolt, nut and v-ribbed belt tensioner.
- Remove crankshaft position sensor (see page es-402)
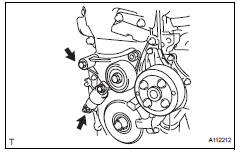
- Remove timing chain cover sub-assembly
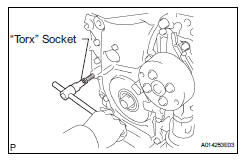
- Using an e10 "torx" socket, remove the stud bolt for the v-ribbed belt tensioner.
- Remove the 12 bolts and 2 nuts.
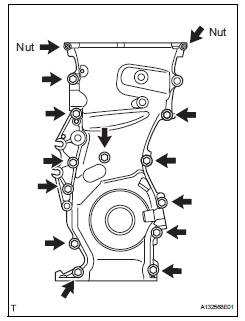
- Remove the timing chain cover by prying the portions between the timing chain cover, cylinder head and cylinder block with a screwdriver.
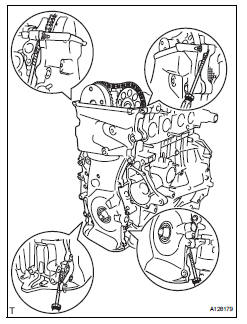
Notice:
Be careful not to damage the contact surfaces of the timing chain cover, cylinder head and cylinder block.
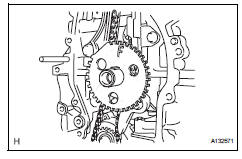
- Remove no. 1 Crankshaft position sensor plate
- Remove timing chain guide

- Remove the bolt and timing chain guide.
- Remove chain tensioner slipper

- Remove the bolt and chain tensioner slipper.
- Remove no. 1 Chain vibration damper
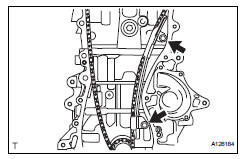
- Remove the 2 bolts and chain vibration damper.
- Remove chain sub-assembly
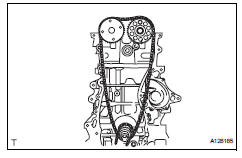
- Remove crankshaft timing sprocket
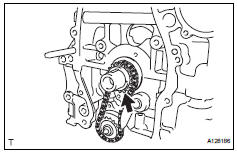
- Remove no. 2 Chain sub-assembly
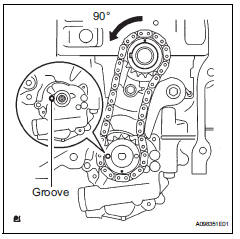
- Turn the crankshaft by 90° counterclockwise to align the adjusting hole of the oil pump drive shaft sprocket with the groove of the oil pump.
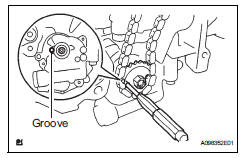
- Insert a 4 mm diameter bar into the adjusting hole of the oil pump drive shaft sprocket to lock the gear in position, and then remove the nut.
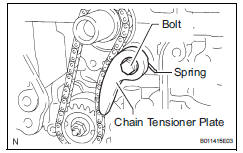
- Remove the bolt, chain tensioner plate and spring.
- Remove the oil pump drive sprocket, oil pump drive shaft sprocket and no. 2 Chain.
Test yourself
A quick Toyota RAV4 quiz: every answer comes with an explanation and a link to the manual page.