Lighting
DRL Relay Circuit
In this manual: Lighting
7steps
~42min
2/5difficulty
Done 0 of 7
DESCRIPTION
The Multiplex network body ECU controls the DRL No.2 relay
WIRING DIAGRAM
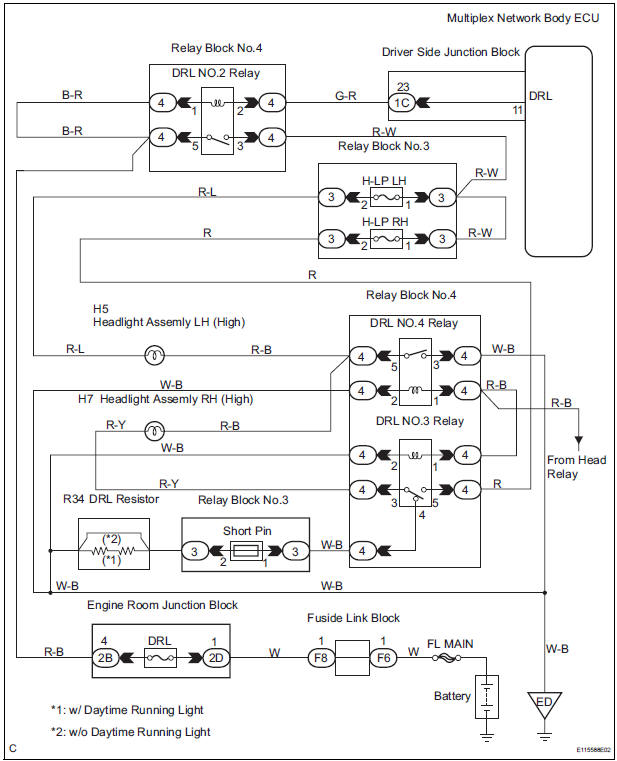
INSPECTION PROCEDURE
1 PERFORM ACTIVE TEST BY INTELLIGENT TESTER
- Connect the intelligent tester to DLC3.
- Turn the ignition switch ON and push the intelligent tester main switch ON.
- Select the item below in the ACTIVE TEST and then check that the relay operates.
BODY NO.1:

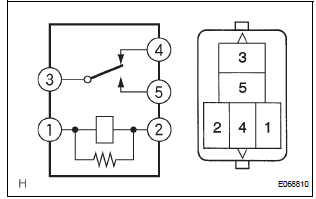
2 INSPECT DRL NO.2 RELAY
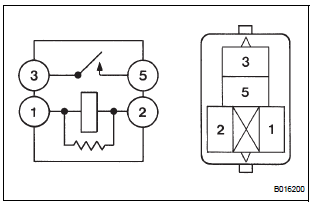
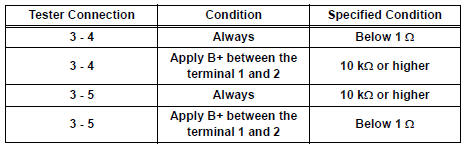
- Inspect DRL No.2 Relay continuity.
Resistance

3 CHECK HARNESS AND CONNECTOR (POWER SOURCE)
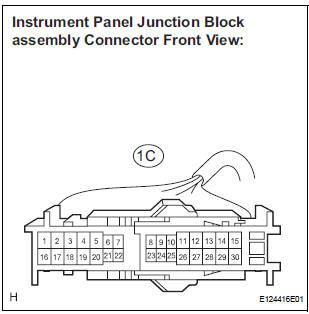
- Disconnect the connector from the instrument panel junction block assembly.
- Measure the voltage according to the value(s) in the table below.
Voltage

4 INSPECT INSTRUMENT PANEL JUNCTION BLOCK ASSEMBLY
- Reconnect the connector to the instrument panel junction block assembly.

- Measure the voltage according to the value(s) in the table below.
Voltage


5 INSPECT RELAY (DRL NO.3, DRL NO.4)
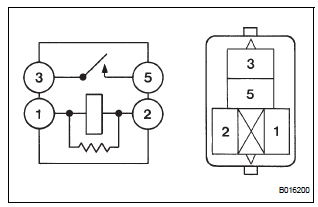
- Inspect DRL NO.4 Relay continuity.
Resistance

- Inspect DRL NO.3 Relay continuity.
Resistance
6 INSPECT DAYTIME RUNNING LIGHT RESISTER

- Measure the resistance according to the value(s) in the table below.
Resistance

REPAIR OR REPLACE HARNESS OR CONNECTOR
Test yourself
A quick Toyota Sienna quiz: every answer comes with an explanation and a link to the manual page.
Was this page helpful?