Automatic Light Control Sensor
 Installation INSTALLATION PROCEDURE
1. INSTALL AUTOMATIC LIGHT CONTROL SENSOR
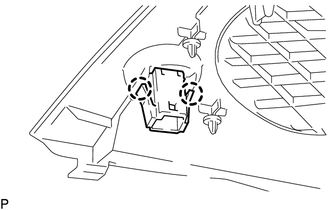
(a) Engage the 2 claws to install the automatic light control sensor.
2. INSTALL NO. 2 INSTRUMENT PANEL SPEAKER PANEL SUB-ASSEMBLY
(See page  )
1. REMOVE NO. 2 INSTRUMENT PANEL SPEAKER PANEL SUB-ASSEMBLY
(See page  )
2. INSPECT AUTOMATIC LIGHT CONTROL SENSOR
(a) Check the voltage.
(1) Measure the voltage according to the value(s) in the table below. Text in Illustration
Standard Voltage:
If the result is not as specified, repair or replace the wire harness. |
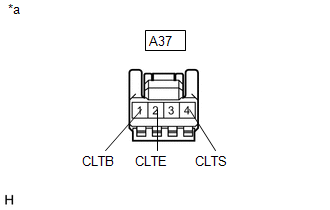 |
(2) Measure the resistance according to the value(s) in the table below.
Standard Resistance:
Tester Connection | Condition | Specified Condition |
|---|---|---|
A37-2 (CLTE) - Body ground |
Always |
Below 1 Ω |
If the result is not as specified, repair or replace the wire harness.
(b) Connect the connector.
(c) Connect an oscilloscope to the automatic light control sensor connector. Text in Illustration
|
 |
(d) Check the waveform. :
HINT: The communication waveform changes according to the surrounding brightness. If the result is not as specified, replace the automatic light control sensor. |
 |
3. INSTALL NO. 2 INSTRUMENT PANEL SPEAKER PANEL SUB-ASSEMBLY
(See page )
1. REMOVE NO. 2 INSTRUMENT PANEL SPEAKER PANEL SUB-ASSEMBLY
(See page  )
2. REMOVE AUTOMATIC LIGHT CONTROL SENSOR
(a) Disengage the 2 claws to remove the automatic light control sensor. |
 |
Test yourself
A quick Toyota Tacoma quiz: every answer comes with an explanation and a link to the manual page.