Rear Light Assembly
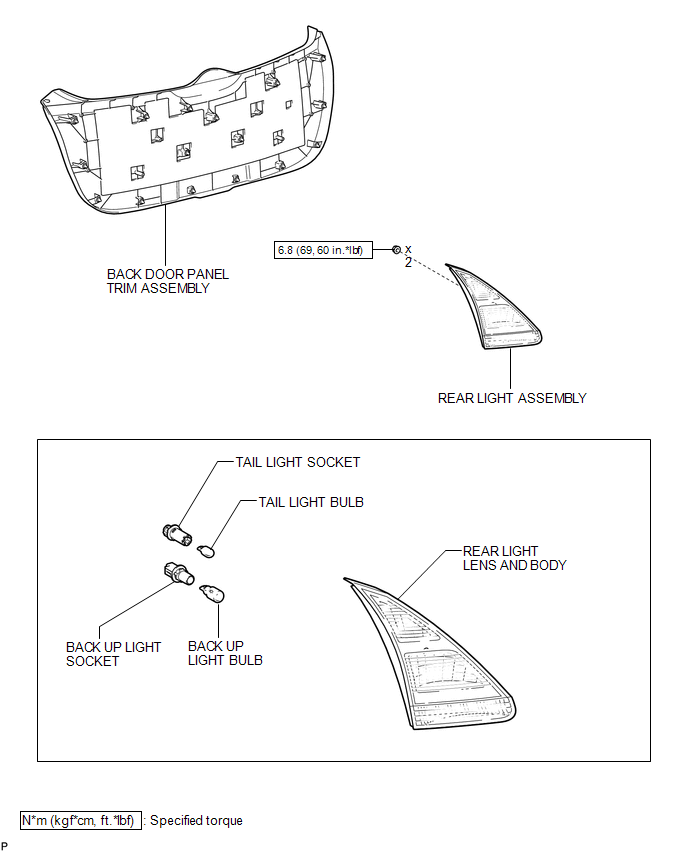
On-vehicle Inspection ON-VEHICLE INSPECTION PROCEDURE
1. INSPECT REAR LIGHT ASSEMBLY
(a) Disconnect the connector from the rear light assembly. |
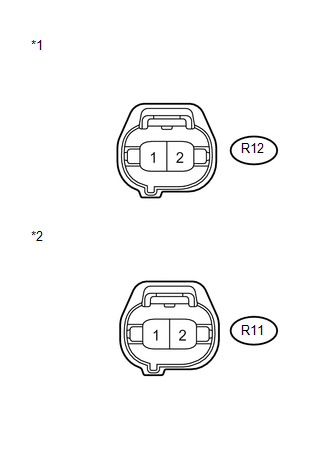 |
(b) Measure the voltage according to the value(s) in the table below.
Standard Voltage:
LH SideTester Connection | Condition | Specified Condition |
|---|---|---|
R12-1 - R12-2 |
Light control switch in tail position |
11 to 14 V |
Light control switch off |
Below 1 V |
Tester Connection | Condition | Specified Condition |
|---|---|---|
R11-1 - R11-2 |
Light control switch in tail position |
11 to 14 V |
Light control switch off |
Below 1 V |
*1 |
Front view of wire harness connector (to Rear Light Assembly LH) |
*2 |
Front view of wire harness connector (to Rear Light Assembly RH) |
If the result is not as specified, repair or replace the wire harness or connector.
Disassembly DISASSEMBLY PROCEDURE1. REMOVE TAIL LIGHT BULB
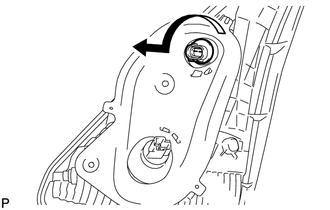
(a) Turn the tail light bulb and the tail light socket in the direction indicated by the arrow shown in the illustration and remove them as a unit. |
 |
(b) Remove the tail light bulb from the tail light socket.
2. REMOVE BACK UP LIGHT BULB
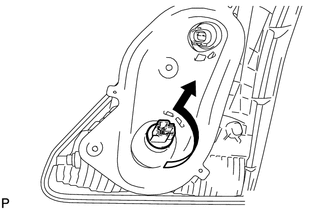
(a) Turn the back up light bulb and the back up light socket in the direction indicated by the arrow shown in the illustration and remove them as a unit. |
 |
(b) Remove the back up light bulb from the back up light socket.
Removal REMOVAL PROCEDURE1. REMOVE BACK DOOR PANEL TRIM ASSEMBLY

2. REMOVE REAR LIGHT ASSEMBLY
(a) Disconnect the 2 connectors. |
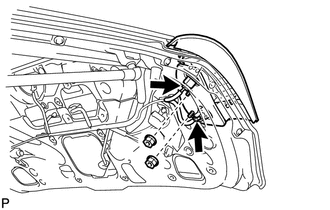 |
(b) Remove the 2 nuts.
(c) Disengage the 2 pins and remove the rear light assembly. |
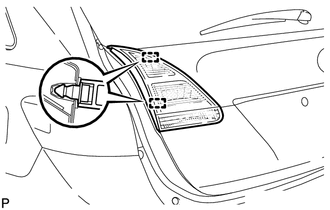 |
1. INSTALL REAR LIGHT ASSEMBLY
(a) Engage the 2 pins to install the rear light assembly. |
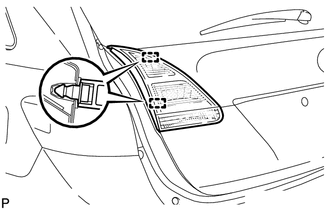 |
(b) Install the 2 nuts. Torque: 6,8 N·m {69 kgf·cm, 60 in·lbf} |
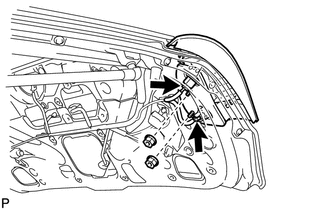 |
(c) Connect the 2 connectors.
2. INSTALL BACK DOOR PANEL TRIM ASSEMBLY

Reassembly REASSEMBLY PROCEDURE
1. INSTALL BACK UP LIGHT BULB
(a) Install the back up light bulb to the back up light socket.
(b) Turn the back up light bulb to the back up light socket in the direction indicated by the arrow shown in the illustration to install them as a unit. |
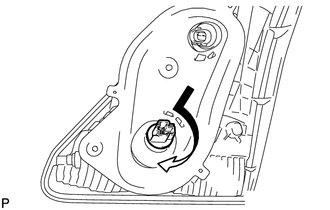 |
2. INSTALL TAIL LIGHT BULB
(a) Install the tail light bulb to the tail light socket.
(b) Turn the tail light bulb to the tail light socket in the direction indicated by the arrow shown in the illustration to install them as a unit. |
 |
Test yourself
A quick Toyota Venza quiz: every answer comes with an explanation and a link to the manual page.