Removal
1. RECOVER REFRIGERANT FROM REFRIGERATION SYSTEM

2. DISCONNECT CABLE FROM NEGATIVE BATTERY TERMINAL
NOTICE:
When disconnecting the cable, some systems need to be initialized after the cable is reconnected (See page ).
3. REMOVE FRONT WHEEL RH
4. REMOVE NO. 1 ENGINE UNDER COVER
5. SEPARATE FRONT FENDER LINER RH
6. REMOVE FRONT FENDER APRON SEAL RH
7. REMOVE V-RIBBED BELT
8. REMOVE RADIATOR ASSEMBLY
HINT:
Refer to the procedure for Remove Radiator Assembly (See page ).
9. DISCONNECT COOLER REFRIGERANT DISCHARGE HOSE
(a) Disengage each clamp. |
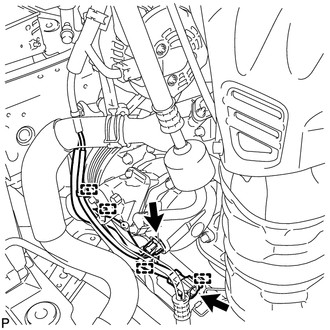 |
(b) Disconnect each connector.
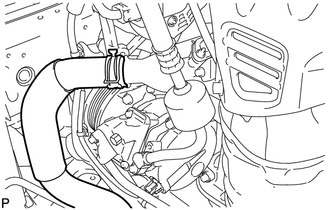
(c) Using pliers, grip the claws of the clip and slide the clip to remove the No. 2 radiator hose. |
 |
(d) Remove the bolt and disconnect the cooler refrigerant discharge hose from the compressor assembly with pulley. |
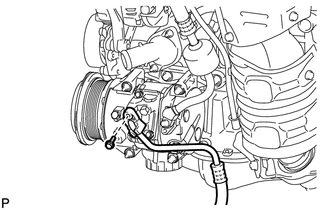 |
(e) Remove the O-ring from the discharge hose.
NOTICE:
Seal the openings of the disconnected parts using vinyl tape to prevent entry of moisture and foreign matter.
10. DISCONNECT SUCTION HOSE SUB-ASSEMBLY
(a) Remove the bolt and disconnect the suction hose sub-assembly from the compressor assembly with pulley. |
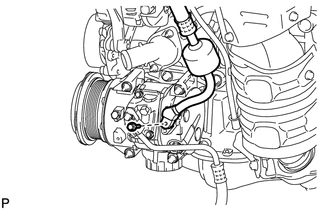 |
(b) Remove the O-ring from the suction hose sub-assembly.
NOTICE:
Seal the openings of the disconnected parts using vinyl tape to prevent entry of moisture and foreign matter.
11. REMOVE COMPRESSOR ASSEMBLY WITH PULLEY
(a) Remove the 2 bolts, 2 nuts and compressor assembly with pulley. |
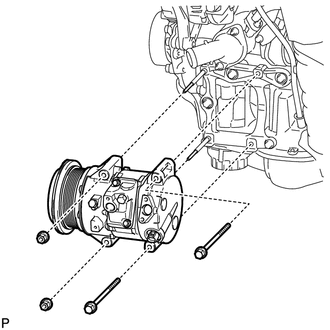 |
(b) Using an E8 "TORX" socket wrench, remove the 2 stud bolts. |
 |
Test yourself
A quick Toyota Venza quiz: every answer comes with an explanation and a link to the manual page.