General body repairs, interior

Removing and installing front backrest

~1min read

Special tools and workshop equipment required

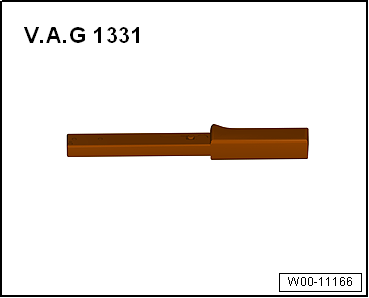
Torque wrench -V.A.G 1331-

Removing

  • Remove front seat → Chapter.
  • Secure seat on seat repair stand → Chapter.
  • Remove seat trim on tunnel side → Chapter.
  • Remove seat trim on sill side → Chapter.

Torque wrench -V.A.G 1331

  • Disconnect connectors of wiring harnesses leading to backrest.
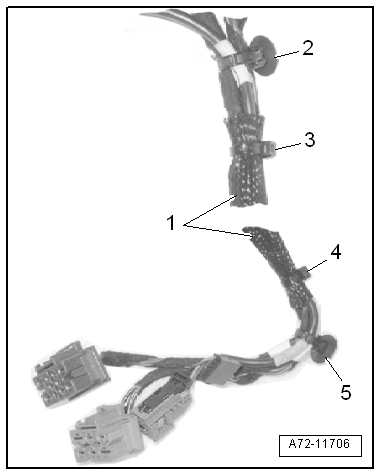
  • Unclip clips -2- and -5- of wiring harness -1- from seat pan.
  • Release wiring harness -1- together with braided sleeve from seat pan.
  • To do this, remove all cable ties -3- and -4-.

The wiring harness between coupling station and side airbag is continuous.

  • Thread wiring harness leading to side airbag out if braided sleeve.
  • To do this, remove cable ties -3- and -4-.
Removing and installing front backrest

Only for vehicles with entry assistance

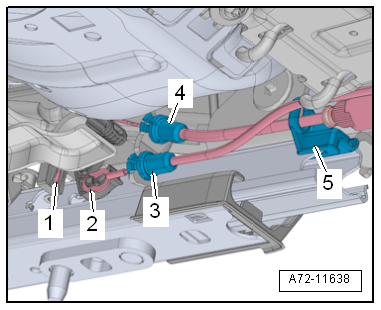
  • Detach Bowden cable support bracket -3, 4- from retainer for entry assistance on seat pan.
  • Unclip Bowden cables -1 and 2- for entry assistance from seat rail release mechanism.
  • Detach retainer -5- for Bowden cable from seat rail.
Removing and installing front backrest

Continued for all vehicles

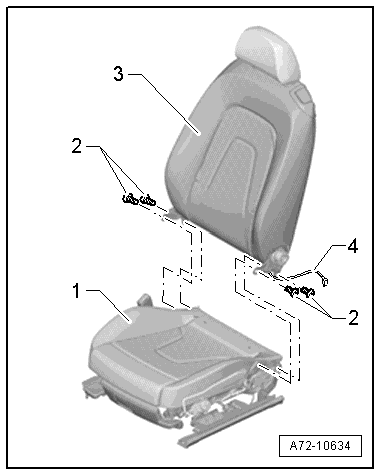
  • Remove bolts -2-.
  • Fold backrest -3- forwards onto seat pan -1-.
  • Push seat pan padding to side.
  • Carefully pull side airbag wiring harness -4- out of seat pan.
  • Remove backrest.

Installing

Install in reverse order, but note the following:

  • Renew any damaged cable ties and clips.
  • Route wires in their original positions.

Specified torques

→ Chapter „Assembly overview - front seat“
→ Chapter „Assembly overview - seat pan“
→ Chapter „Assembly overview - front backrest“
Removing and installing front backrest

Test yourself

A quick Volkswagen Golf quiz: every answer comes with an explanation and a link to the manual page.