Driver airbag
Assembly overview - Driver airbag
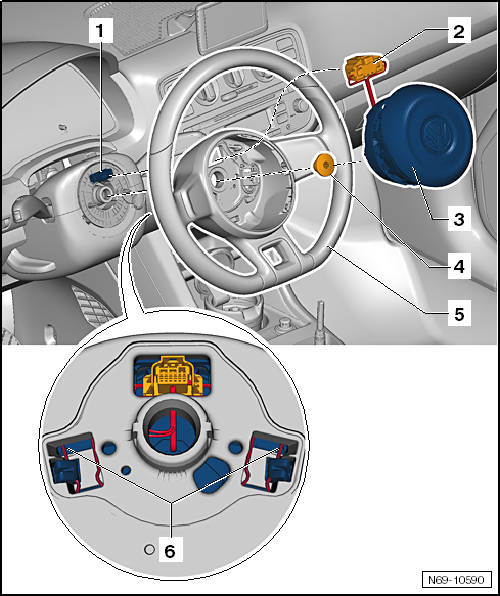
- Steering column switch module (SMLS)
- with clock spring for airbag and return ring with slip ring -F138-
- Removing and installing → Electrical system.
- electrical wiring harness
- for igniter for driver airbag -N95-
- Driver airbag with igniter for driver airbag -N95-

WARNING!
Observe the safety regulations for pyrotechnic components.
Remove and install- Bolt
- Tightening torques → Chassis, axles, steering
- Steering wheel
- Removing and installing → Suspension, Axles, Steering
- Locking clip
Removing and installing airbag unit with igniter
Required Special Tools, Test and Measuring Equipment and Auxiliary Items
- Pin punch, blade diameter 2 mm; maximum length 120 mm, with conically tapered blade tip, commercially available
Removing

WARNING!
- Observe the safety regulations for pyrotechnic components.
- Observe the disposal regulations for pyrotechnic components.
- Set steering wheel as far up as possible. To do this, use the full adjustment range of the steering column adjustment.
- On e-up! vehicles, disconnect service plug for high-voltage system -TW-.
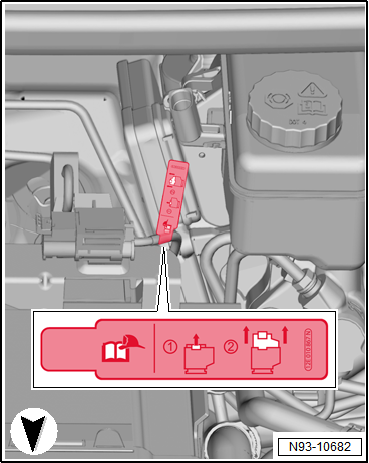
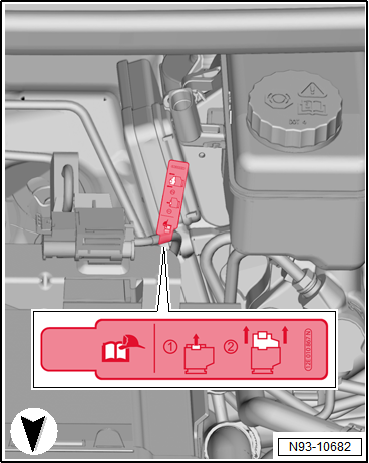
- Disconnect the battery ground cable with ignition switched on → Electrical system.
- Turn steering wheel so that the opening on the back of the steering wheel points exactly upward, "3 o'clock position or 9 o'clock position".

Note
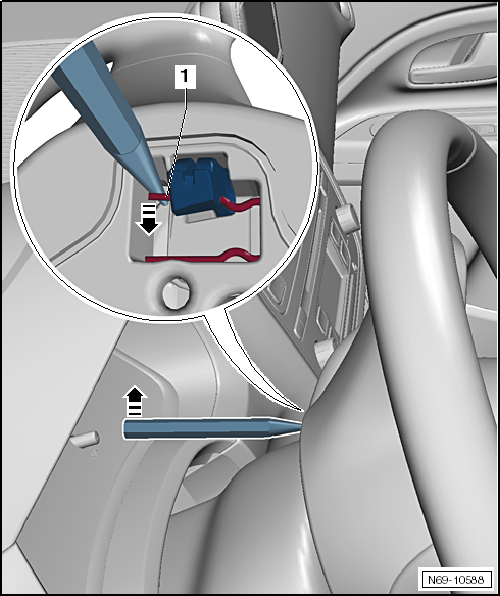
To rule out damage from scratches to the dash panel insert, wrap the striking head of the pin punch with masking tape, for example.
- Unlock locking clip -1- for driver airbag -arrows-, using a pin punch, blade diameter 2 mm; maximum length 120 mm, with conically tapered blade tip, commercially available.
- Turn steering wheel 180º and repeat the procedure on the opposite side of the steering wheel.
- Return steering wheel to center position (wheels pointing straight ahead).

WARNING!
Before handling pyrotechnic components (for example, disconnecting the electrical connector), the person handling them must "discharge static electricity". To do this, briefly touch the door striker plate, for example.
- Remove driver airbag slightly from the steering wheel.
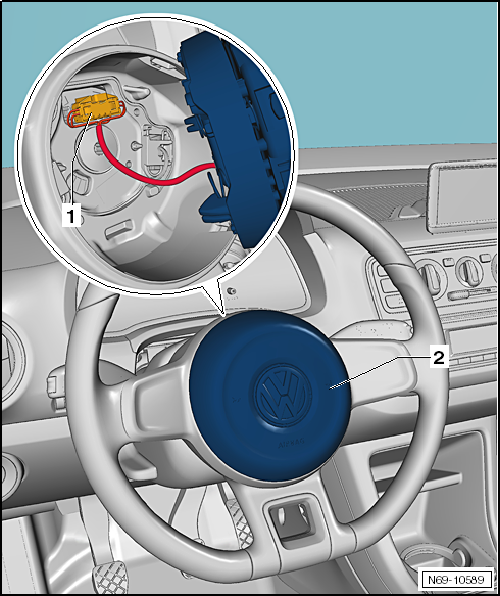
- Pull out connector lock and press it down, then disconnect electrical connector -1-.
- Remove airbag -2-.

WARNING!
Place the airbag so that the VW emblem faces upward.
Installing

WARNING!
- Observe the safety regulations for pyrotechnic components.
- Before handling pyrotechnic components (for example, connecting the electrical connector), the person handling them must "discharge static electricity". For example, briefly touch the door striker.
Installation is carried out in the reverse order, observing the following:

Note
- Make sure that the electrical connectors are pushed on as far as they will go and audibly engage.
- Make sure that the wiring is not pinched.
- Connect the electrical connector for clock spring to the airbag plug connection on the centering ring with slip ring.
- Position the driver airbag in the steering wheel and press it in until it audibly engages.

WARNING!
The battery must be connected with the ignition switched on. Improper repair work on pyrotechnic components (for example airbags or belt tensioners) can cause unintended deployment after the battery is connected. No person may be inside the vehicle cabin when connecting the battery.
- On e-up! vehicles, connect the service plug for high-voltage system -TW-.
- Connect the battery ground cable with ignition switched on → Electrical system.
- Finally, read out and clear the airbag control module fault memory, as faults may have been stored when the electrical connectors were disconnected → Vehicle diagnostic tester.
Installation notes: e.g. tightening torques, replacing components