Windshield
Assembly overview - windshield

- Windshield
- Remove and install
- PUR sealing adhesive
- Bead cross-section: -width b- = 7 mm -height a- = 10 mm (including pre-coating, remaining material on windshield and windshield flange)
- Minimum curing time
- Body flange
- Repair paint damage if damaged
- Gap dimension
- Must be even on left and right.
- Gap dimension
- Must be even.
- Gasket
- Only for vehicles with panoramic tilt/slide sunroof.
- Windshield positioning aid
- 443 845 631 A
- Remove 2 hours after installing the windshield.
- Surround moulding
- Is part of the windshield.
- Cowl Cover
- May only be pulled out of the edge trim by hand.
- Remove and install
Removing and installing the windshield

Note
Removing bonded windshields is described with the bonded windshield release device -V.A.G 1474 A-. The corresponding tools from the bonded windshield release device -VAS 6452- can also be used.
Required Special Tools, Test and Measuring Equipment and Auxiliary Items
- Bonded windshield release device -V.A.G 1474 A- or bonded windshield release device -VAS 6452-
- Suction cup lifter -V.A.G 1344-
- Cutting tool -V.A.G 1351-
- Windshield removal set -V.A.G 1755-
- Hand pressure gun -V.A.G 1628-
- Cartridge heater -V.A.G 1939-
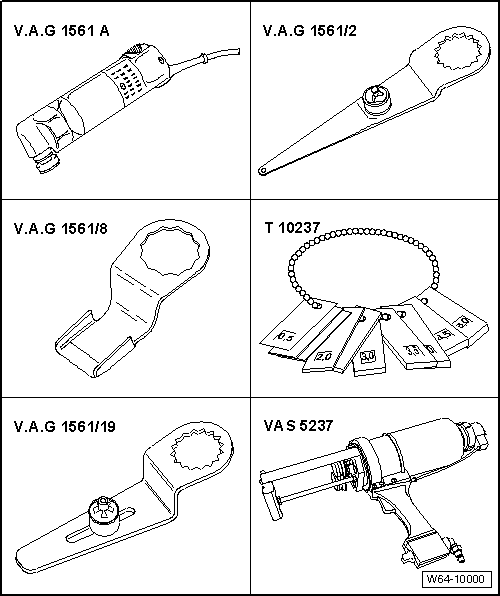
- Electric knife -V.A.G 1561 A-
- Cutting blade -V.A.G 1561/2-
- Cutting blade -V.A.G 1561/8-
- Adjustment gauge -3371-
- Cutting blade -V.A.G 1561/19-

- Double cartridge gun -VAS 5237-
Removing
Carry out the following work:
- On vehicles with emergency braking function, first remove the emergency braking function sensor unit → Electrical system.
- Remove the upper left and right A-pillar trim → Body assembly work interior.
- Remove the left and right sun visors → Body assembly work interior.
- Remove the interior mirror → Body assembly work interior.
- Lower the headliner in the area of the windshield → Body assembly work interior.
- The headliner can now be lowered far enough that the windshield can be cut out without damaging the headliner.
- Remove cowl panel cover.

- On vehicles with heated windshield -1-, disconnect the ground strap -2-.
- Disconnect the lines -5- in the cowl.
- Insert protective film -V.A.G 1474/8--1- between windshield and dashboard.
- Pull the cutting wire end -2- through the adhesive sealant into the vehicle interior with the awl -V.A.G 1474/2-.

- Secure the cutting wire end inside with the pull handle -V.A.G 1351/1--3- to prevent it from being pulled out.
- Insert cutting wire -2- into the window flange using tube -1-.
- Place the cutting wire around the windshield.
- Make sure the cutting wire is routed under the windshield at the corners.
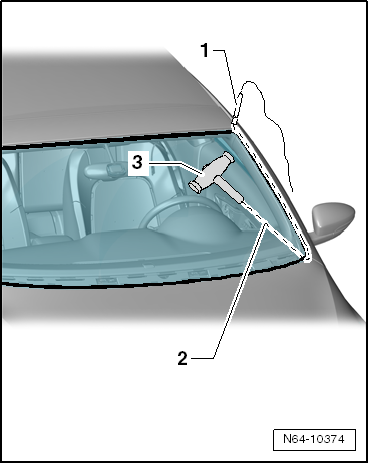
- Attach the second wire end to the winding device -V.A.G 1654 A-.
- Position winding device -V.A.G 1654 A- in "Position I".
- Move winding device -V.A.G 1654 A- accordingly and cut the windshield free.
- While cutting free, press the cutting wire against the windshield with a plastic wedge to create clearance at the window flange and the dashboard.
Installing


Note
- The original windshield is supplied with spacers.
- On vehicles without panoramic sunroof, spacers -1- remain installed.
- On vehicles with panoramic sunroof, seal -4- must be installed.

- Cut off spacers -1- with the tool.
- Stick seal -4- to the edge of the windshield.
- On vehicles with emergency braking function, install the sensor unit for emergency braking function → Electrical system.
Prepare undamaged windshield for glazing.
Prepare new windshield for glazing.
Prepare body flange for glazing.
Installation notes.
Minimum curing time.
Remove damaged windshield
Removing a damaged windshield is performed in the same way as removing a damaged rear window.