Door windows
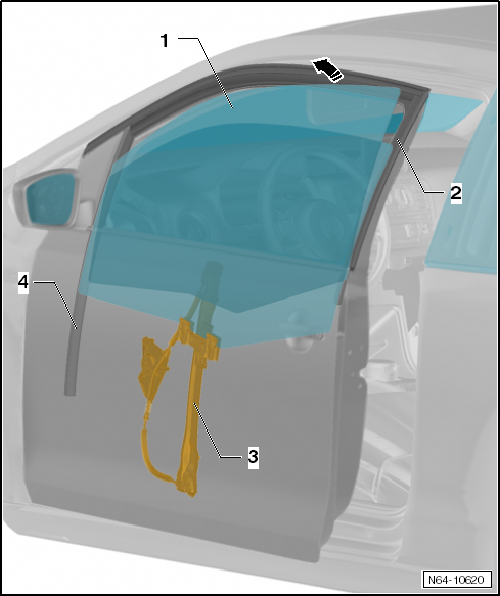
Assembly overview - front door window

Note
The illustration shows the left side. The right side is performed in the same way.
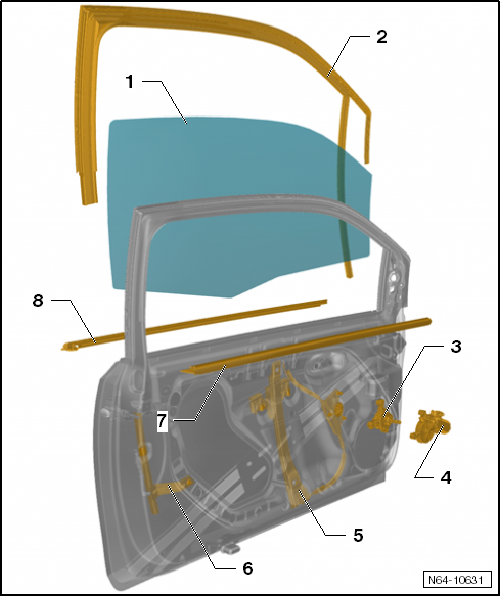
- Door glass
- Remove and install
- Window guide
- Remove and install
- Window regulator mechanism
- Remove and install
- Window regulator motor
- Remove and install
- Window regulator
- Remove and install
- Guide rail
- With additional window guide.
- Window channel seal, inside
- Window channel seal, outside
Assembly overview - rear door window
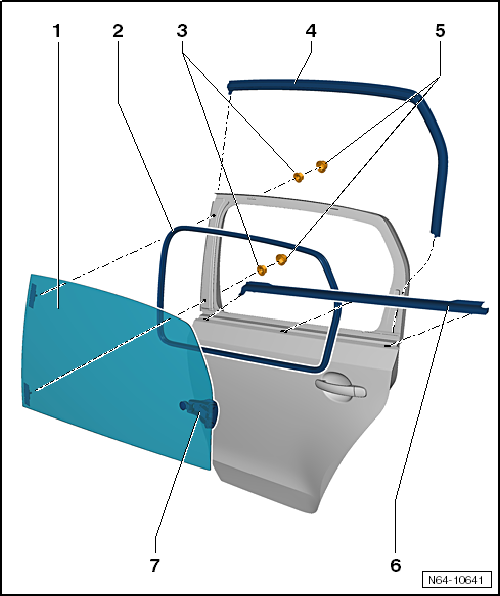
- Door glass
- Remove and install
- Gasket
- Remove and install
- Hex nut
- 2 pieces
- Tightening torque: 8 N·m
- Window guide
- Remove and install
- Cover caps
- 2 pieces
- Window channel seal, outside
- Remove and install
- Window operating mechanism
- Remove and install
Removing and installing front door window
Required Special Tools, Test and Measuring Equipment and Auxiliary Items
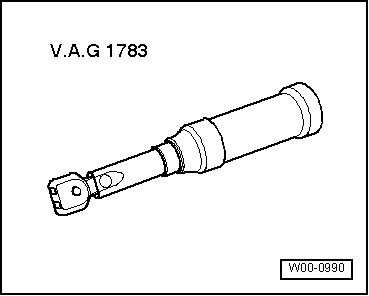
- Torque wrench -V.A.G 1783-

Note
Removal and installation is described for the left door window only. The right side is performed in the same way.
Removing
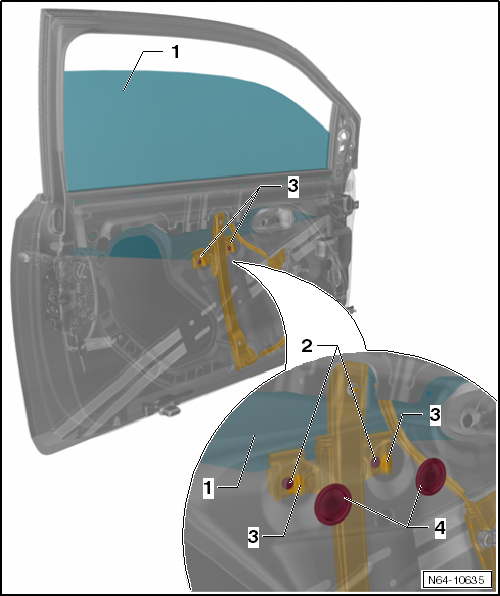
Carry out the following work:
- If equipped, remove window crank.
- Remove the front door trim panel → Body assembly work, interior.
- Remove cover.
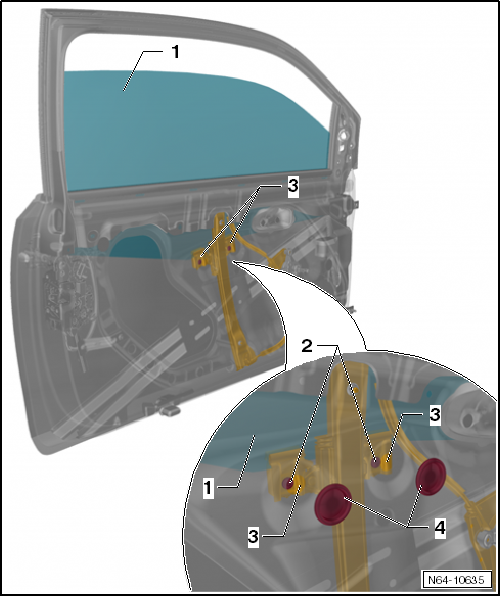
- Pry off cover cap -4-.
- Lower door window -1- until clamping screws -2- of the door window are accessible.

Note
- If this step is not possible due to a fault in the window regulator motor, the window regulator motor can be removed.
- Then the door window can be moved into the required working position.
- Loosen clamping screws -2- (2 pcs.), do not unscrew. Then push clamping jaws -3- apart.
- Pull door window -1- upward out of window regulator -3-.
- Lift rear of door window -1- and swivel it forward out of window guides -4- -arrow-.
Installing

Carry out the following work:
- Swivel door window -1- into window guides -2- -arrow a-.

Note
Make sure the door window is correctly seated in the window guide.
- Guide door window into clamping jaws -3- without pressure -arrows b-.
- Align door window to window frame -arrow c-.
- Tighten clamping screws -2- (2 pcs.), tightening torque: 8 N·m.
Installation is carried out in reverse order.
- Before installing cover caps -4-, cover and door trim, perform a function check.
Removing and installing rear door window
Removing
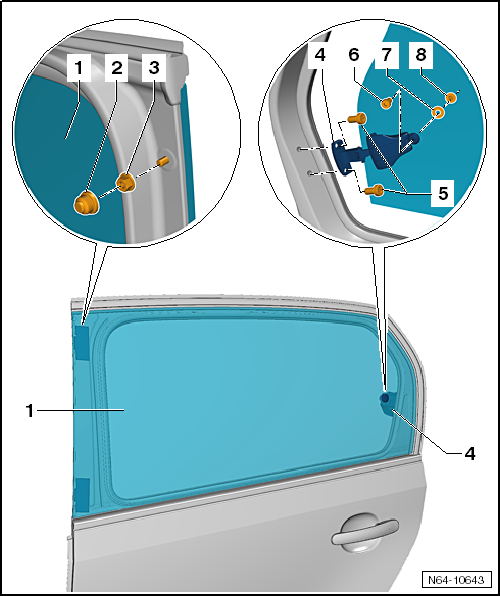
- Unscrew bolts -5-.
- Pull off cover caps -2-.
- Unscrew hex nuts -3- and remove door window -1-.
- If necessary, remove window operating mechanism -4-.
Installing
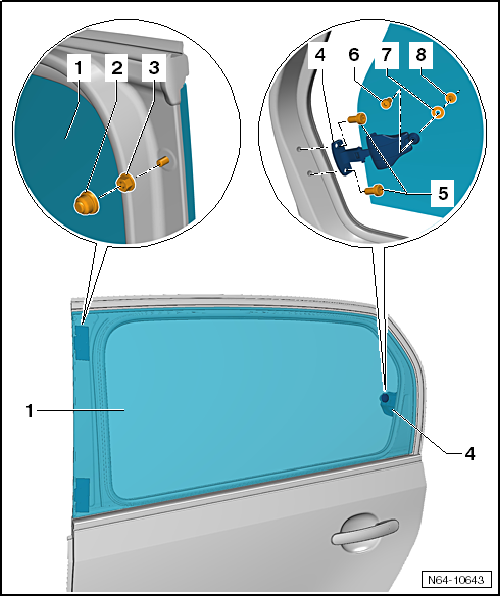
- Window operating mechanism -4- is installed loosely.
- Install door window -1- and loosely screw on hex nuts -3-.
- Align door window.
- Tighten hex nuts -3-, tightening torque: 8 N·m.
- Screw window operating mechanism -4- to rear door. Tightening torque of screws -5-: 8 N·m.
- Screw bolt -6- to threaded bushing -8-. Tightening torque: 4 N·m.
- Press on cover caps -2-.
Installation dimensions
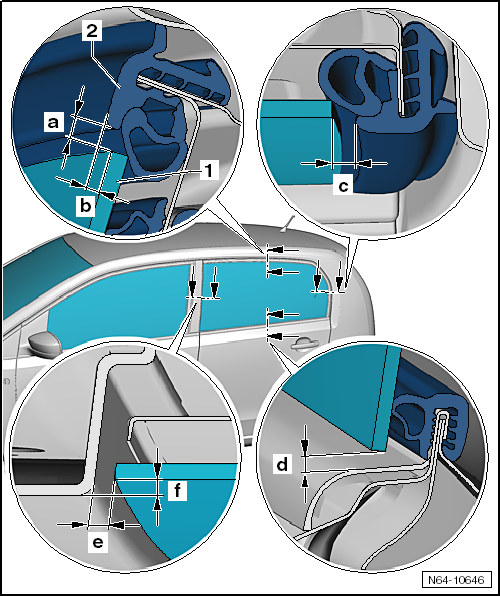
- Door glass
- Gap dimension -a- 3.5 mm +- 1 mm
- Depth dimension -b- 3.4 mm +- 0.5 mm
- Gap dimension -c- 3.5 mm +- 0.5 mm
- Gap dimension -d- 3.8 mm +- 0.5 mm
- Gap dimension -e- 4.2 mm +- 0.5 mm
- Depth dimension -f- 4.9 mm +- 0.1 mm
- Window guide