Rear window
Installation overview - Rear window
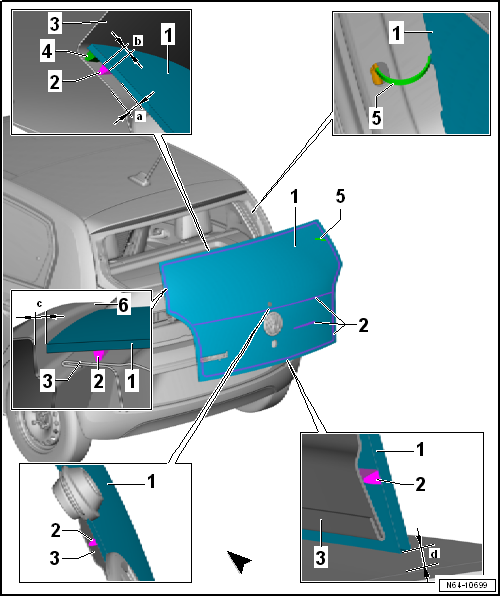
- Rear window
- Remove and install
- Distance dimension -c- to the side panel must be set equally on the right and left.
- Distance dimension -d- to the bumper cover must be set evenly.
- PUR sealing adhesive
- Bead cross-section: -Width b- = 7 mm -Height a- = 10 mm (including primer, residual material on glass and window flange)
- Minimum curing time
- Body flange
- Spacer
- Rear window heater connection
- Side panel
Removing and installing rear window

Note
Removal of bonded windows is described with the bonded window cutting device -V.A.G 1474 A-. The corresponding tools from the bonded window cutting device -VAS 6452- can also be used.
Required special tools, testers and equipment, and auxiliary items
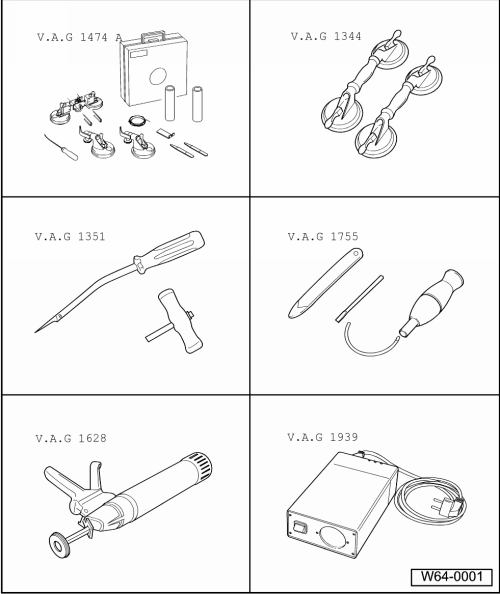
- Bonded window cutting device -V.A.G 1474 A- or bonded window cutting device -VAS 6452-
- Suction cup lifter -V.A.G 1344-
- Cutting tool -V.A.G 1351-
- Windshield removal set -V.A.G 1755-
- Hand pressure gun -V.A.G 1628-
- Cartridge heater -V.A.G 1939-
Removing

Note
If the window is reused, make sure the electrical connections for the window heater are not damaged.
Carry out the following work:
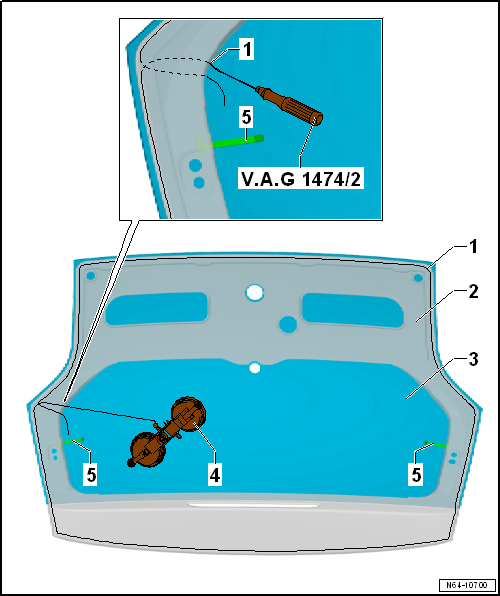
- Disconnect the connections for heated rear window -5- and window antenna. Then tape them to the rear window.
- Pull cutting wire -1- inward through the adhesive sealant at the point shown in the illustration -arrow- using the awl -V.A.G 1474/2--1-.
- Secure the cutting wire end with the pull handle -V.A.G 1351/1- before pulling it out.
- Place the cutting wire around the rear window and also guide the second wire end inward.
- Attach the cutting wire end to the winding device -V.A.G 1654 A-.

Note
The protective film or plastic strip -V.A.G 1474/15- must be used to protect the raised sheet metal flange.
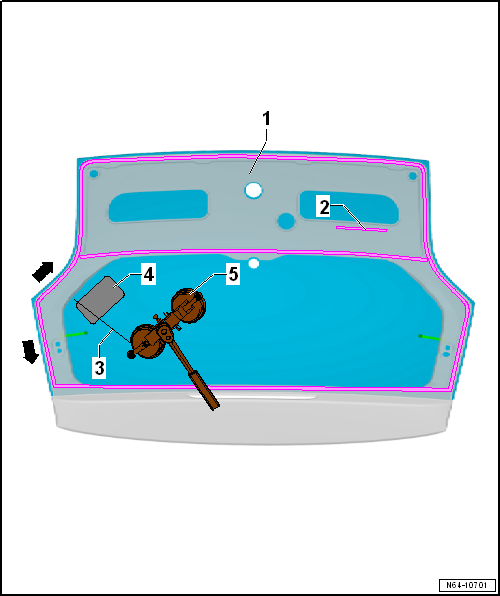
- Carefully insert protective film -4- or plastic strip -V.A.G 1474/15- between rear window and sheet metal flange.
- Position winding device -V.A.G 1654 A- in the position shown.
- Move winding device -V.A.G 1654 A- accordingly and first cut the rear window free in the upper area on both sides.
- While cutting free, press cutting wire -3- against the rear window with wedge -V.A.G 1474/5- to create clearance at the body flange.
- Then cut the rear window free in the lower area.
- Hold the rear window with 2 suction cup lifters while cutting free.

Caution!
Increased force is required, as 2 adhesive beads are cut through in the lower area of the rear window.
- Lift the rear window off the tailgate using the 2 suction cup lifters.
Installing
Carry out the following work:
Prepare undamaged rear window for glazing.
Prepare new windshield for glazing.
Prepare body flange for glazing.
Installation notes.
Minimum curing time.
Remove damaged rear window
Carry out the following work:
- Protect body and interior from glass splinters.
- Remove glass fragments down to the adhesive sealant.
- Disconnect connections for window heater and antenna.
- Tape flange -2- all around with textile-reinforced adhesive tape.
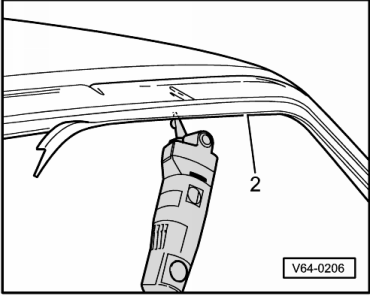
- Cut through the adhesive sealant (with glass residue) in the window opening using electric knife -V.A.G 1561 A- and U-shaped cutting blade -V.A.G 1561-.

WARNING!
Always wear safety goggles and leather gloves.