Window regulator
Removing and installing front window regulator
Required Special Tools, Test and Measuring Equipment and Auxiliary Items
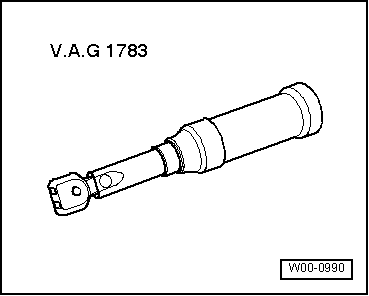
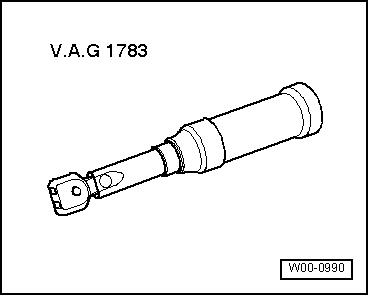
- Torque wrench -V.A.G 1783-

Note
Removal and installation is described for the left window regulator only. Removal and installation of the right window regulator is performed in the same way.
Removing
- If equipped, remove window regulator handle.
- Remove the front door trim panel → Body assembly work, interior.
- Remove door window.
- Remove window regulator motor.
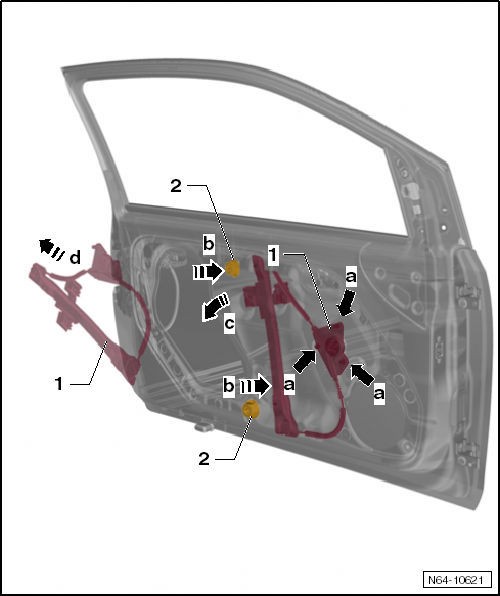
- Unlock latch hooks of cable drum -arrows a- and push into door.
- Unscrew hex nuts -2- and push threaded studs of window regulator into door -arrows b-.
- Turn window regulator slightly in door in direction of arrow c.
- Remove window regulator -1- through the opening in door -arrow d-.
Installing
Carry out the following work:
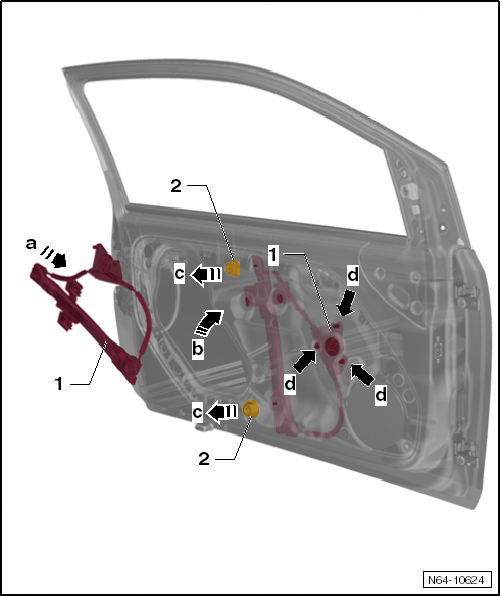
- Guide window regulator -1- through the opening into door -arrow a- and bring into installed position -arrow b-.
- Insert threaded studs of window regulator through inner door panel -arrows c-.
- Tighten hex nuts -2-, tightening torque: 8 N·m.
- Press cable drum against inner door part -arrows d- until latch hooks audibly engage.
- Install window regulator motor or install window regulator drive.
- Install door window.
Removing and installing front window regulator motor
Required Special Tools, Test and Measuring Equipment and Auxiliary Items
- Torque wrench -V.A.G 1783-

Note
Removal and installation is described for the left window regulator motor only. Removal and installation of the right window regulator is performed in the same way.
Removing
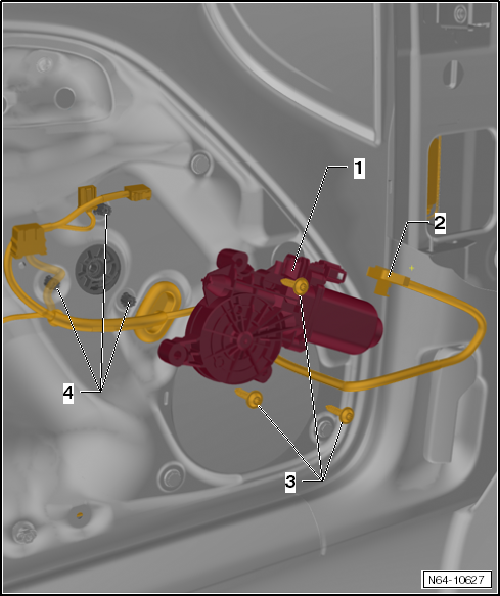
Carry out the following work:
- Remove the front door trim panel → Body assembly work, interior.
- Secure door window with adhesive tape so that it does not slide down.

Caution!
- Switch off ignition and all electrical consumers.
- Remove ignition key.
- Disconnect connector -2-.
- Unscrew screws -3- (3 pcs.).
- Remove window regulator motor with control unit -1- from the mounts of cable drum -4-.
Installing

WARNING!
When installing a new window regulator motor (door control unit), additional functions and the excess force limitation must be coded!

Carry out the following work:
- Fit window regulator motor -1- onto the mounts of cable drum -4-. Move door window slightly up and down so that the teeth of window regulator motor and cable drum engage more easily.
- Screw in screws -3- (3 pcs.), tightening torque: 3 N·m.
- Connect plug connection -2-.
- A new window regulator motor must be coded with the → vehicle diagnostic tester.
- The work procedure and information on the auto up/down function and the excess force limitation can be found in.
Installation is carried out in reverse order.
Removing and installing front window regulator drive
Required Special Tools, Test and Measuring Equipment and Auxiliary Items
- Torque wrench -V.A.G 1783-
Removing

Note
Removal and installation is described for the left window regulator only. Removal and installation of the right window regulator is performed in the same way.

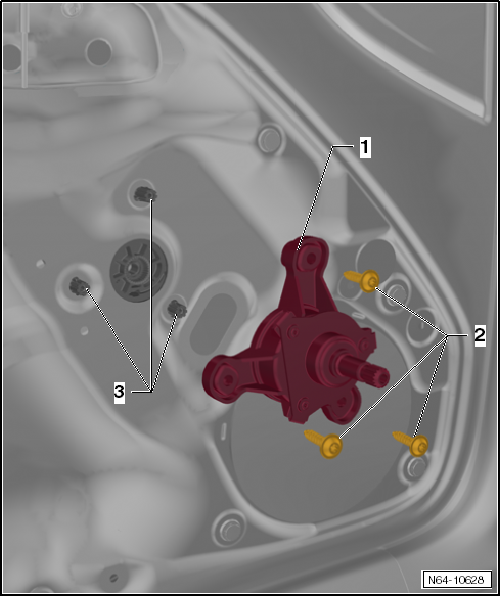
- If equipped, remove window regulator handle.
- Remove the front door trim panel → Body assembly work, interior.
- Secure door window with adhesive tape so that it does not slide down.
- Unscrew bolts -2- (3 pcs.).
- Remove window regulator mechanism -1- from the cable drum -3- mounts.
Installing

Installing
- Fit window regulator mechanism -1- onto the cable drum -3- mounts. Move the door glass up and down slightly so that the teeth of the window regulator mechanism and cable drum engage more easily.
- Screw in bolts -2- (3 pcs.), tightening torque: 3 N·m.
Removing and installing front window crank
Removing
- Push spacer ring -1- in the -arrow direction- and pull the window crank off the drive.
Installing
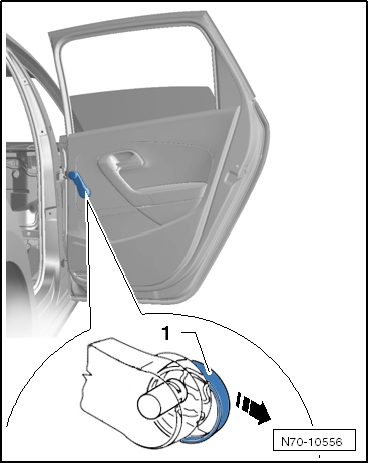
- Insert spacer ring and press the window crank onto the drive.
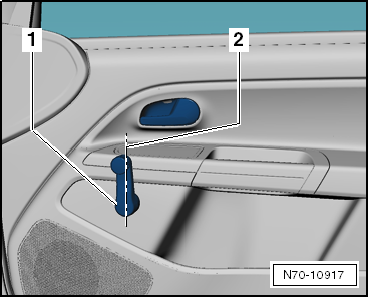
With the crank disc closed, the installed position of the window crank -1- runs vertically upward.
The deviation of the window cranks from each other must not exceed a maximum of 6º.
Removing and installing rear window regulator operating mechanism
Removing

Note
The window regulator operating mechanism can be removed and installed with the door glass removed or installed.

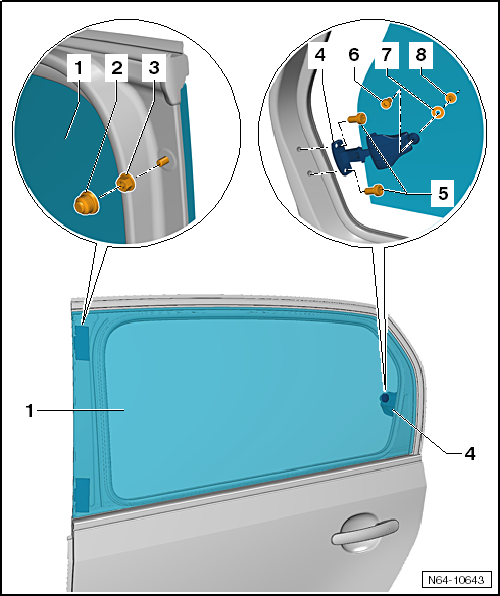
- Unscrew bolts -5-.
- Unscrew bolt -6- from threaded bushing -8-.
- Remove window regulator operating mechanism -4- from door glass -1-.
Installing
- If necessary, install door glass.
- Insert undamaged seal -7- between door glass -1- and threaded bushing -8-.
- Loosely bolt window regulator operating mechanism -4- to door glass -1-.
- Screw window operating mechanism -4- to rear door. Tightening torque of screws -5-: 8 N·m.
- Screw bolt -6- to threaded bushing -8-. Tightening torque: 4 N·m.