Repair notes
Minimum curing times for bonded glass

WARNING!
Special requirements apply to replacing bonded glass. These include, for example, that a newly bonded windshield must meet operating safety requirements, including in the event of an accident, after a specified minimum curing time.
For the 2K windshield adhesive, the minimum curing time is 2 hours for all glass.
The minimum curing time is the time from bonding the glass until the vehicle is put back into service. During this time, the vehicle must stand at room temperature (at least 15 ºC) on level ground.

WARNING!
The vehicle is not operationally safe until the minimum curing time has elapsed.
Glass repair

Note
- If the windshield is damaged, clarify whether glass repair is possible before replacing it.
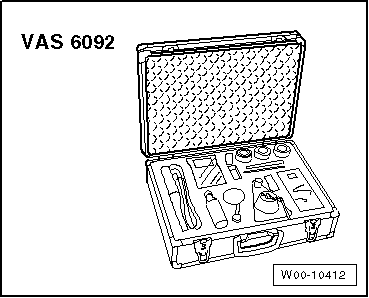
- Damaged windshields can be repaired using the Windshield Repair Kit -VAS 6092-.
- This damage must not exceed a certain size and position.
- Each Windshield Repair Kit includes work instructions.
Required Special Tools, Test and Measuring Equipment and Auxiliary Items
- Windshield Repair Kit -VAS 6092-
Installation notes for bonded glass
Installation notes
Carry out the following work:
- Apply adhesive sealant all around, at a right angle to the glass.

WARNING!
The windshield must be installed within 10 minutes, otherwise the adhesion of the windshield adhesive will be impaired.
Do not apply the adhesive bead too thick, and do not press the windshields too hard onto the body flange. Because the windshields no longer have sealing lips, squeezed-out adhesive is visible in the joint area.
- Using 2 suction cup lifters -V.A.G 1344-, insert the windshield into the window opening, center it, and press it in up to the spacer rib.
- Re-attach any labels present (e.g. for airbag).
Materials

Note
Part numbers for materials can be found in → ETKA.
- 2K windshield adhesive 1)2)3)6)
- 1K windshield adhesive 1)2)4)5)6)
- Activator 1)6)
- Glass primer/paint primer 1)6)
- Cleaning solution 1)6)
- Primer applicator 1)6)
- Adhesive remover 1)6)
- Cutting thread 6)
1) Observe the processing instructions according to the manufacturer's specifications on the packaging insert.
2) Observe the minimum curing time.
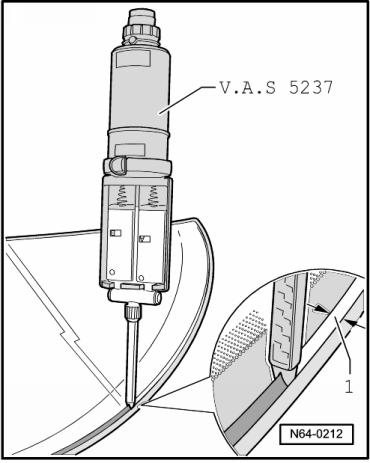
3) You must use the double cartridge gun -VAS 5237- to process this material.
4) Heat according to manufacturer's specifications with cartridge heater -V.A.G 1939-.
5) 180 ml small cartridge for sealing work and/or if the 400 ml dual cartridge is not sufficient.
6) Part numbers for materials can be found in → ETKA.
Prepare undamaged windshields for installation
Cutting down the adhesive bead
Carry out the following work:

WARNING!
Keep the bonding surface free of dirt and grease.
Do not treat the bonding surface immediately after cutting down with activator. Do not prime it, and do not treat it with cleaning solution.

Note
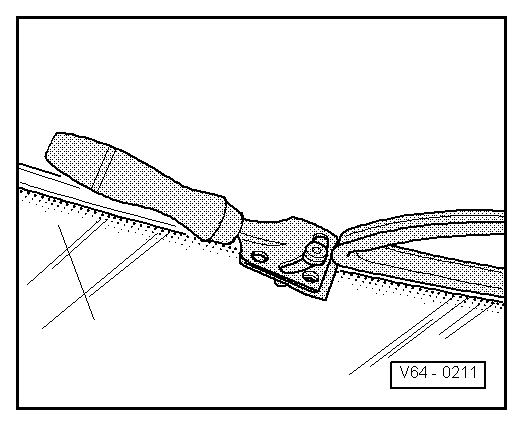
- When reusing an undamaged windshield, shortly before re-bonding, cut the remaining adhesive back to 1 ... 2 mm. Do not damage the primer and ceramic layer while doing so.
- The remaining material serves as a bonding base for the new sealing adhesive to be applied.

WARNING!
Exception: If bonding takes place more than one day after cutting back the adhesive bead, the remaining material must be activated with activator.
Apply the activator evenly in one stroke using the applicator.
Activator must not come into contact with the paint, otherwise paint damage will result.
Drying time approx. 10 minutes
Exception: If bonding does not take place immediately after cutting back, the remaining material must be activated with activator -D 181 801 A1-.
Prepare new windshields for installation
Carry out the following work:

Note
- The application area for the adhesive bead is not pre-coated and not primed.
- The sealing lip is part of a new windshield.
- All windshields are not pre-coated.
- Clean the windshield edge all around over a width of 20 mm with the cleaning solution.
- Then wipe the windshield edge dry with a lint-free cloth.

WARNING!
The ceramic layer on the windshield is not glass/paint primer! The ceramic layer must be primed before applying the sealing adhesive! Use only glass/paint primer D 009 200 02!
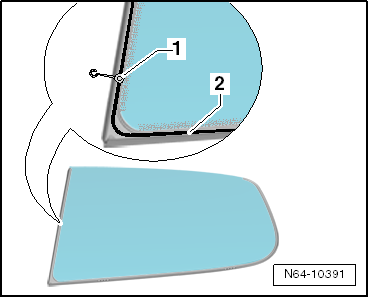
- Apply glass/paint primer -2- evenly in one stroke using applicator -1-.
- Drying time approx. 10 minutes
Prepare the body flange for installation of the windshield
Carry out the following work:

WARNING!
Keep the bonding surface free of dirt and grease.
Do not treat the bonding surface immediately after cutting down with activator. Do not prime it, and do not treat it with cleaning solution.
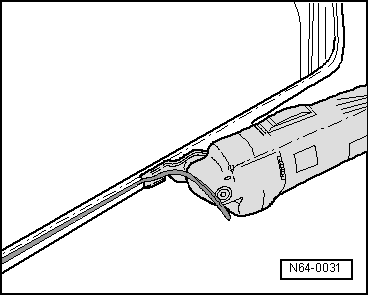
- Cut back the remaining material on the body flange with U-shaped cutting blade -V.A.G 1561/3-, but do not remove it completely under any circumstances.

Note
The remaining material serves as a bonding base for the new sealing adhesive to be applied. Keep the bonding surfaces free of dirt and grease.

WARNING!
Exception: If bonding takes place more than one day after cutting back the adhesive bead, the remaining material must be activated with activator.
Apply the activator evenly in one stroke using the applicator.
Activator must not come into contact with the paint, otherwise paint damage will result.
Drying time approx. 10 minutes
- If the body flange has been machined or partially replaced, the affected area must be cleaned and primed again after painting.

Note
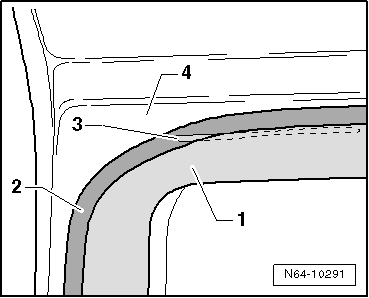
It is possible that a laser weld seam is not located in the area of the adhesive bead. In that case, the exposed weld seam must be sealed with windshield adhesive before bonding the windshield.
- If the laser weld seam -3- on the sheet metal flange -4- is not covered by the existing adhesive bead -1-, coat the laser weld seam -3- with glass/paint primer -3-. Then fill the laser weld seam with 1K windshield adhesive -1-.
Repairing paint damage
After paint damage, restore the paint build-up according to the specifications in the "Paint" repair guide.
Cleaning adhesive contamination
Carry out the following work:
- Use adhesive remover as the cleaning agent. Observe the safety regulations when working with it.

WARNING!
When cleaning the vehicle interior, do not push the windshield that was installed immediately beforehand outward.
- First roughly clean the paint surface with a dry cloth. Remove remaining dirt with the adhesive remover.
- Cleaning plastic trim: Allow the adhesive sealing material to cure (approx. 1 hour), then peel it off.