Alternator
Assembly overview - Alternator
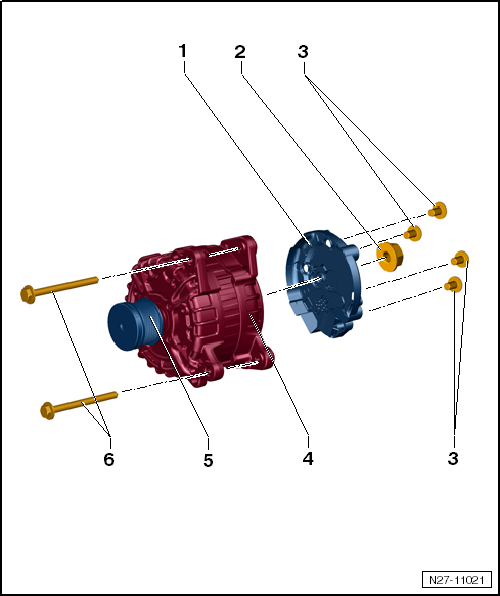
- Shield cap
- Fastening nut for B+ cable
- Tightening torque: 20 N·m
- Fastening B+ cable to alternator
- Mounting bolts, shield cap
- Alternator
- Removing and installing alternator
- Check alternator
- Remove and install alternator V-ribbed belt pulley
- Remove and install voltage regulator
- V-ribbed belt pulley
- Check V-ribbed belt
- Tightening torque: 65 N·m, without freewheel on alternator
- Tightening torque: 80 N·m, with freewheel on alternator
- Hex flange bolts
- M8
- Tightening torque: 20 N·m
Remove and install alternator
Remove and install alternator, gasoline engine

Caution!
When disconnecting and connecting the battery, follow the procedure described in the repair manual.
Required Special Tools, Test and Measuring Equipment and Auxiliary Items
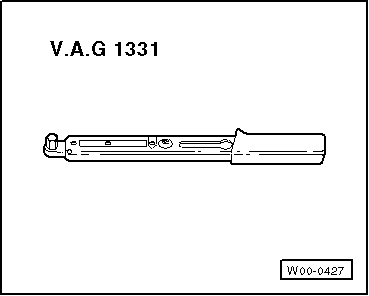
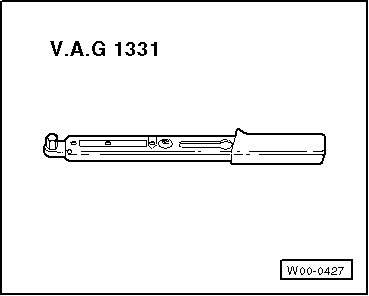
- Torque Wrench -V.A.G 1331-
Removing
- Disconnect battery.
- Move lock carrier into service position → Body assembly work, exterior.
- Remove V-ribbed belt.
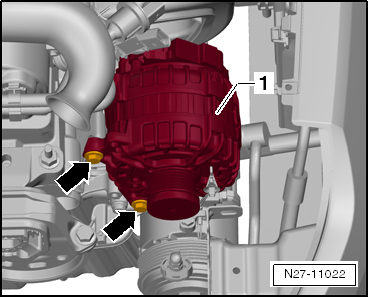
- Unscrew the 2 alternator mounting bolts -arrows- of alternator -C-.
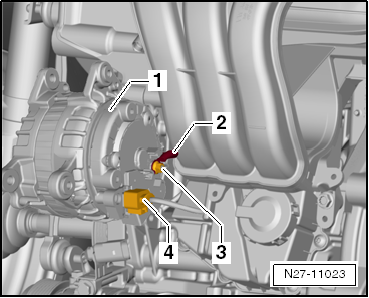
- Remove alternator -C--1- and turn it over, taking into account the connected cable lengths.

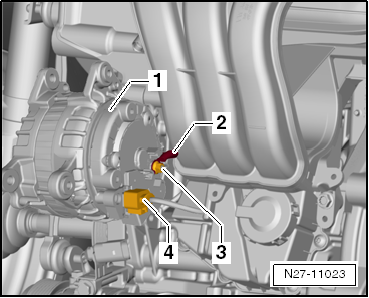
- Unlock and disconnect the connector of DF cable -4-.
- Unscrew mounting nut -3- and remove B+ cable -2- from the terminal stud.
- Lift alternator -C--1- out of the vehicle upwards.
Installing
Installation is carried out in the reverse order of removal, observing the following:

Caution!
- When installing V-ribbed belts that have already been run, observe the direction of travel marked during removal!
- Before installing the V-ribbed belt, make sure that all components (alternator, A/C compressor) are firmly mounted.
- When placing the belt on the pulleys, make sure the V-ribbed belt is seated correctly in the belt pulleys!
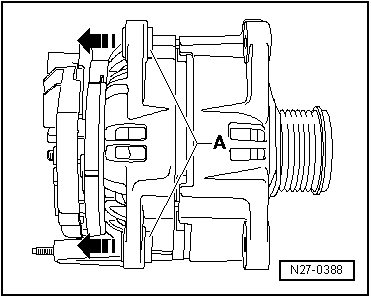
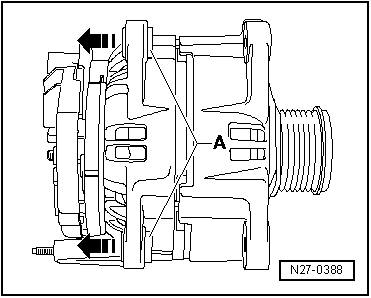
- Press threaded bushings -A- out approx. 4 mm from the housing of alternator -C- in the direction of the arrow.
- Connect battery.
- Start engine and check belt operation.
Tightening torques
- "Assembly overview - alternator"
Remove and install alternator, natural gas engine

Caution!
When disconnecting and connecting the battery, follow the procedure described in the repair manual.
Required Special Tools, Test and Measuring Equipment and Auxiliary Items
- Torque Wrench -V.A.G 1331-
Removing
- Disconnect battery.
- Move lock carrier into service position → Body assembly work, exterior.
- Remove V-ribbed belt.
- Remove V-ribbed belt tensioning device.
Vehicles with air conditioning

Caution!
Risk of damage to A/C compressor, refrigerant lines and hoses:
Do not overstretch, kink or bend refrigerant lines and hoses.
- Remove A/C compressor from bracket → Heating, Air Conditioning.
- Secure A/C compressor to the lock carrier so that the refrigerant lines are relieved of stress.
Continuation for all vehicles
- Unscrew 2 alternator mounting bolts -arrows- of alternator -C-.
- Remove alternator -C--1- and turn it over, taking into account the connected cable lengths.
- Unlock and disconnect electrical connector -4-.
- Unscrew mounting nut -3- and remove B+ cable -2- from the terminal stud.
- Remove alternator -C--1- downwards out of the vehicle.
Installing
Installation is carried out in the reverse order of removal, observing the following:

Caution!
- When installing V-ribbed belts that have already been run, observe the direction of travel marked during removal!
- Before installing the V-ribbed belt, make sure that all components (alternator, A/C compressor) are firmly mounted.
- When placing the belt on the pulleys, make sure the V-ribbed belt is seated correctly in the belt pulleys!
- Press threaded bushings -A- out approx. 4 mm from the housing of alternator -C- in the direction of the arrow.
- Connect battery.
- Start engine and check belt operation.
Tightening torques
- "Assembly overview - alternator"
Check alternator
- Connect the vehicle diagnostic tester.
- Check alternator -C- → Vehicle Diagnostic Tester.
Check V-ribbed belt
- Turn engine over at the vibration damper/belt pulley using a socket wrench.
- Check V-ribbed belt for:
- Base cracks (fine cracks, core breaks, cross-section breaks)
- Ply separation (top layer, tension cords)
- Chunks missing from base
- Fraying of tension cords
- Rib wear (material removal, frayed ribs, hardened ribs -glazed ribs-, surface cracks)
- Oil and grease marks

Caution!
To avoid failures or malfunctions, a damaged V-ribbed belt must be replaced.
Remove and install V-ribbed belt pulley
Remove and install V-ribbed belt pulley, without freewheel on alternator
Required Special Tools, Test and Measuring Equipment and Auxiliary Items
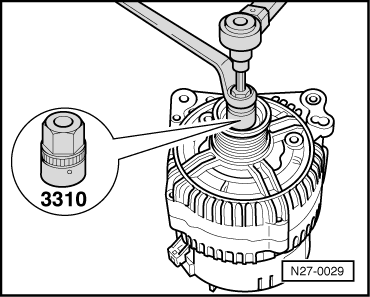
- Socket insert -VAS 3310-

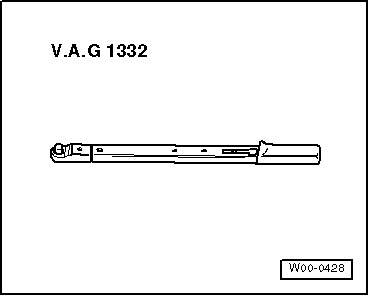
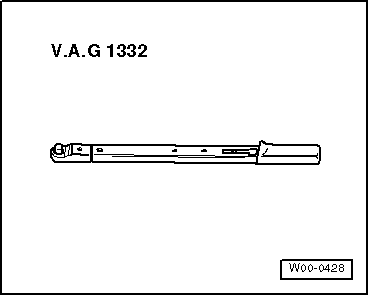
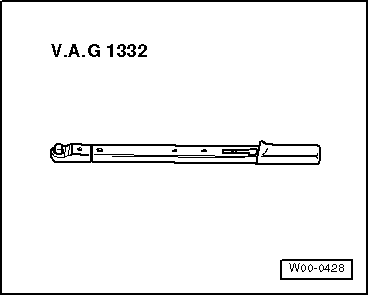
- Torque Wrench -V.A.G 1332-
Removing
- Remove alternator.
- Clamp alternator in a vise at the mounting points.
- Use socket insert -VAS 3310- to unscrew the V-ribbed belt pulley mounting nut from the alternator shaft.
Installing
Installation is carried out in the reverse order, observing the following:
Tightening torques
- "Assembly overview - alternator"
Remove and install V-ribbed belt pulley, with freewheel on alternator, Bosch
Required Special Tools, Test and Measuring Equipment and Auxiliary Items
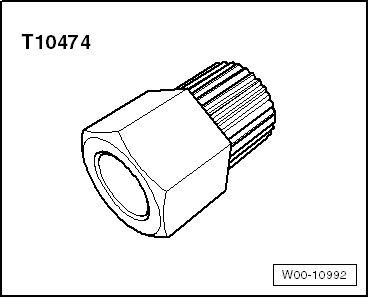
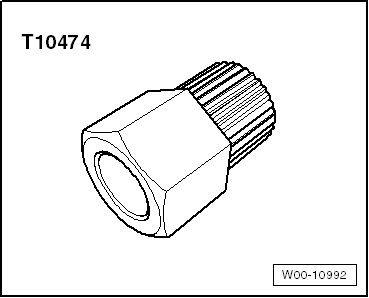
- Multi-tooth adapter -T10474-
- Torque Wrench -V.A.G 1332-
- Socket insert, internal hex 8 mm or TORX T50
Removing
- Remove alternator.
- Clamp alternator in a vise at the mounting points.
- Where fitted, remove protective cap from V-ribbed belt pulley with freewheel.
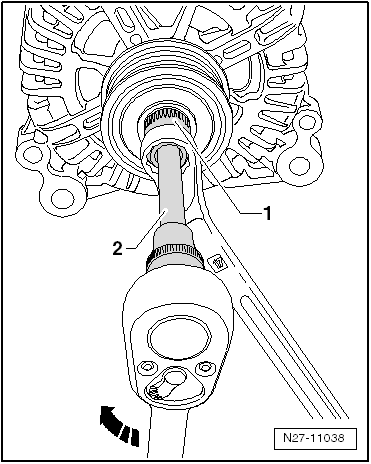
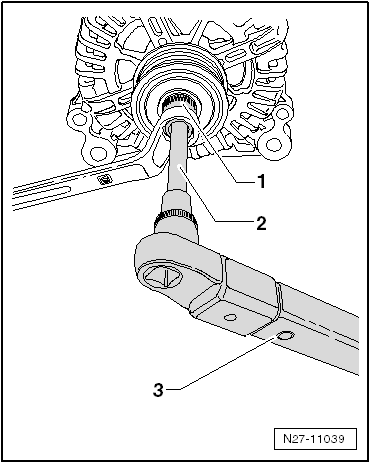
- Insert multi-tooth adapter -T10474--1- into the V-ribbed belt pulley and fit a ring spanner (width across flats 17 mm).
- Insert internal hex or TORX insert -2- into the alternator shaft.
- To loosen, turn alternator shaft clockwise (left-hand thread) while counter-holding with the ring spanner.
- Hold V-ribbed belt pulley with freewheel by hand and turn it on the alternator shaft until the V-ribbed belt pulley with freewheel can be removed.
Installing
Installation is carried out in the reverse order of removal, observing the following:
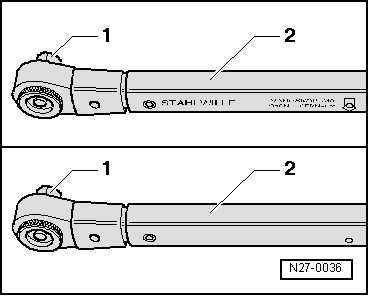
The torque wrench -V.A.G 1332- must be converted as follows for installing the V-ribbed belt pulley with freewheel:
- Unlock socket insert -1- and pull it off handle -2-.
- Turn handle -2- of the torque wrench through 180º and reinsert the socket insert.
- Set the direction of rotation of the torque wrench on the socket insert to left.
- First screw the V-ribbed belt pulley with freewheel onto the alternator shaft by hand until it stops.
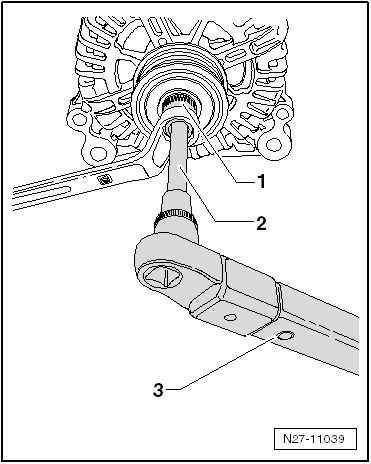
- Insert multi-tooth adapter -T10474--1- into the V-ribbed belt pulley and fit a ring spanner (width across flats 17 mm).
- Insert internal hex or TORX insert -2- into the alternator shaft.
- Turn alternator shaft counterclockwise with torque wrench -V.A.G 1332--3- to tighten the V-ribbed belt pulley with freewheel.
Tightening torques
- "Assembly overview - alternator"
Remove and install V-ribbed belt pulley, with freewheel on alternator, Valeo
Required Special Tools, Test and Measuring Equipment and Auxiliary Items
- Multi-tooth adapter -T10474-
- Torque Wrench -V.A.G 1332-
- Socket insert, internal hex 8 mm or TORX T50
Removing
- Remove alternator.
- Clamp alternator in a vise at the mounting points.
- Where fitted, remove protective cap from V-ribbed belt pulley with freewheel.
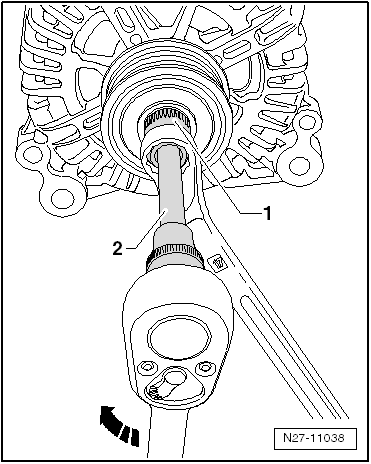
- Insert multi-tooth adapter -T10474--1- into the V-ribbed belt pulley and fit a ring spanner (width across flats 17 mm).
- Insert internal hex or TORX insert -2- into the alternator shaft.
- To loosen, turn alternator shaft clockwise (left-hand thread) while counter-holding with the ring spanner.
- Hold V-ribbed belt pulley with freewheel by hand and turn it on the alternator shaft until the V-ribbed belt pulley with freewheel can be removed.
Installing
Installation is carried out in the reverse order of removal, observing the following:
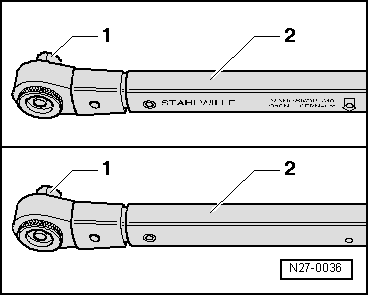
The torque wrench -V.A.G 1332- must be converted as follows for installing the V-ribbed belt pulley with freewheel:
- Unlock socket insert -1- and pull it off handle -2-.
- Turn handle -2- of the torque wrench through 180º and reinsert the socket insert.
- Set the direction of rotation of the torque wrench on the socket insert to left.
- First screw the V-ribbed belt pulley with freewheel onto the alternator shaft by hand until it stops.
- Insert multi-tooth adapter -T10474--1- into the V-ribbed belt pulley and fit a ring spanner (width across flats 17 mm).
- Insert internal hex or TORX insert -2- into the alternator shaft.
- Turn alternator shaft counterclockwise with torque wrench -V.A.G 1332--3- to tighten the V-ribbed belt pulley with freewheel.
Tightening torques
- "Assembly overview - alternator"
Remove and install voltage regulator
Remove and install voltage regulator, Bosch, variant 1
Required Special Tools, Test and Measuring Equipment and Auxiliary Items
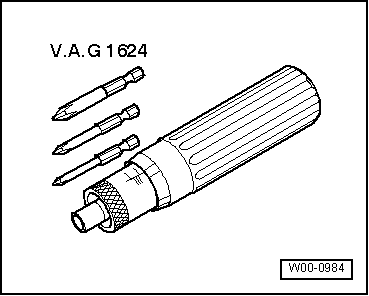
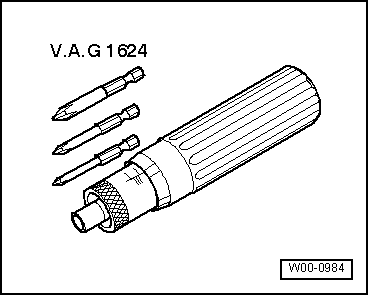
- Torque screwdriver -V.A.G 1624-
Removing
- Remove alternator.
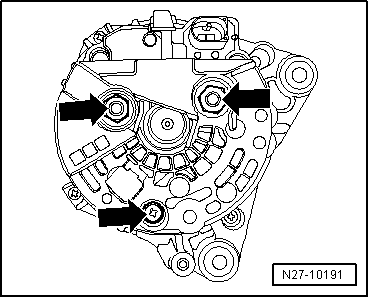
- Unscrew the mounting bolt and nuts -arrows- and remove the shield cap from the alternator.
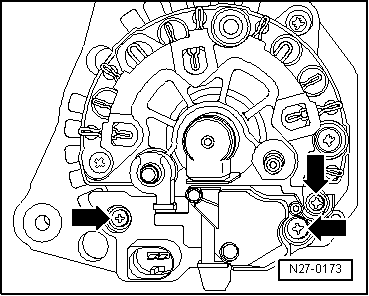
- Unscrew the voltage regulator mounting bolts -arrows-.
- Remove voltage regulator from the alternator.
Installing
Installation is carried out in the reverse order of removal, observing the following:
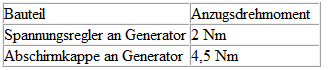
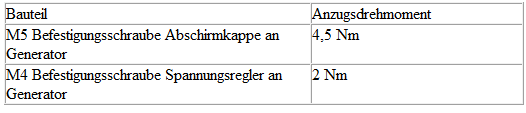
Tightening torques
Remove and install voltage regulator, Bosch, variant 2
Required Special Tools, Test and Measuring Equipment and Auxiliary Items
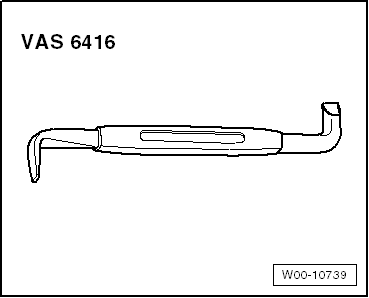
- Angled screwdriver for slotted screws -VAS 6416-
- Torque screwdriver -V.A.G 1624-
Removing
- Remove alternator -C-.
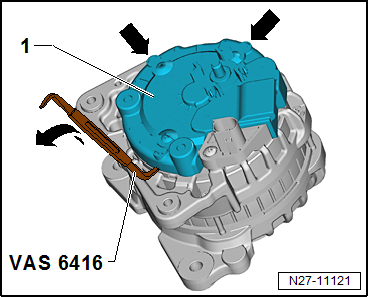
- Carefully pry off shield cap -1- at the latches -arrows- using angled screwdriver for slotted screws -VAS 6416-.
- Unscrew voltage regulator -C1- mounting bolts -arrows-.
- Remove voltage regulator -C1- from alternator -C-.
Installing
Installation is carried out in the reverse order of removal, observing the following:

Tightening torques

Remove and install voltage regulator, Valeo
Required Special Tools, Test and Measuring Equipment and Auxiliary Items
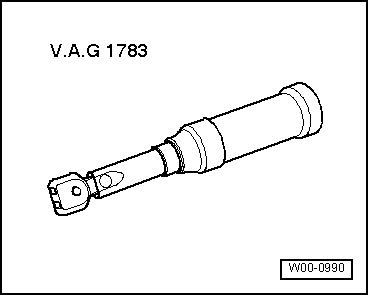
- Torque wrench -V.A.G 1783/-
Removing
- Remove alternator.
- Remove the clamping rings -arrows- and remove the shield cap from the alternator.

- Unscrew the voltage regulator mounting bolts -arrows-.
- Remove voltage regulator from the alternator.
Installing
Installation is carried out in the reverse order of removal, observing the following:
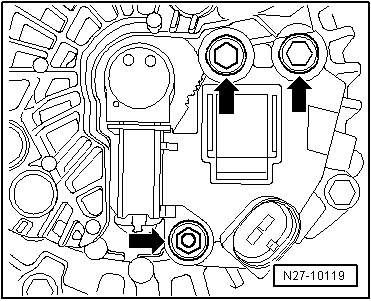
- Unlock the latches -arrows- and pull the shield cap off the voltage regulator.
- Press the carbon brushes into the voltage regulator housing and install the voltage regulator in the generator.
- Tighten the screw connections to the specified tightening torques.
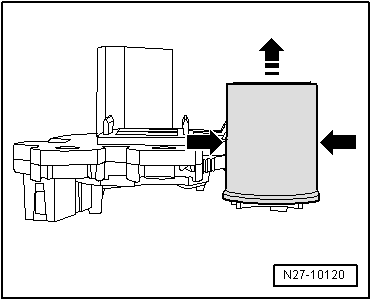
- Slide the shield cap into the guide rails -arrows- until it audibly engages.

Tightening torques