Radiator Removal and Installation
During long-term operation of the vehicle, the passages in the radiator may become narrowed due to deposits of lime contained in the coolant. As a result, cooling efficiency drops sharply and the engine overheats. In this case, the radiator must be replaced.
If oil has entered the radiator, for example due to a faulty cylinder head gasket, remove and flush the radiator and expansion tank with cleaner after repair. Approximately 2 L of cleaner is required for this purpose. After installing the radiator, fill the entire cooling system with hot water several times and drain it. Water used to flush the system must be disposed of properly.
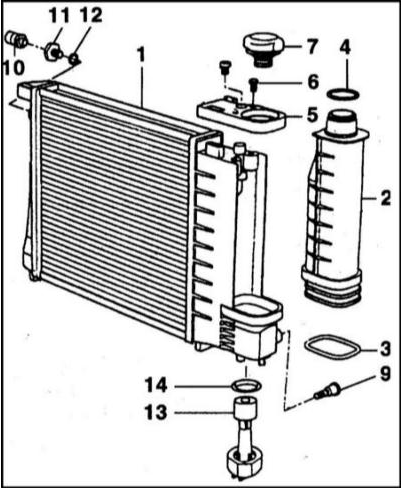
1 — Radiator
2 — Expansion tank
3 — O-ring
4 — O-ring
5 — Cap
6 — Bolt
7 — Plug
8 — Air bleed fitting
9 — Plug
10 — Thermo switch, air conditioning only
11 — Plug
12 — O-ring
13 — Level sensor
14 — O-ring
REMOVAL
1. Remove the fan. Refer to Fan and Fan Clutch Removal and Installation.
2. Drain the coolant and dispose of it. Refer to Coolant Replacement. Coolant Freeze Protection Check. Visual Inspection of the Cooling System.
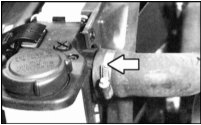
3. Disconnect the large-diameter coolant hoses at the top and bottom of the radiator after opening the clamps. Refer to the accompanying illustration.
4. Disconnect the connector from the level sensor (13) on the lower left side of the radiator. Refer to the illustration before the table.
5. If equipped with air conditioning, disconnect the connector of the thermo switch (10) on the right side of the radiator.
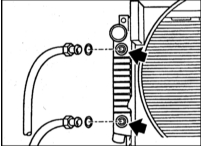
6. Disconnect the automatic transmission (AT) oil cooler hoses (if equipped) at the radiator. Collect the spilled oil and dispose of it. Plug the hoses to prevent dirt from entering them. Refer to the accompanying illustration.
* The power steering, air conditioning and, as a rule, AT radiators are located in front of the engine radiator in a holder. To remove these radiators, the engine radiator must first be removed. The air conditioning refrigerant circuit must only be opened at a service station using special equipment. There is a risk of injury.
7. Lift the sealing tab (1) upward. Remove the bolts (2) on the left and right. Remove both radiator brackets (3). Refer to the accompanying illustration.

8. Lift the radiator upward and remove it.
* The radiator fins have sharp edges. Therefore, it is recommended to wear gloves when removing the radiator.
INSTALLATION
1. Check all coolant hoses for cuts, cracks and other damage. Replace if necessary. Check both radiator rubber mounts.
2. Insert the radiator from above so that the rubber mounts seat exactly in place. Refer to the accompanying illustration.
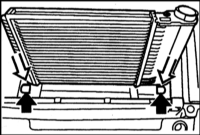
3. Press the radiator down and secure the brackets. Press the sealing tab down.
4. Secure the AT oil hoses with new seals to the radiator. Tighten to 20 N·m. Check the AT fluid level. Refer to Automatic Transmission Fluid Level Check and Replacement.
5. Install the coolant hoses and secure them with clamps.
6. Connect the connector to the thermo switch and level sensor, if they were disconnected.
7. Install the fan. Refer to Fan and Fan Clutch Removal and Installation.
8. Fill the system with coolant and bleed air from it. Refer to Coolant Replacement. Coolant Freeze Protection Check. Visual Inspection of the Cooling System.
9. Start and warm up the engine and check the hose connections for leaks.
10. Check the coolant level and top up if necessary.
Test yourself
A quick BMW 1 quiz: every answer comes with an explanation and a link to the manual page.