Exhaust System Removal and Installation
All exhaust system components can be replaced separately.
* When installing exhaust system components, make sure they connect to each other with a gas-tight seal. Otherwise, exhaust gas analysis may give incorrect results.
Self-locking nuts and gaskets must be replaced with new ones after removal. Inspect rings and rubber mounts for damage. Replace them with new ones if necessary.
When installing a new exhaust system, it is also recommended to replace all mounting parts with new ones.
REMOVAL
1. Raise and support the vehicle on stands. Remove the engine undershield. Refer to Engine Undershield Removal and Installation.
2. Spray all bolted connections with rust penetrant. Allow time for the penetrant to work.
3. Remove the crossmember bolts in the area of the catalytic converter.

4. Place a floor jack under the exhaust system and install a wooden block. The weight of the system is 35 - 45 kg.
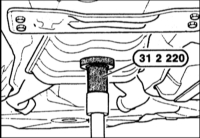
5. Remove the mounting bolts and separate the front pipe from the exhaust manifold (gasoline engine) or turbocharger.

6. Release the mountings on the transmission bracket.

7. Remove nuts (1) and (2) from the main muffler hanger.
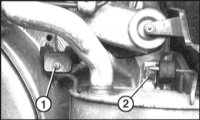
8. Disconnect the exhaust system from the hangers.
* The catalytic converter is sensitive to impact. Avoid impacts and make sure it is not dropped.
INSTALLATION
1. Before installing the exhaust system, check the exhaust manifold flange for distortion. Straighten it if necessary.
* To make it possible to unscrew the exhaust system nuts and bolts later, coat them with high-temperature copper grease, for example Liqui Moly LM-508-ASC or CRC paste.
2. Install the exhaust system in position and secure it with the hangers, without tightening the bolts and nuts.
3. Align the system so that it has an even clearance of at least 25 mm from the body everywhere. The tailpipe must also have an even distance from the body in the area of its recess.
4. Diesel engine: Secure the front pipe to the turbocharger. First check the sealing ring and replace it if necessary. Lubricate the ring with high-temperature copper grease.
5. Gasoline engine: Install the front pipe to the manifold with a new sealing ring and evenly secure it with new self-locking nuts in two stages to a torque of 30 N·m + 50 N·m.
6. Tighten all bolts and nuts. Last, secure the muffler hanger to the transmission so that the muffler is free of stress. Tightening torques for threaded connections are given in Specifications.
7. Install the crossmember and tighten the bolts to a torque of 20 N·m.
8. Start the engine and check the exhaust system for leaks. To do this, block the muffler outlet with a rag. With an assistant, check for exhaust gas leaks (characteristic noise, feel by hand).
9. Install the engine undershield. Refer to Engine Undershield Removal and Installation.
Test yourself
A quick BMW 1 quiz: every answer comes with an explanation and a link to the manual page.