General notes
As an alternative to fix&go, a spare wheel or a wheel with standard dimensions can be supplied (on request). Any tire change and correct use of the jack require observing certain precautions, which are explained below.
 Note
Secure the stopped vehicle according to applicable regulations: hazard warning lights, warning triangle, etc. It is advisable for passengers to get out of the vehicle, especially if it is fully loaded, and wait at a safe distance from road traffic while the wheel is changed. On sloping roads or uneven ground, place wheel chocks or other suitable objects in front of or behind the wheels to block the vehicle.
 Note
The supplied spare wheel is specific to this vehicle; it cannot be used on other vehicles or models, nor can spare wheels of other models be used on this vehicle. The spare wheel is to be used only in emergencies. Use must be limited to the necessary minimum, and 80 km/h must not be exceeded. An orange label is attached to the spare wheel, showing the main instructions for its use and the corresponding prohibitions. The label must never be removed or covered. A wheel cover must never be fitted to the spare wheel. The label states in four languages: WARNING! For short distances only! 80 km/h max! Replace with the standard wheel as soon as possible. Do not cover this note.
NoteWith the spare wheel fitted, the driving characteristics change.
Avoid rapid acceleration, hard braking, sudden steering maneuvers and fast cornering.
The total service life of the spare wheel is approx. 3000 km; after that, the tire must be replaced with one of the same type. Never mount a conventional tire on a spare wheel rim. Have the replaced wheel repaired and refitted as soon as possible. Using two or more spare wheels at the same time is not permitted.
Do not lubricate the wheel bolt threads before fitting: they could loosen by themselves.
NoteThe jack is intended only for changing a tire on the vehicle in which it is carried or on a vehicle of the same model. Other uses, such as lifting other vehicle models, must be strictly avoided. It must never be used for repairs under the vehicle. If the jack is not correctly positioned, the raised vehicle may fall.
Do not use the jack for loads higher than those indicated on its label. Snow chains must not be fitted to the spare wheel. If snow chains must be fitted after a breakdown of a front (drive) wheel, the spare wheel can be fitted in place of a rear wheel, and that rear wheel can be moved to the front axle. In this way, two normal wheels are fitted at the front, and snow chains may be used, which solves the problem.
NoteA poorly fitted wheel cover may come off while driving. Never make any adjustments to the tire inflation valve.
Never insert any tool between the rim and the tire. Check the tire pressure of the tires and the spare wheel regularly, observing the values given in the chapter "Technical data".
You should know that:
- The jack weighs 1.76 kg;
- The jack requires no adjustment;
- The jack cannot be repaired. If it is defective, replace it with an original jack;
- No tool other than its hand crank can be fitted to the jack.
To change the tire, proceed as follows:
- Park the vehicle so that it does not obstruct traffic and allows the wheel to be changed safely. The ground should be as level and firm as possible;
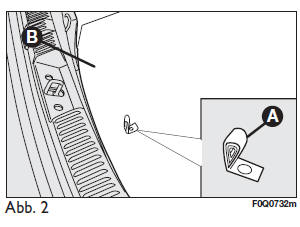
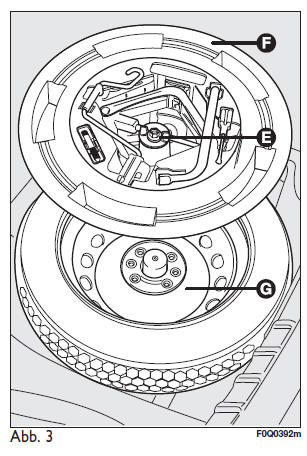
- Switch off the engine and apply the parking brake. Engage first gear or reverse gear. Using the handle a - Fig. 2, remove the rigid trim cover b. Unscrew the locking device e - Fig. 3;
- On versions with the fix&go tyre repair kit, take the tool container out of the luggage compartment;
- On versions with a small spare wheel, unscrew the retaining device e - Fig. 3, remove the tool container f and place it near the tyre to be replaced. Then remove the spare wheel g;
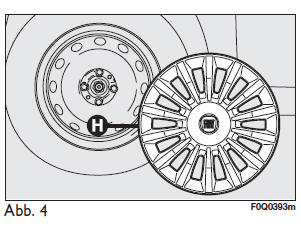
- Remove the wheel trim h - Fig. 4 (versions with steel wheels) or the hub cap (versions with alloy wheels);
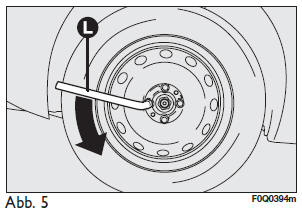
- Using the supplied wheel wrench l - Fig. 5, loosen the wheel bolts by about one turn. On vehicles with alloy wheels, rock the vehicle to help release the wheel from the hub, then remove the wheel hub cap;
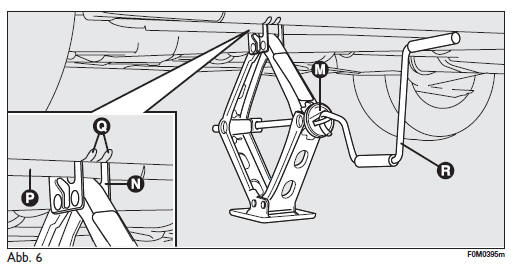
- Using the device m - Fig. 6, extend the jack until the recess n on the upper part of the jack is exactly under the lower body reinforcement p at the point marked q (approx. 72 cm from the centre of the front wheel or 75 cm from the centre of the rear wheel);
- Inform any persons present that the vehicle is being lifted, so that they stay clear of it and do not touch the vehicle until it has been lowered again;
- Insert the jack crank r - Fig. 6 into the jack and raise the vehicle until the wheel is a few centimetres above the ground;
- Remove the wheel bolts completely and take off the wheel.
- Make sure that the contact surface of the spare wheel and the wheel hub are clean and free of any dirt that could later cause the wheel bolts to loosen;
- Fit the spare wheel, making sure that the holes s - Fig. 7 align with the corresponding centring pins t;
- Using the supplied wheel wrench, tighten the four wheel bolts. Using the jack crank r - Fig. 6, lower the vehicle and retract the jack;
- Using the supplied wheel wrench, tighten the wheel bolts evenly and in a crosswise sequence as shown in Fig. 8.
Test yourself
A quick Fiat Bravo quiz: every answer comes with an explanation and a link to the manual page.