Clutch System
Clutch Cover and Disc Repair Procedures
In this manual: Clutch System
12steps
~77min
5/5difficulty
1special tools
Done 0 of 12
DEPOSIT
- Remove the transaxle assembly. (Refer to Manual Transaxle System - Manual Transaxle)
- Remove the clutch cover bolts. Be careful not to drop the bolts. Loosen the bolts in a diagonal pattern.
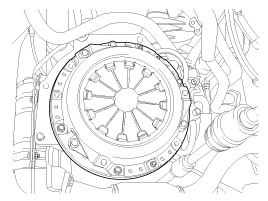
Inspection
- Check the diaphragm spring for wear at the contact point with the release cylinder bearing.
- Check whether the clutch disc and clutch cover surfaces are worn or cracked.
- Make sure the clutch disc facing is not slippery or oily.
- Measure the depth from the clutch facing surface to the rivet. If the measured value is less than the value below, replace.
Clutch disc rivet thickness (A): 0.3 mm (0.0118 in.)
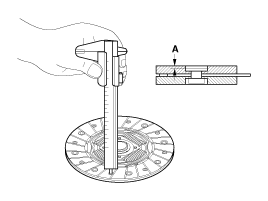
REMEDY
- If necessary, apply grease to the spline portion of the disc and the spline portion of the transaxle input shaft.
Specified grease: CASMOLY-L9508 Amount: 0.2 g
- The surface marked SIDE T/M must face the rear of the transaxle.
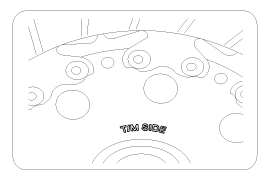
- Install the clutch disc and cover using SST (A: 09411-1P000).
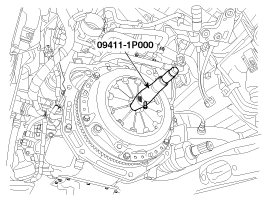
- Install the clutch cover bolts. Tightening torque: Gasoline 1.0 T-GDI, 1.2, 1.4, Diesel 1.1: 14.7 ~ 22 N·m N·m, Diesel 1.4: 11.8 ~ 14.7 N·m N·m
- Remove the SST from the clutch disc guide (part No.: 09411-1P000).
- Install the transaxle assembly. (Refer to Manual Transaxle System - Manual Transaxle)
Test yourself
A quick Hyundai i20 quiz: every answer comes with an explanation and a link to the manual page.
Was this page helpful?