Engine Mechanical System
Cylinder block
In this manual: Engine Mechanical System
42steps
~252min
4/5difficulty
Done 0 of 42
Repair Procedures
Disassembly
|

|

|

- Remove the engine assembly from the vehicle. (Refer to Engine and Transaxle Assembly - "Engine and Transaxle Assembly")
- Remove the transaxle assembly from the engine assembly. (Refer to Automatic Transaxle System - "Automatic Transaxle")
- Remove the drive plate and adapter plate. (Refer to Cylinder Block - "Drive Plate")
- Remove the rear oil seal retainer. (Refer to Cylinder Block - "Rear Oil Seal")
- Install the engine assembly on an engine stand for disassembly.
- Remove the expansion tank. (Refer to Intake and Exhaust System - "Expansion Tank")
- Remove the intake manifold. (Refer to Intake and Exhaust Systems — Intake Manifold)
- Remove the exhaust manifold. (Refer to Intake and Exhaust System - "Exhaust Manifold")
- Remove the timing chain. (Refer to Valve Timing System - Timing Chain)
- Remove the water temperature control unit. (Refer to Cooling System - "Water Temperature Control Assembly")
- Remove the cylinder head assembly. (Refer to Cylinder Head Assembly - "Cylinder Head")
- Remove the lower oil pan and upper oil pan. (Refer to Lubrication System - "Oil Pan")
- Remove the oil pump. (Refer to Lubrication System - "Oil Pump")
- Remove the oil filter housing. (Refer to Lubrication System - "Oil Filter Housing").
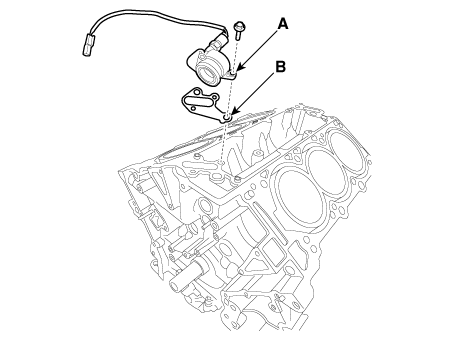
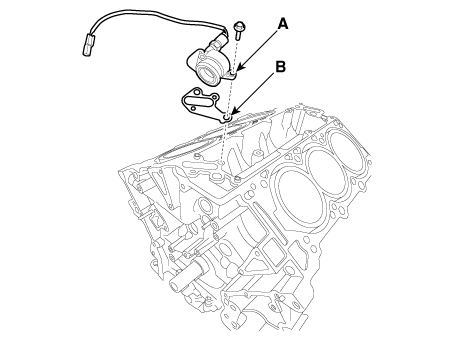
- Remove the oil cap (A) and gasket (B).
- Remove the water jacket spacer. (Refer to Cylinder Block - "Water Jacket Spacer")
- Remove the knock sensor. (Refer to Engine Control/Fuel System - Knock Sensor)
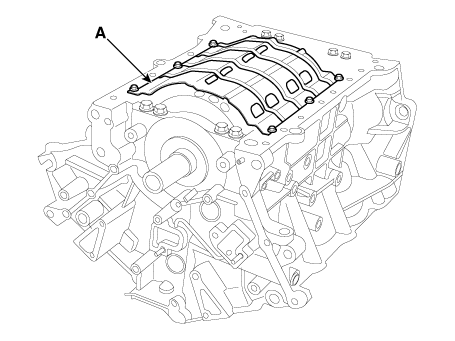
- Remove the baffle (A).
- Check the connecting rod side clearance. (Refer to Cylinder Block - Piston and Connecting Rod)
- Check the connecting rod cap oil clearance. (Refer to Cylinder Block – Piston and Connecting Rod)
- Remove the piston and connecting rod assembly. (Refer to Cylinder Block - Piston and Connecting Rod)
- Remove the crankshaft main bearing cap and check the oil clearance. (Refer to Cylinder Block - Crankshaft)
- Check the crankshaft end play. (Refer to Cylinder Block - Crankshaft)
- Remove the crankshaft. (Refer to Cylinder Block - Crankshaft)
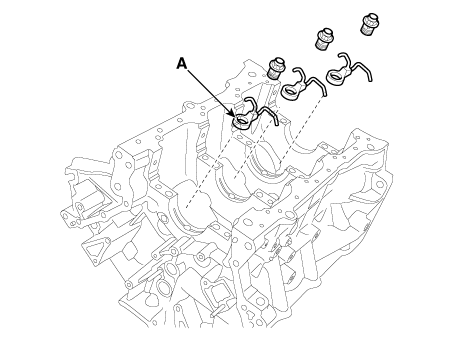
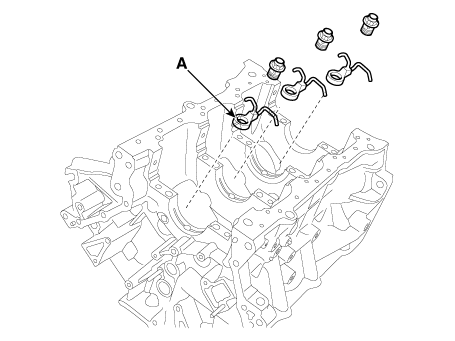
- Remove the oil jets (A).
Inspection
Cylinder block- Remove the gasket material. Using a gasket scraper, remove all gasket material from the upper surface of the cylinder block.
- Clean the cylinder block. Using a soft brush and solvent, thoroughly clean the cylinder block.
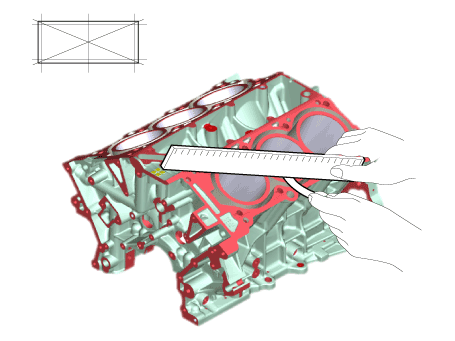
- Inspect the upper surface of the cylinder block for flatness. Using a precision straightedge and feeler gauge, measure the distortion of the surface contacting the cylinder head gasket. Cylinder block gasket surface flatness Standard: Less than 0.05 mm (0.0020 in.) Less than 0.02 mm (0.0008 in.) / 150 x 150
- Inspect the cylinder bore diameter. Visually check the cylinder for vertical scratches. If deep scratches are found, replace the cylinder block.
- Check the cylinder bore diameter. Using a cylinder bore gauge, measure the cylinder diameter in the thrust direction and the axial direction.
Standard diameter: 96.00–96.03 mm (3.7795–3.7807 in)
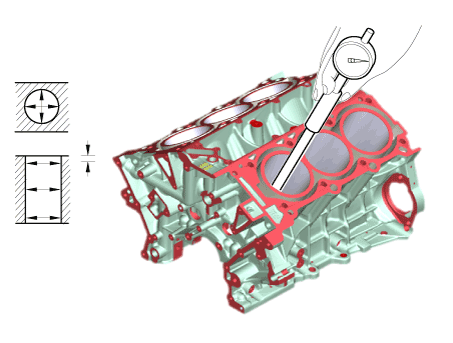
- Check the cylinder bore size code on the cylinder block.
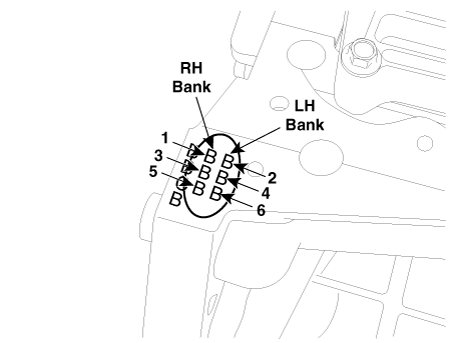
Grade Size code Cylinder Inner Diameter A A 96.00–96.01 mm (3.7795–3.7799 in) B B 96.01–96.02 mm (3.7799–3.7803 in) C C 96.02–96.03 mm (3.7803–3.7807 in)
Installation
- Install the oil jets (A).
Tightening torque: 27.5–31 N·m
- Install the crankshaft. (Refer to Cylinder Block - Crankshaft)
- Install the crankshaft main bearing cap and check the oil clearance. (Refer to Cylinder Block - Crankshaft)
- Check the crankshaft end play. (Refer to Cylinder Block - Crankshaft)
- Install the piston and connecting rod assembly. (Refer to Cylinder Block - Piston and Connecting Rod)
- Check the connecting rod end play. (Refer to Cylinder Block - Piston and Connecting Rod)
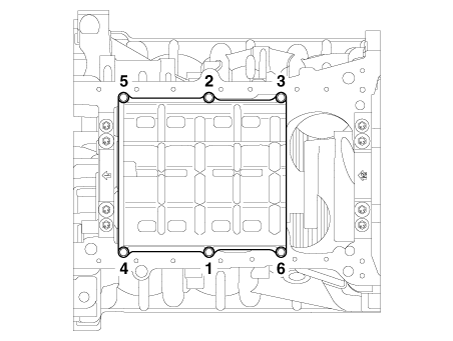
- Install the baffle plate. Install and tighten the baffle plate bolts evenly in multiple passes in the sequence shown.
Tightening torque: 9.8–11.8 N·m
- Install the knock sensor. (Refer to Engine Control/Fuel System - Knock Sensor)
- Install the water jacket separator. (Refer to Cylinder Block - Water Jacket Separator)
- Install the oil cap (A) and gasket (B).
Tightening Torque: 9.8–11.8 N·m
- Assemble the remaining components in the reverse order of removal.
After replacing the cylinder block with a new one, select the correct main bearings and piston according to the crankshaft journal bore mark and the cylinder bore mark on the cylinder block.
- Selection of Crankshaft Main Bearing (Refer to Cylinder Block - Crankshaft)
- Selection of Piston (Refer to Cylinder Block - Piston and Connecting Rod)
Test yourself
A quick Hyundai Palisade quiz: every answer comes with an explanation and a link to the manual page.
Was this page helpful?