Heating, Ventilation, and Air Conditioning
Refrigerant Line
In this manual: Heating, Ventilation, and Air Conditioning
24steps
~144min
4/5difficulty
Done 0 of 24
Components and Component Location
Components
[Isometric View]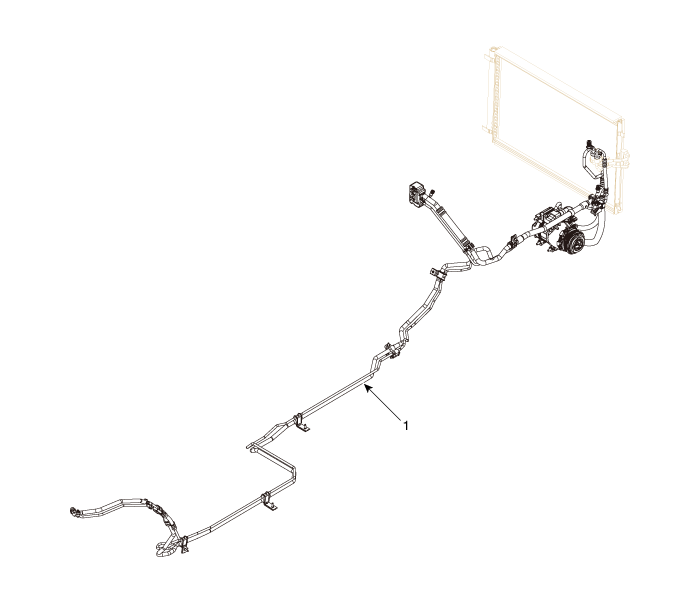
| 1. Front Suction and Liquid Line Assembly |
[Top View]
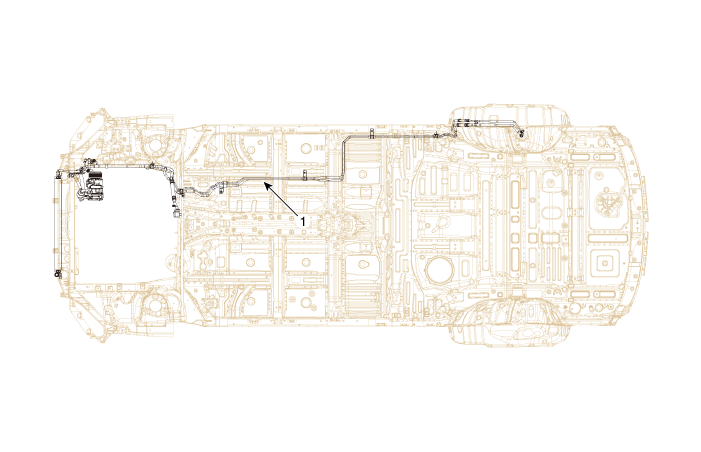
| 1. Front Suction and Liquid Line Assembly |
Repair Procedures
Replacement
[Front Suction and Liquid Line Assembly]- If equipped with a compressor, the A/C operates for several minutes at idle, and then the engine stops.
- Disconnect the negative (-) battery terminal.
- Recover the refrigerant using a recovery/recharging station.
- Remove the engine cover. (Refer to Engine Mechanical System - "Engine Cover")
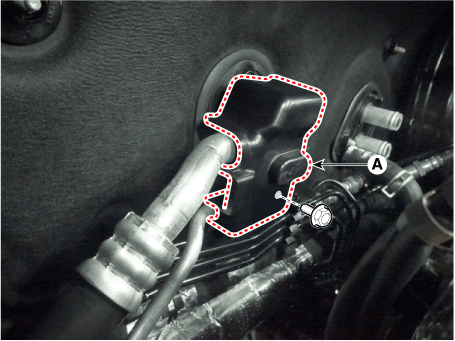
- Loosen the nut and remove the expansion valve cover (A).
Tightening torque: 8.8–13.7 N·m
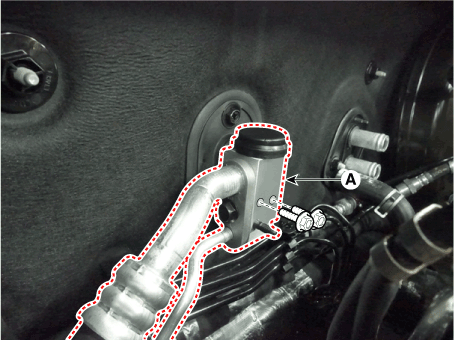
- Loosen the mounting bolts and separate the expansion valve (A) from the evaporator core.
Tightening torque: 8.8–13.7 N·m
- Loosen the mounting nuts and separate the suction line (A) and liquid line (B).
Tightening torque: 19.6–24 N·m
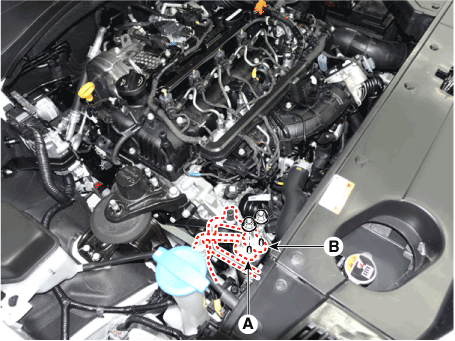
- Press the locking pin and disconnect the APT (A/C pressure transducer) connector (A).
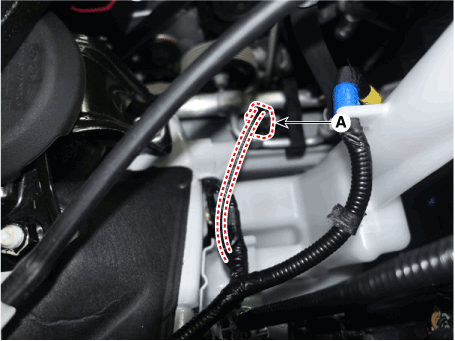
- Remove the engine room cover. (Refer to Engine Mechanical System - "Engine Room Cover")
- Remove the engine mounting bracket. (Refer to Engine Mechanical System - "Engine Mounting")
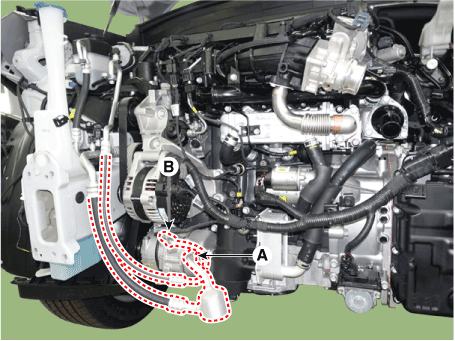
- Disconnect the compressor suction line (A) and discharge line (B) by removing the nuts and separating the lines.
Tightening torque: 20.9–31 N·m

- Be careful not to damage the underbody components (floor cover, fuel filter, fuel tank and canister) when lifting the vehicle on a lift. (Refer to General Information - "Jacking and Lifting Points")
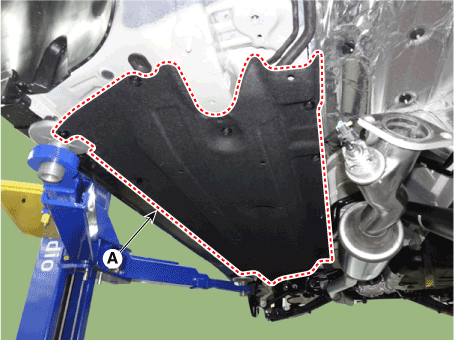
- Remove the bolts, nuts and the engine compartment undercover. [RH] (A).
Tightening torque: 8.8–13.7 N·m
- Remove the refrigerant line nuts and the bracket bolt. Tightening torque: Nut: 8.8–13.7 N·m Bolt: 7.8–11.8 N·m
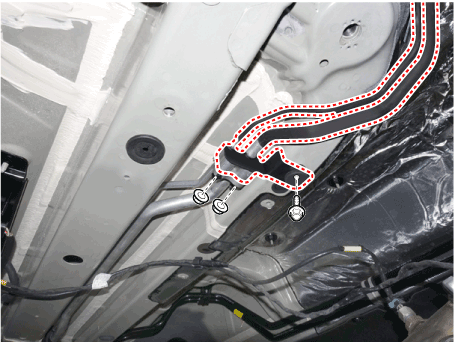
- Loosen the mounting bolt and remove the front suction and liquid line assembly (A).
Tightening torque: 7.8–11.8 N·m
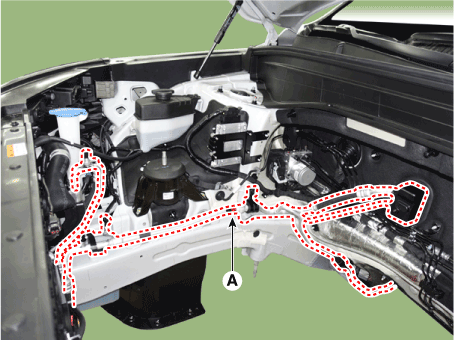
- To install, reverse the removal procedure.
|

- If equipped with a compressor, the A/C operates for several minutes at idle, and then the engine stops.
- Disconnect the negative (-) battery terminal.
- Recover the refrigerant using a recovery/recharging station.
- Remove the rear wheel guard cover [RH]. (Refer to Body - "Rear Wheel Guard Cover")
- Loosen the mounting nuts and separate the suction line and discharge line (A).
Tightening torque: 19.6–24 N·m
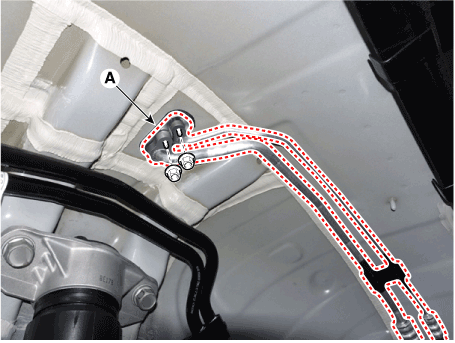
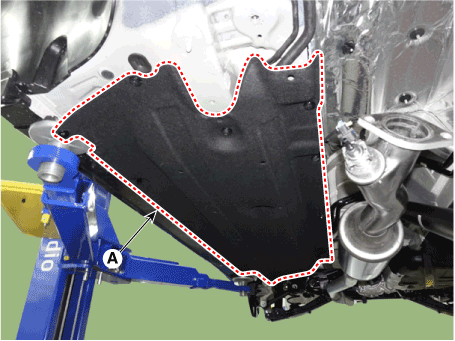
- Remove the bolts, nuts and the engine compartment undercover. [RH] (A).
Tightening torque: 8.8–13.7 N·m
- Remove the refrigerant line mounting nuts.
Tightening torque: 8.8–13.7 N·m
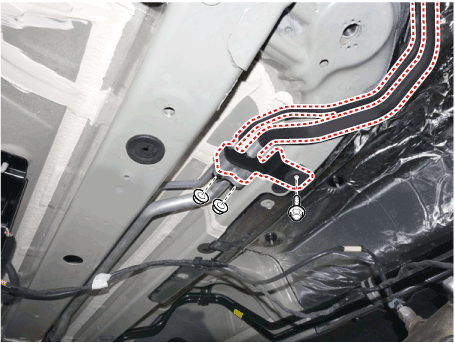
- Loosen the mounting bolt and remove the rear suction and liquid line assembly (A).
Tightening torque: 7.8–11.8 N·m
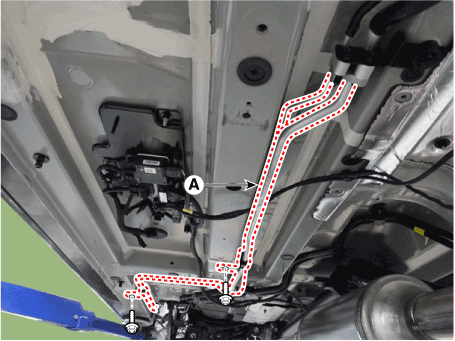
- To install, reverse the removal procedure.
|

Test yourself
A quick Hyundai Palisade quiz: every answer comes with an explanation and a link to the manual page.
Was this page helpful?