In this manual: Advanced Driver Assistance System (ADAS)
8steps
~48min
2/5difficulty
Done 0 of 8
Inspection
Tolerance Compensation: Tolerance compensation corrects the surround view video error caused by installation tolerances when the four cameras making up the SVM system are installed. You must perform tolerance compensation if you do any of the following.
Remove and install the wide camera.
Perform work on a body part that changes the focus of the wide camera, such as a main frame repair.
Replace the outside mirror with the wide camera.
Replace the surround view control unit.
Tolerance Compensation Conditions
There are two types of tolerance compensation: [Manual Tolerance Compensation] and [Automatic Tolerance Compensation]. A service center with an exclusive SVM workshop performs [Automatic Tolerance Compensation]. A service environment without an exclusive SVM workshop performs [Manual Tolerance Compensation].
Manual Tolerance Compensation Procedure
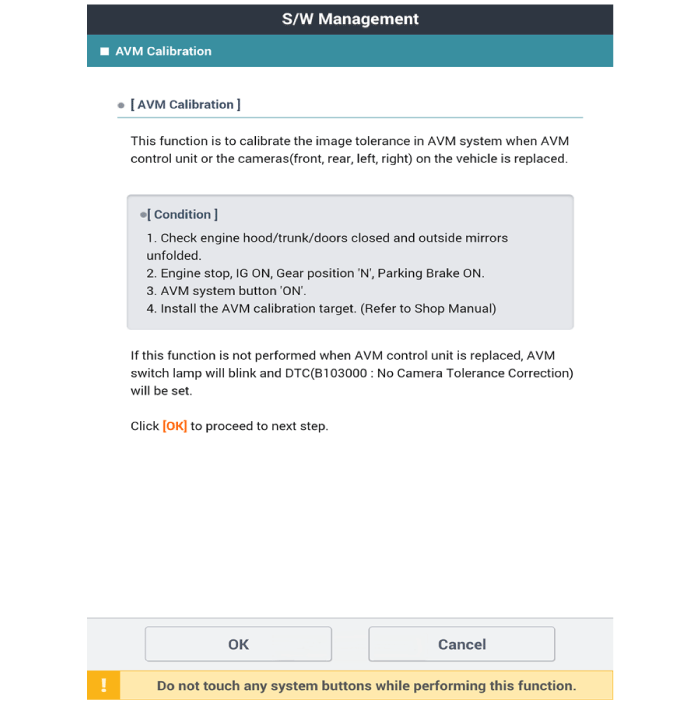
Perform the preparations as follows.
Make sure the hood, liftgate and doors are closed.
Close the passenger-side door after boarding.
Extend the side mirrors if they are folded.
Shift the transmission into the neutral position.
Make sure the LED turn signal indicators are lit inside the switch.
During preparation, do not install the exhaust fan in advance, as it may block the rear camera view.
Also, exhaust from the tailpipe may create a smoke screen that blocks the rear frame, so after using the fan to clear the exhaust, perform the compensation work with the ignition in the IGN (ON) position.
The foot brake or electric parking brake must be applied to prevent the vehicle from moving.
The following processes will be performed to confirm that the SVM ECU and cameras operate correctly before entering tolerance compensation mode.
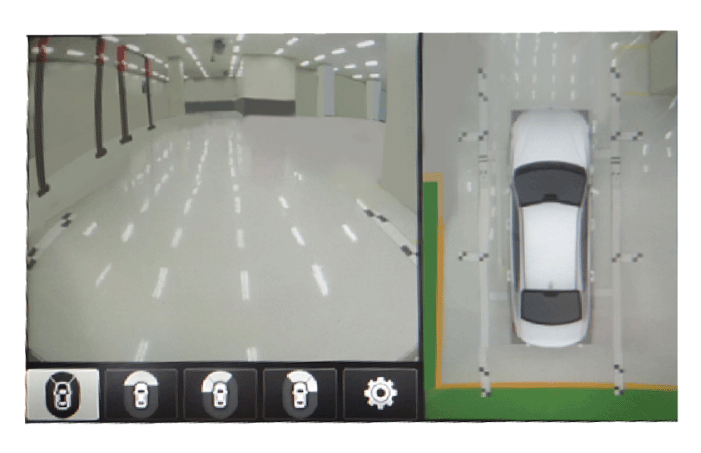
Make sure the initially configured video is displayed (front view when the transmission is in neutral + surround view).
Make sure the front, rear, left and right views are displayed correctly.
When the video is displayed correctly, tolerance compensation mode will be entered. If the video is not displayed clearly or does not appear at all, the part must be replaced.
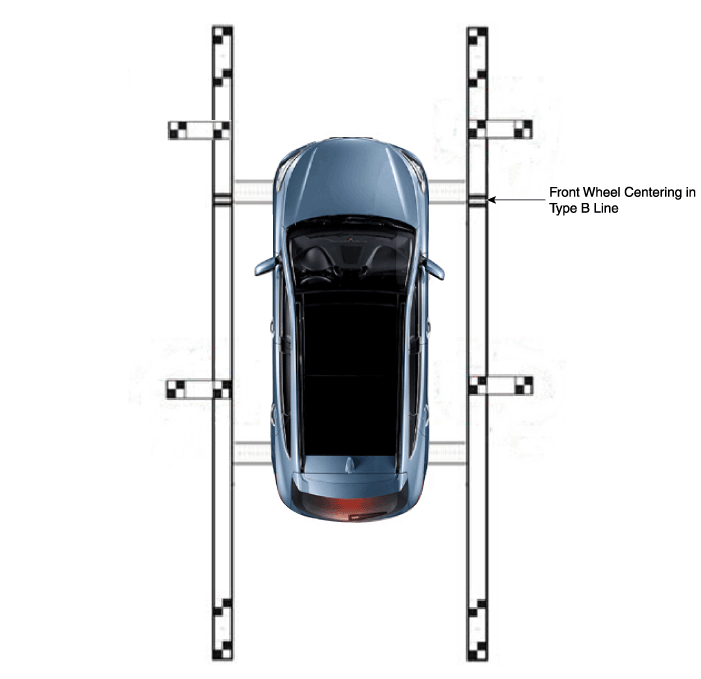
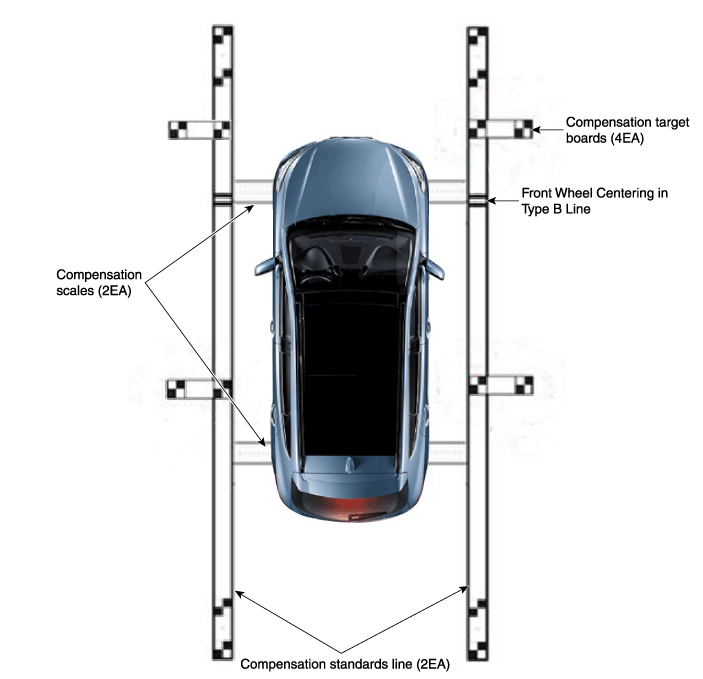
Install the compensation scales (2), compensation standard line plates (2) and compensation targets (4) around the vehicle, referring to the provided manual.
When centering the wheels on the compensation line plates, Type A and Type B must be centered separately. Be careful, as the central placement of the white and black compensation plates is very important for standard coordinate accuracy (distance / right angles).
Front and rear / left and right centering must be maintained within a deviation of 3 cm.
When centering the vehicle, the rotation deviation must be maintained within 1 degree per side.
Keep the ignition on while the vehicle is stopped, confirm the shift lever is in the "N" position, and apply the parking brake on a level surface.
Perform the work with the SVM switch on the vehicle set to the "ON" position.
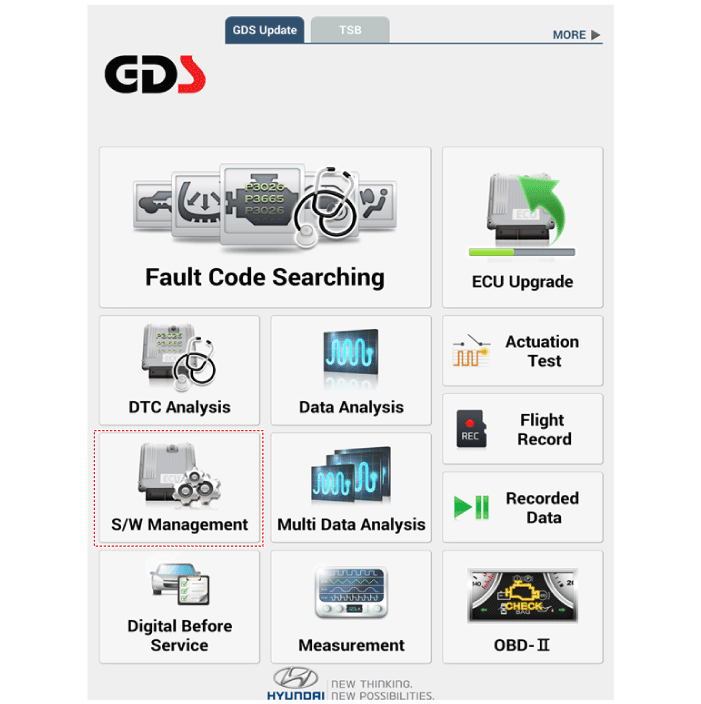
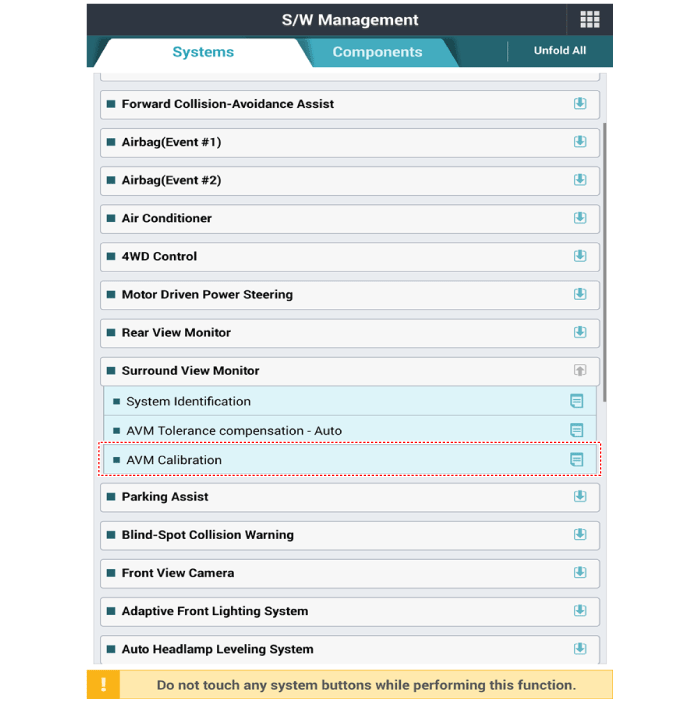
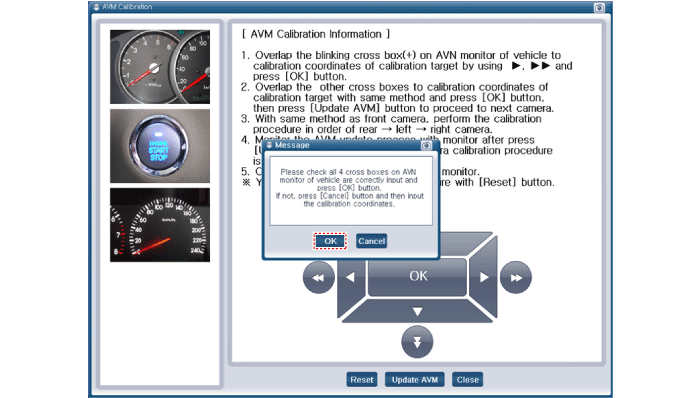
Perform SVM calibration according to the diagnostic tool display.
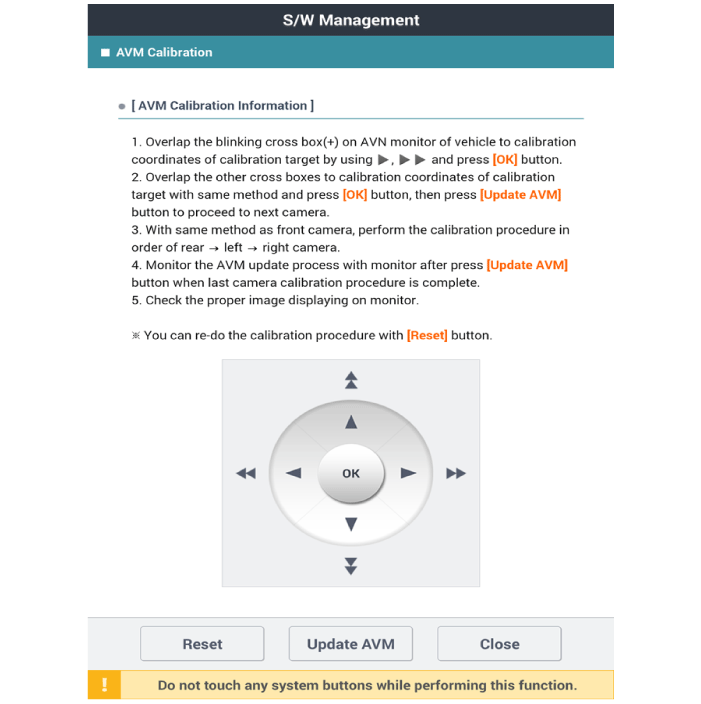
Perform AVM calibration according to the diagnostic tool screen.
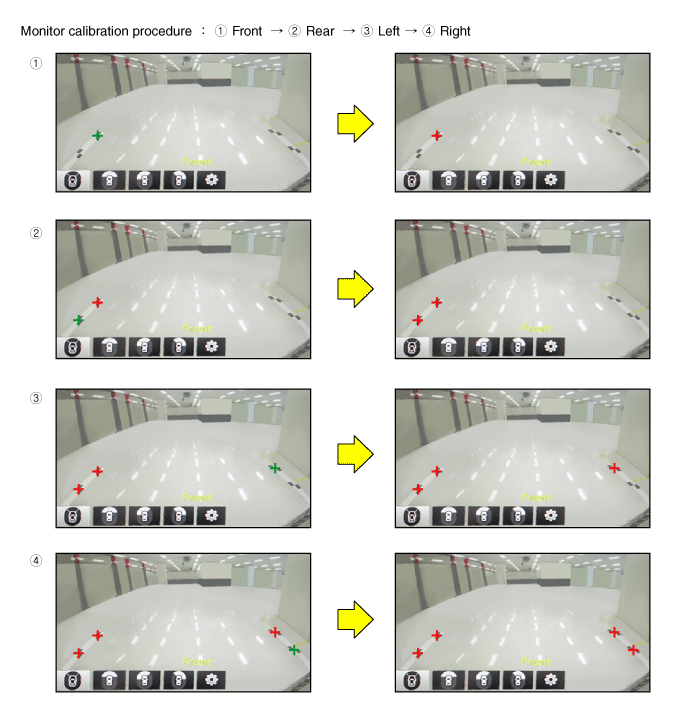
Before matching the calibration point: the "+" blinks green.
When you press [OK] after matching the calibration point: the "+" lights red.
After matching the 4 direct correction points, press the [OK] button and press the [Update AVM] button to proceed to the next camera calibration.
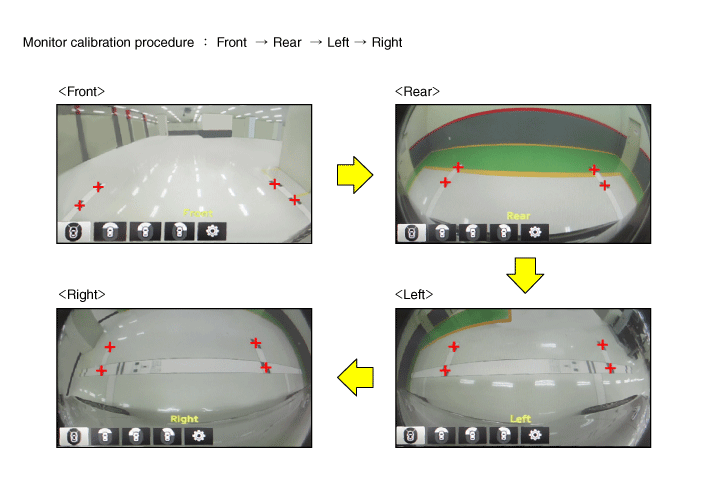
Perform calibration in the order: front -> rear -> left -> right camera.
After checking the vehicle and the calibration line on the AVN monitor screen to make sure the calibration was performed correctly, press the [OK] button. If the calibration was not performed properly, press the [Cancel] button to match the calibration points again. [AVN Monitor][Diagnostic Tool Screen]
?
Test yourself
A quick Hyundai Palisade quiz: every answer comes with an explanation and a link to the manual page.