Automatic Transmission
Shift Lever Repair Procedures
In this manual: Automatic Transmission
9steps
~54min
2/5difficulty
Done 0 of 9
Removal
- Remove the center console assembly. (Refer to Body - "Floor Console")
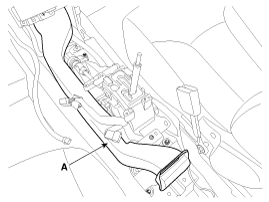
- Remove the air duct (A).
- Disconnect the shift cable (A), then remove the cable (B) after pressing the shift cable socket (C) in the direction "F".
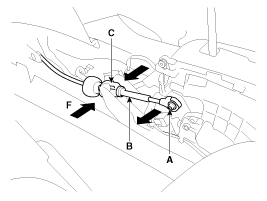
Shift Cable Installation Method at the Lever
- Securely install the cable connector part to the lever assembly after aligning the cable connector protrusions (A) upward.
- Securely install the cable connector part to the lever assembly after aligning the protrusion (B) to prevent incorrect assembly upward.

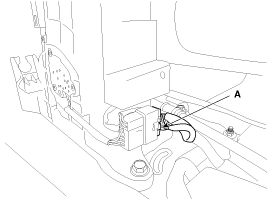
- Shift lever assembly connector (A).
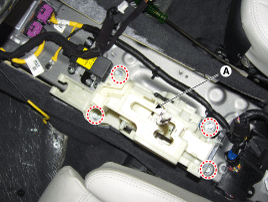
- Remove the shift lever assembly (A) by removing the bolts (4 pcs).
Tightening torque: 8.8 - 13.7 N·m
Inspection
- Check the control cable for damage and operation.
- Check the boot for damage.
- Check the bushing for damage and corrosion.
- Check the spring for damage or looseness.
Installation
- Installation is the reverse of removal.
Set the cabin side shift lever and the T/M side shift lever to the "N" position.
Test yourself
A quick Kia Cadenza VG Owner's Manual quiz: every answer comes with an explanation and a link to the manual page.
Was this page helpful?