Automatic Transmission
Inhibitor Switch Repair Procedures
In this manual: Automatic Transmission
24steps
~149min
5/5difficulty
1special tools
Done 0 of 24
Inspection
|
- Disconnect the inhibitor switch connector.
- Ignition switch "ON" and engine "OFF".
- Measure the voltage between the power supply and ground in the inhibitor circuit.
Specification: Approx. 12V
- Connect the inhibitor switch connector.
- Ignition switch "ON" and engine "OFF".
- Measure the voltage between each terminal and chassis ground while moving the shift lever to "P, R, N, D".
Specification: Refer to the "Signal Code Table" below.
Signal Code TableP P-R R P-R N N-D D Signal "1" 12V 12V 0 0 0 0 0 Signal "2" 0 12V 12V 12V 0 0 0 Signal "3" 0 0 0 12V 12V 12V 0 Signal "4" 0 0 0 0 0 12V 12V
Removal
- Move the shift lever to the "N" position.
- Remove the air cleaner assembly. (Refer to Engine Mechanical System - "Air Cleaner")
- Remove the battery and battery tray. (Refer to Engine Electrical System - "Battery")
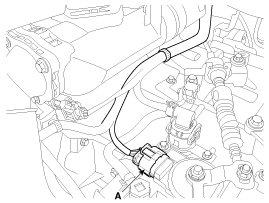
- Disconnect the shift lock switch connector (A).
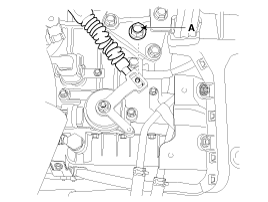
- Remove the shift cable mounting nut (A).
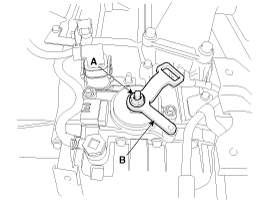
- Remove the manual control lever (B) and washer by removing the nut (A).
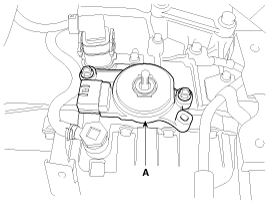
- Remove the inhibitor switch (A) after removing the 2 bolts.
Installation
- Make sure the shift lever is in the "N" position.
- Install the inhibitor switch (A).
Loosely tighten the inhibitor switch mounting bolts so that the necessary adjustments can be made.
- Install the manual control lever (A).
Loosely tighten the manual control lever nut (B) so that the necessary adjustments can be made.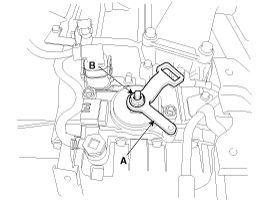
- Align the hole (A) in the manual control lever with the "N" mark. Install the inhibitor switch hole (B), then insert the SST inhibitor switch guide pin (09480-A3800).
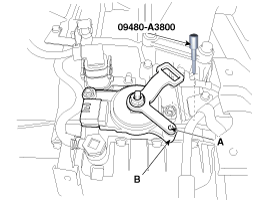
- Tighten the nut (A) and bolts (B) to the specified torque. Torque A: 17.7 ~ 24 N·m B: 9.8 ~ 11.8 N·m
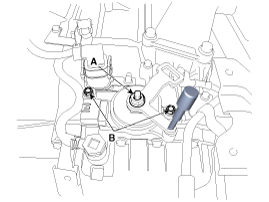
- Remove the SST (09480-A3800) from the hole.
- Connect the shift lock switch connector (A).
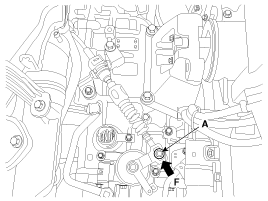
- Install the shift cable, tightening the nut (A).
Loosely tighten the shift cable mounting nut (A) to allow the necessary adjustments. - Push the shift cable in the direction of arrow "F" to remove the free play, then tighten the nut (A) to the specified torque.
Tightening torque: 8.8 - 13.7 N·m
- Install the battery and battery tray. (Refer to Engine Electrical System - "Battery".)
- Install the air cleaner assembly. (Refer to Engine Mechanical System - "Air Cleaner")
Test yourself
A quick Kia Cadenza VG Owner's Manual quiz: every answer comes with an explanation and a link to the manual page.
Was this page helpful?