Concentric Slave Cylinder Assembly
Components and Component Location
Components
[Gasoline 1.6 / Diesel 1.6 / Gasoline 1.6 T-GDI]
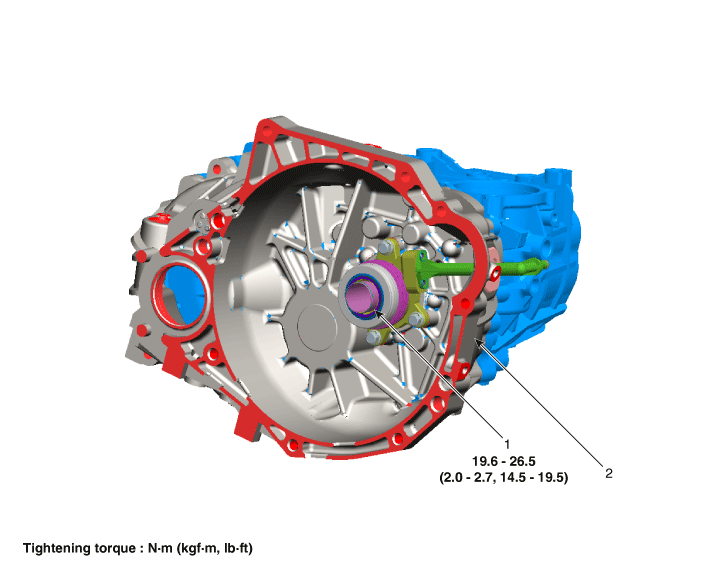
| 1. Concentric Slave Cylinder Assembly | 2. Manual Transaxle Case |
Repair Procedures
Removal
[Gasoline 1.6 / Diesel 1.6 / Gasoline 1.6 T-GDI]
Remove the manual transaxle assembly.
G 1.6 MPI (Refer to Manual Transmission System - "Manual Transmission")
D 1.6 TCI-NEW-U (Refer to Manual Transmission System - "Manual Transmission")
G 1.6 T-GDI GAMMA (Refer to Manual Transmission System - "Manual Transmission")
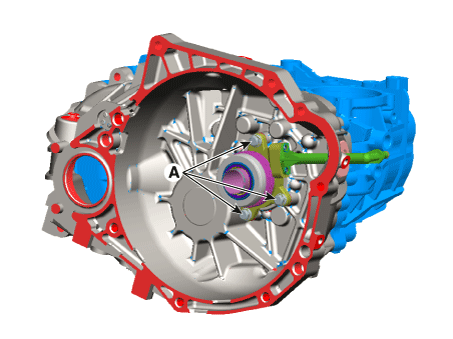
Remove the concentric slave cylinder assembly from the transaxle case by removing the bolts (A).
Installation
[Gasoline 1.6 / Diesel 1.6 / Gasoline 1.6 T-GDI]
Install the concentric slave cylinder bolts (3 pcs). Make sure they are not bent or twisted, and tighten them in a diagonal sequence.
Once assembled, make sure there are no foreign objects and no oil leakage.
Do not allow grease or oil to contact the bearings and moving parts of the concentric slave cylinder.
(Noise/wear caused by abnormal slipping during operation)
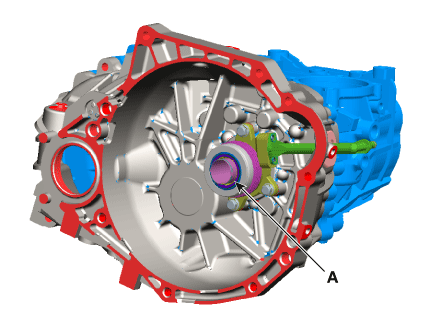
Install the concentric slave cylinder (A).
Tightening torque: 19.6 - 26 N·m
Install the manual transaxle assembly.
G 1.6 MPI (Refer to Manual Transmission System - "Manual Transmission")
D 1.6 TCI-NEW-U (Refer to Manual Transmission System - "Manual Transmission")
G 1.6 T-GDI GAMMA (Refer to Manual Transmission System - "Manual Transmission")
After filling with brake fluid, perform the air bleeding procedure for the concentric slave cylinder.
(Refer to Concentric Slave Cylinder Assembly - "Adjustment") [Gasoline 1.6 / Diesel 1.6 / Gasoline 1.6 T-GDI]
Adjustment
[Gasoline 1.6 / Diesel 1.6 / Gasoline 1.6 T-GDI]
After removing the cap from the concentric slave cylinder bleeder, insert a vinyl hose onto the bleeder nipple.
Fill the reservoir tank with the specified fluid.
Specified fluid: SAE J1703 (DOT 3 or DOT 4)
Depress the clutch pedal approximately 10 times.
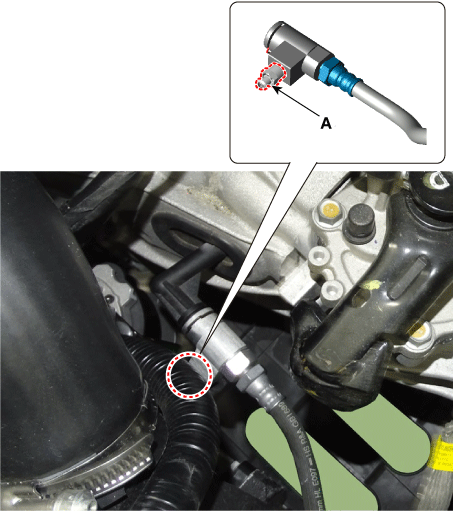
With the clutch pedal depressed, loosen the bleeder screw (A) to allow air to escape from the clutch system. Then tighten the bleeder screw.
Repeat steps 2 through 4 until no more air bubbles appear in the fluid.
Test yourself
A quick Kia Forte BD quiz: every answer comes with an explanation and a link to the manual page.