Engine Electrical System
Battery Sensor Repair Procedures
In this manual: Engine Electrical System
9steps
~54min
2/5difficulty
Done 0 of 9
Removal
- Disconnect the negative (-) battery cable.
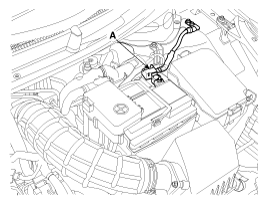
- Disconnect the battery sensor connector (A).
- Disconnect the negative (-) battery cable after removing the bolt.
Installation
- Install in the reverse order of removal. Battery sensor cable bolt: 10.8 ~ 13.7 N·m Battery (-) terminal nut: 3.9 ~ 5.9 N·m
Inspection
- Check for DTCs.
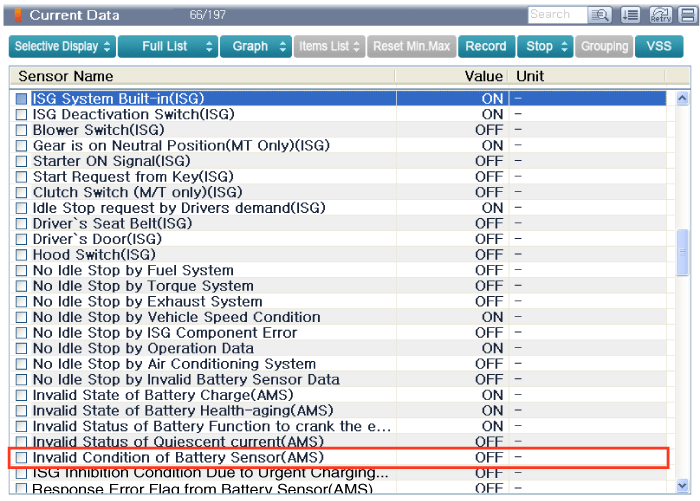
- Check whether the battery sensor condition is normal using the current data with GDS. If its value is ON, replace the battery sensor.
- Battery sensor (AMS) condition is abnormal = OFF.
Adjustment
Battery Sensor Recalibration Procedure
When disconnecting the negative (-) battery cable from the battery during repair work on a vehicle equipped with the Alternator Management System (AMS), the battery sensor recalibration procedure must be performed after the repair work is completed.- Turn the ignition switch ON and OFF.
- Park the vehicle for approximately 4 hours in the following conditions.
- Park the vehicle for approximately 4 hours in the following conditions.
- Close the hood, trunk, and all doors.
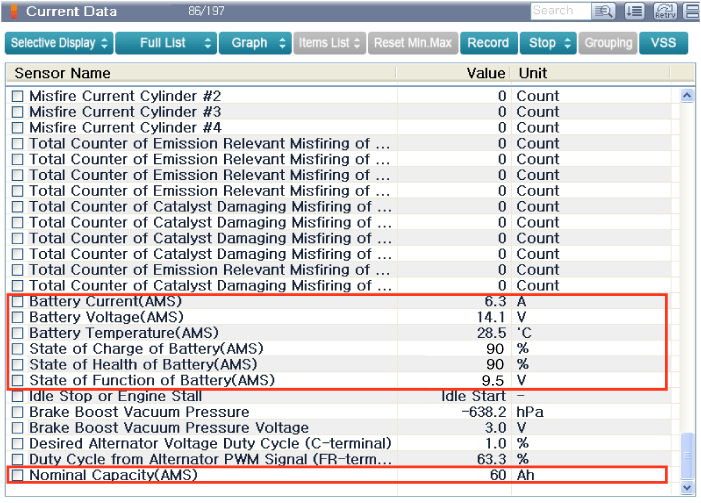
- After 4 hours, check whether the current data is displayed normally using GDS.
- Rated capacity (AMS) = 45 Ah [for non-ISG type]
- Rated capacity (AMS) = 60 Ah [for ISG type or Russia region]
- Battery state of charge (AMS) = (0~100%)
- Battery condition (AMS) = (0~100%)
- After cranking the engine 2 or more times, check the "Battery Functional Status" (AMS) = (0~12 V). [ISG system only]
Test yourself
A quick Kia Cee'd quiz: every answer comes with an explanation and a link to the manual page.
Was this page helpful?