Cooling System
Repair Procedures
Inspection
Radiator Hoses
Inspect the radiator hoses for the following:
Improper installation
Leaks
Cracks
Damage
Loose connections
Chafing
Deterioration
Coolant Level
Check the coolant level in the coolant reservoir. Make sure it is between the "F" mark and the "L" mark.
If the coolant level in the coolant reservoir is at or below the "L" mark, add coolant so that it is between the "L" and "F" marks, then inspect the cooling system for leaks.
Coolant Quality
Remove the radiator cap.
Check for excessive rust or scale deposits around the radiator cap assembly and radiator filler neck. Also, the coolant must be free of oil.
If there is excessive contamination, clean the coolant passages and replace the coolant.
Install the radiator cap.
Filling and Bleeding
[NU 2.0 MPI]
Make sure the engine and radiator are cold to the touch.
Remove the reservoir tank cap (A).
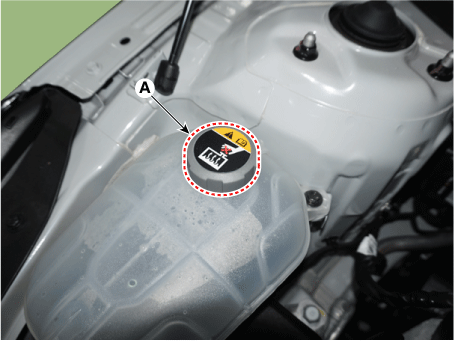
Remove the engine room cover.
(See Engine and Transaxle Assembly - Engine Compartment Cover)
Loosen the drain plug (A) and drain the coolant.
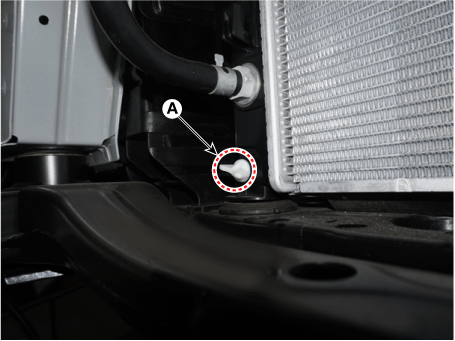
Tighten the radiator drain plug securely.
Clean the reservoir tank.
Fill the reservoir tank with coolant and tighten the reservoir tank cap.
Start the engine and warm it up to normal operating temperature. Wait for the cooling fans to turn on several times. Rev the engine to help purge trapped air. Stop the engine.
Wait until the engine has cooled down.
Repeat steps 1 through 9 until the drained water is clean.
Fill the working mixture of coolant and water (55 - 60%) (except North America, Europe and China: 45 - 50%) slowly through the reserve tank. Squeeze the upper/lower radiator hoses to easily bleed air.
Start the engine and let it run until the coolant begins to circulate. When the cooling fan is operating and the coolant is circulating, add coolant through the coolant reservoir.
Repeat step 12 until the cooling fan has come on 3 to 5 times and sufficient air has been bled from the cooling system.
Fill the coolant reservoir to the "MAX" (or "FULL") mark and tighten the reservoir cap.
Run the vehicle at idle until the cooling fan operates 2-3 times.
Stop the engine and wait for the coolant to cool down.
Repeat steps 11 through 16 until the coolant level stops dropping, bleeding air from the cooling system.
Coolant Capacity
Approx. 6.3 L (1.66 US gal, 6.66 US qt, 5.54 liters)
[THETA III 2.5 GDI]
When KDS is available, replace the coolant and bleed air according to the procedure below.
When KDS is available, replace the coolant and bleed air according to the procedure below.
Remove the reservoir tank cap (A).
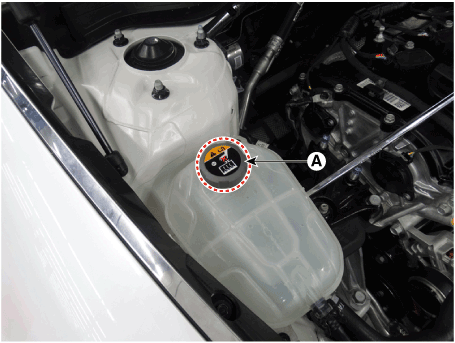
Remove the engine room cover.
(See Engine and Transaxle Assembly - Engine Compartment Cover)
Drain the engine coolant by loosening the drain plug (A).
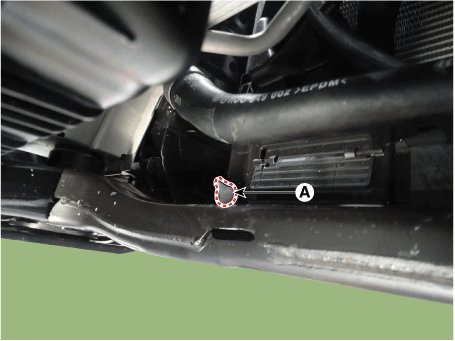
After draining the coolant, retighten the drain plug.
Drain the coolant from the reservoir tank, then clean the reservoir tank.
Install the coolant reservoir tank onto the radiator, then fill with a mixture of antifreeze and water (55 - 60%) (except North America, Europe and China: 45 - 50%).
Coolant Capacity
Approximately 8.2 L (2.2 US gal, 8.7 US qt, 7.2 liters)
Start the engine.
Connect the KDS.
Select "ITM Coolant Filling Mode" in "Vehicle Software Control".
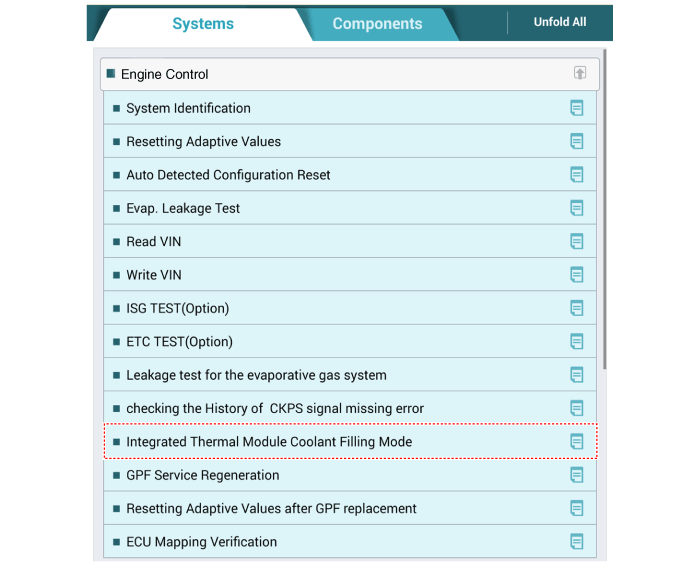
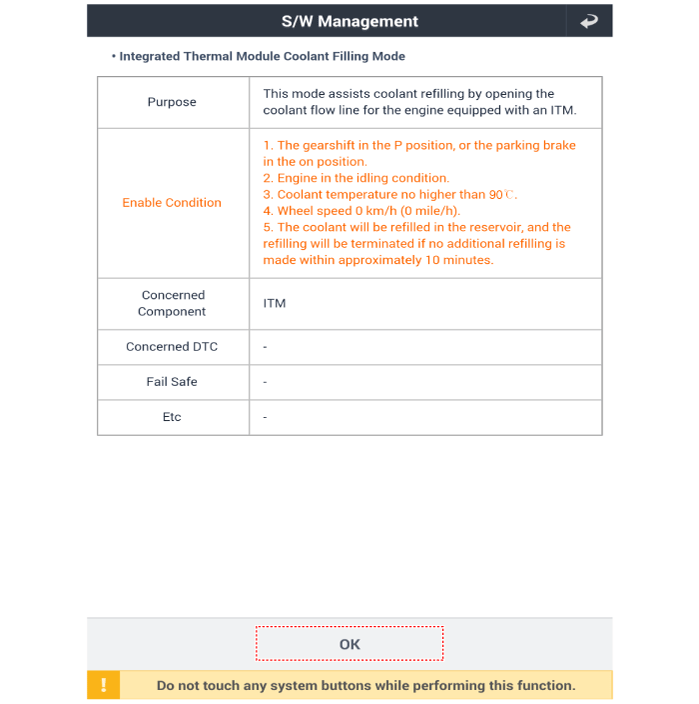
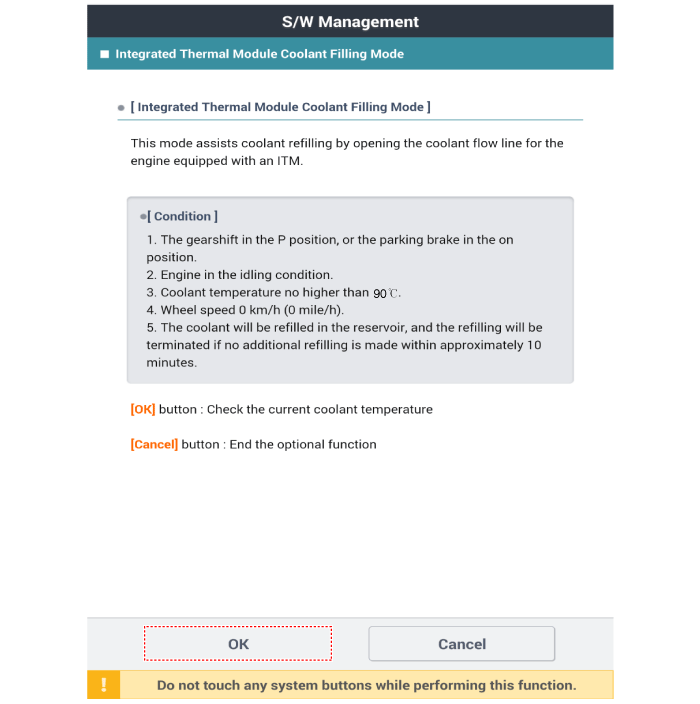
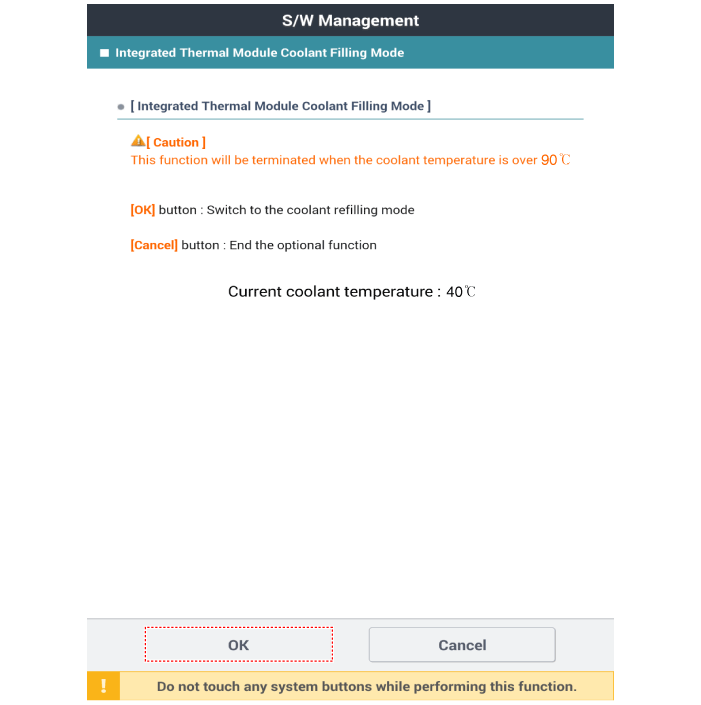
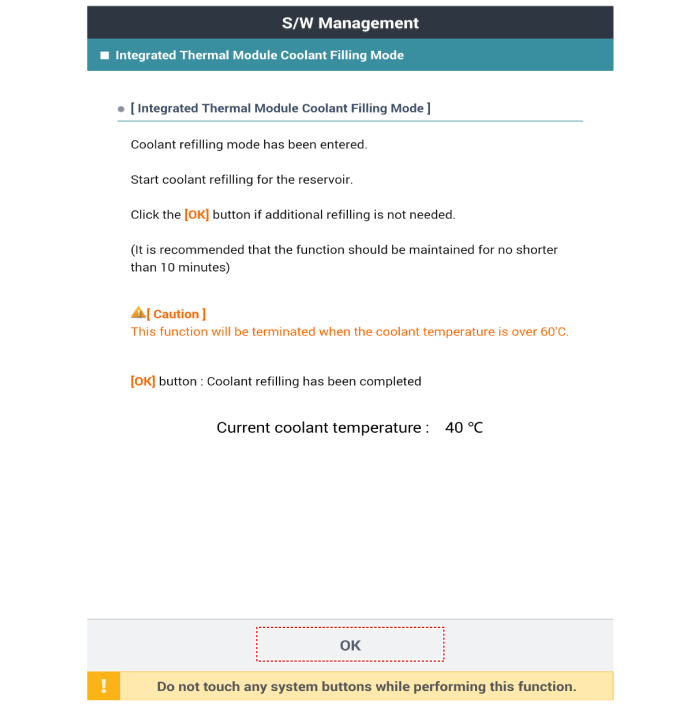
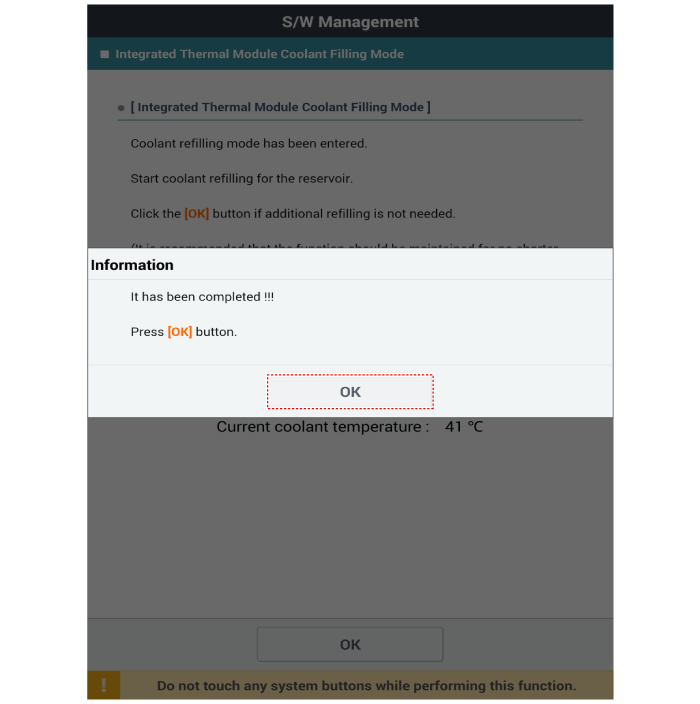
Warm up the engine for 20 minutes after the cooling fan operates once.
After disabling KDS, turn the ignition key to the OFF position, then restart the engine.
Install the coolant reservoir cap (A).
Add coolant if the level is low.
Install the engine compartment cover.
(See Engine and Transaxle Assembly - Engine Compartment Cover)
When KDS is not available, replace the coolant and bleed air according to the procedure below.
Make sure the engine and radiator have cooled sufficiently.
Remove the reservoir tank cap (A).
Remove the engine room cover.
(See Engine and Transaxle Assembly - Engine Compartment Cover)
Drain the engine coolant by loosening the drain plug (A).
After draining the coolant, retighten the drain plug.
Drain the coolant from the reservoir tank, then clean the reservoir tank.
Install the coolant reservoir tank onto the radiator, then fill with a mixture of antifreeze and water (55 - 60%) (except North America, Europe and China: 45 - 50%).
Coolant Capacity
Approximately 8.2 L (2.2 US gal, 8.7 US qt, 7.2 liters)
Disconnect the connector (A) of the Integrated Thermal Management Module (ITM).
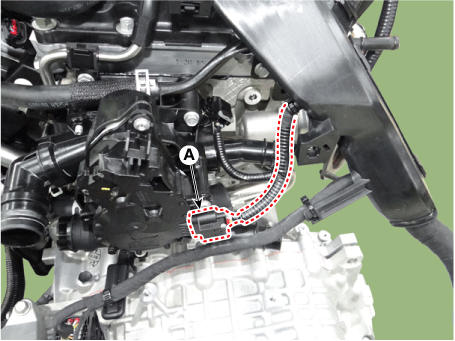
Start the engine.
Warm up the engine for 20 minutes after the cooling fan operates once.
After turning the ignition key to the OFF position, reconnect the Integrated Thermal Management module (ITM) connector (A).
Start the engine.
Check the Integrated Thermal Management (ITM) module for operation by listening for the operating sound.
Repeat the engine ON/OFF cycle and make sure the engine warning lamp does not illuminate.
Wait 5 seconds with the engine ON, then turn the engine OFF.
Repeat step (1) 3 times.
Make sure the engine warning lamp does not illuminate when the engine is turned ON the fourth time.
Drive the vehicle until the cooling fan operates, then check the coolant level in the coolant reservoir with the engine warm.
Add coolant if the level is low.
Install the engine compartment cover.
(See Engine and Transaxle Assembly - Engine Compartment Cover)
Test yourself
A quick Kia Optima DL3 quiz: every answer comes with an explanation and a link to the manual page.