Cylinder block
Repair Procedures
Disassembly
Remove the engine assembly from the vehicle.
(See Engine and Transaxle Assembly - "Engine and Transaxle Assembly")
Remove the transaxle assembly from the engine assembly.
(Refer to Automatic Transmission System - Automatic Transmission)
Remove the drive plate.
(Refer to Cylinder Block - Drive Plate)
Remove the rear oil seal.
(See Cylinder Block - "Rear Oil Seal")
Install the engine on an engine stand for disassembly.
Remove the timing chain.
(See Timing System - Timing Chain)
Remove the water pump assembly.
(See Cooling System - "Water Pump")
Remove the water inlet pipe and thermostat assembly.
(See Cooling System - "Thermostat")
Remove the intake manifold.
(See Intake and Exhaust System - Intake Manifold)
Remove the air conditioning compressor.
(See Heating, Ventilation and Air Conditioning - "Compressor")
Remove the exhaust manifold.
(See Intake and Exhaust System - Exhaust Manifold)
Remove the cylinder head assembly.
(See Cylinder Head Assembly - Cylinder Head)
Remove the oil filter.
(See Lubrication System - Engine Oil)
Remove the oil screen.
(See Lubrication System - Oil Pan)
Remove the piston and connecting rod assembly.
(Refer to Cylinder Block - Piston and Connecting Rod)
Remove the crankshaft.
(Refer to Cylinder Block - Crankshaft)
Remove the knock sensor.
(See Engine Control Module/Fuel System - Knock Sensor (KS)).
Remove the crankshaft position sensor (CKPS).
(Refer to Engine Control System/Fuel System - Crankshaft Position Sensor (CKPS)).
Remove the oil pressure sensor.
(See Lubrication System - Oil Pressure Relief Valve)
Inspection
Remove the gasket material.
Using a gasket scraper, remove all gasket material from the top surface of the cylinder block.
Clean the cylinder block.
Using a soft brush and solvent, thoroughly clean the cylinder block.
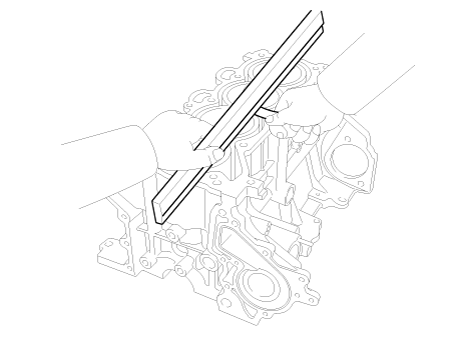
Inspect the top surface of the cylinder block for flatness.
Using a precision straightedge and feeler gauge, measure the cylinder head gasket contact surface for warpage.
Cylinder block gasket surface flatness
Standard:
Total area less than 0.05 mm (0.0020 in.)
Less than 0.02 mm (0.0008 in.) for a 100 mm (3.9370 in.) x 100 mm (3.9370 in.) section
Inspect the cylinder bore.
Visually check the cylinder for vertical scratches.
If deep scratches are present, replace the cylinder block.
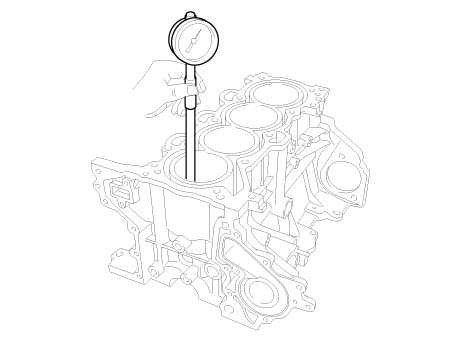
Check the cylinder bore diameter.
Using a cylinder gauge, measure the cylinder diameter at points in the axial and transverse directions.
Cylinder bore diameter: 81.00–81.03 mm (3.1890–3.1902 in.)
Installation
Assemble the remaining components in the reverse order of removal.
Test yourself
A quick Kia Optima DL3 quiz: every answer comes with an explanation and a link to the manual page.