Power Door Lock Module
Repair Procedures
Inspection
Front Door Lock Module
Disconnect the negative battery cable.
Remove the front door module.
(Refer to Body - "Front Door Module")
Disconnect the connector from the door lock actuator.
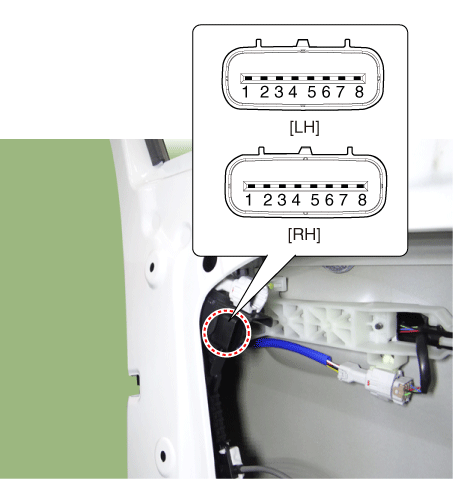
Pin Function Left Right 1 - M2 2 - M3 3 COM - 4 Lock/Unlock Switch ADJUSTER 5 ADJUSTER Lock/Unlock Switch 6 - COM 7 M3 - 8 Motor 2 - Check the actuator operation by connecting power and ground as shown below. To avoid damaging the actuator, apply battery voltage only momentarily.
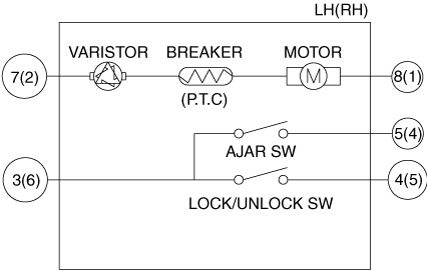
[LH]
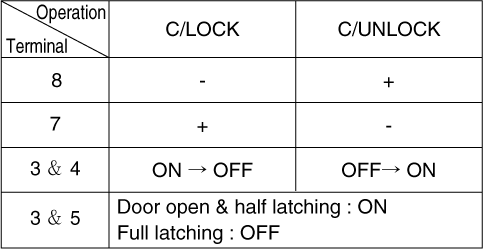
[RH]
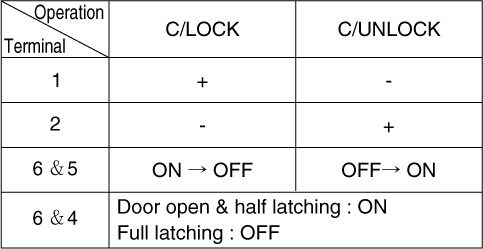
Rear Door Lock Module
Disconnect the negative battery cable.
Remove the rear door module.
(Refer to Body - "Rear Door Module")
Disconnect the connector from the door lock actuator.
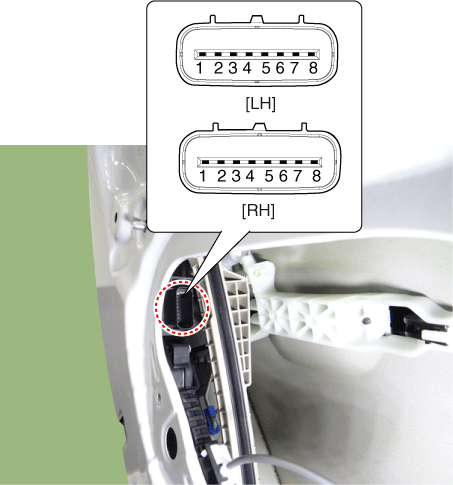
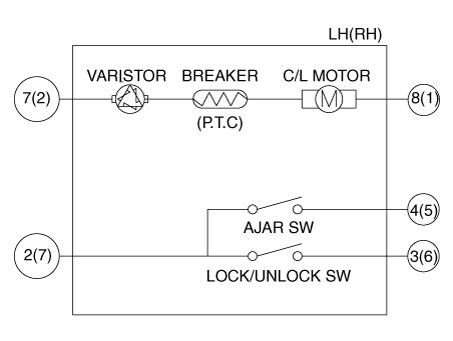
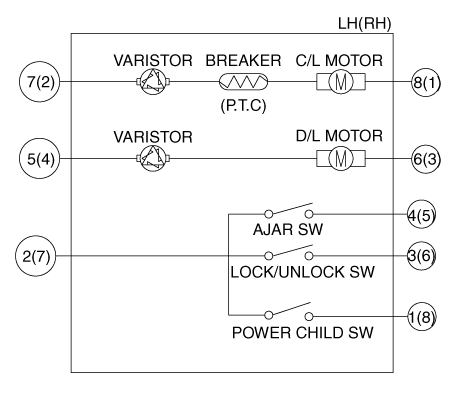
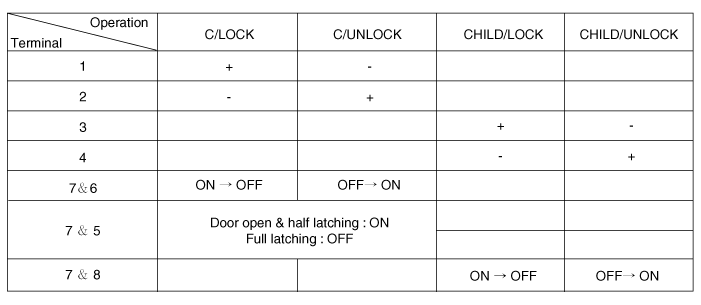
Pin Function Left Right Central Locking Power Child Lock Central Locking Power Child Lock 1 - Child Lock Power Switch M1 M2 2 COM COM M2 M3 3 Lock/Unlock Switch Lock/Unlock Switch - M1 4 ADJUSTER ADJUSTER - M4 5 - M4 ADJUSTER ADJUSTER 6 - M1 Lock/Unlock Switch Lock/Unlock Switch 7 M2 M3 COM COM 8 M1 M2 - Child Lock Power Switch Check the actuator operation by connecting power and ground as shown below. To avoid damaging the actuator, apply battery voltage only momentarily.
[Central Locking]
[Child Safety Lock]
[LH]
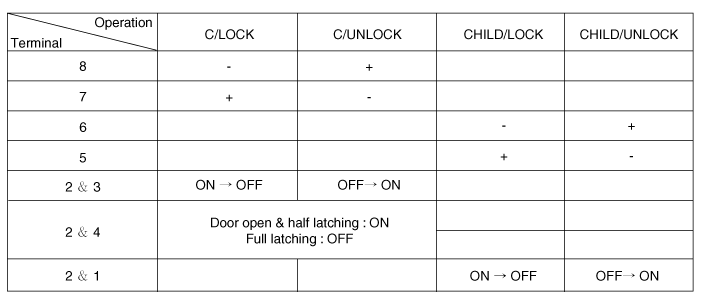
[RH]
Trunk Lock Module
Disconnect the negative battery cable.
Remove the trunk lid trim.
(Refer to Body - "Trunk Lid Trim")
Disconnect the trunk lock module connector (A).
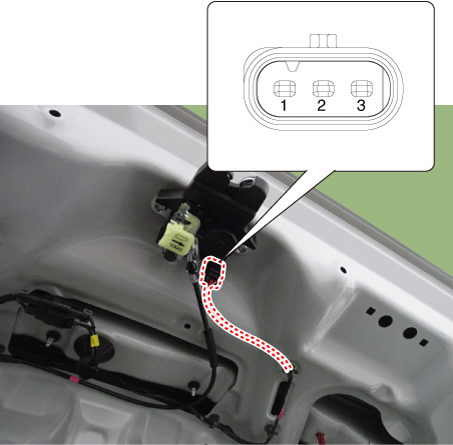
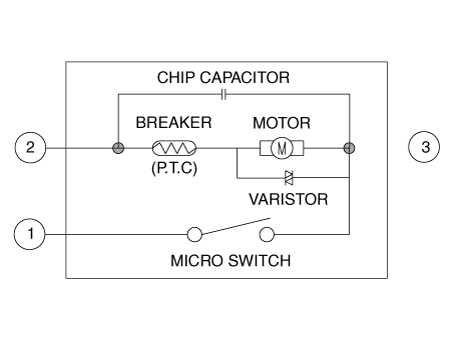
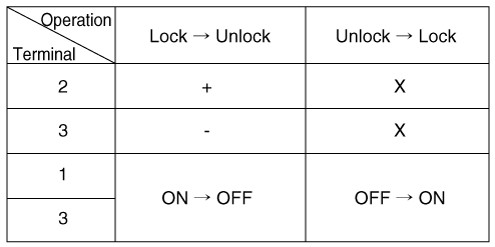
Check the actuator operation by connecting power and ground as shown below. To avoid damaging the actuator, apply battery voltage only momentarily.
Removal
Front Door Lock Module
Remove the front door latch.
(Refer to Body - "Front Door Latch")
Rear Door Lock Module
Remove the liftgate latch.
(Refer to Body - "Rear Door Latch")
Trunk Lock Module
Remove the trunk lid lock.
(Refer to Body - "Trunk Lid Latch")
Installation
Install in the reverse order of removal.
Test yourself
A quick Kia Optima DL3 quiz: every answer comes with an explanation and a link to the manual page.