Brake System
Rear Disc Brake
In this manual: Brake System
26steps
~156min
4/5difficulty
Done 0 of 26
Components and Component Location
Components
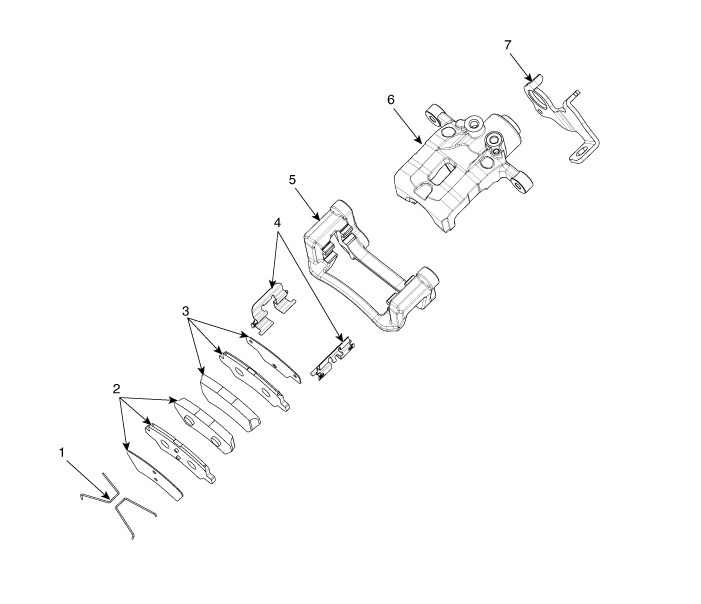
| 1. Return Spring 2. Brake Pad Assembly [OUTER] 3. Brake Pad Assembly [IN] 4. Inner Shim |
5. Brake Disc 6. Caliper Body 7. Cable Guide |
Repair Procedures
Removal
- Remove the wheel tire (A).
Tightening torque: 107.9–128 N·m
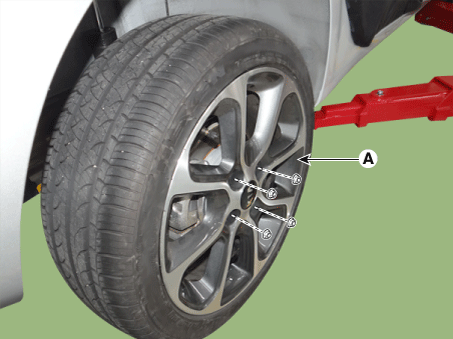
- Disconnect the parking brake cable pin.
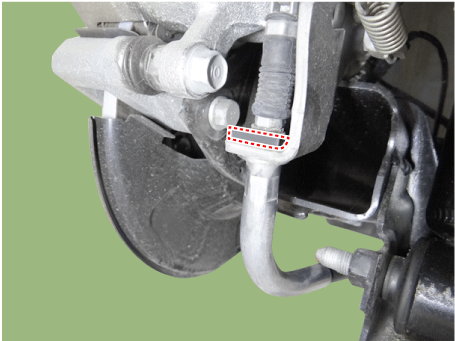
- Remove the brake lever spring, and then loosen the nut.
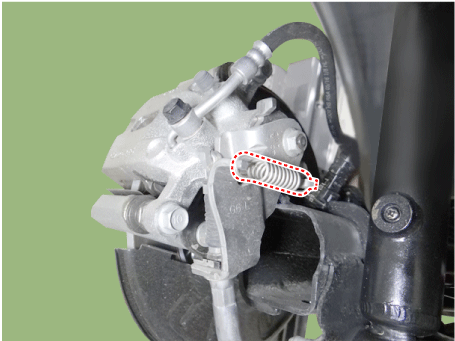
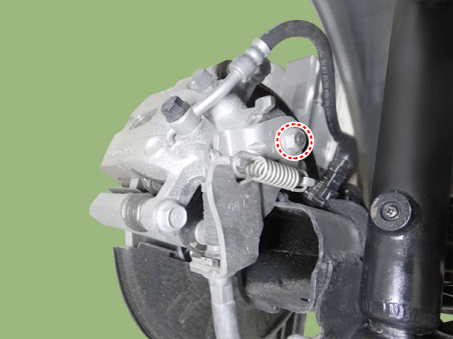
- Disconnect the parking brake cable.
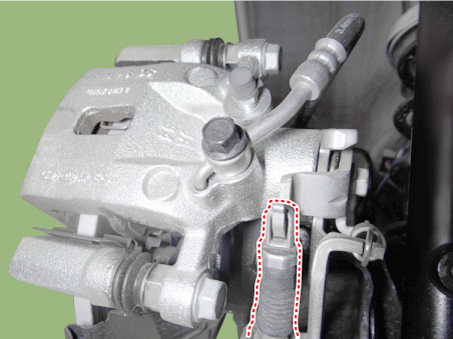
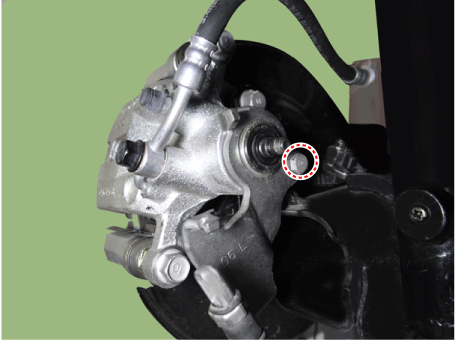
- Loosen the bolt, and then remove the brake lever bracket.
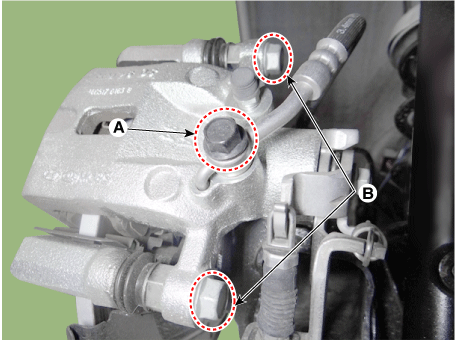
- Loosen the eye bolt (A) and guide bolts (B), then remove the caliper body.
- Remove the return spring and brake pad.
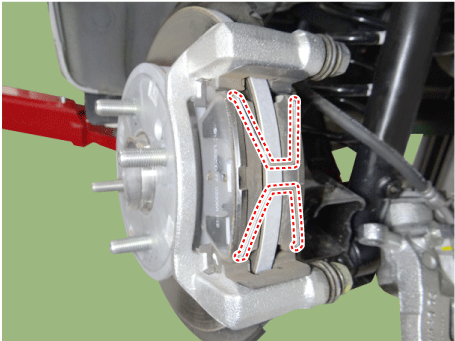
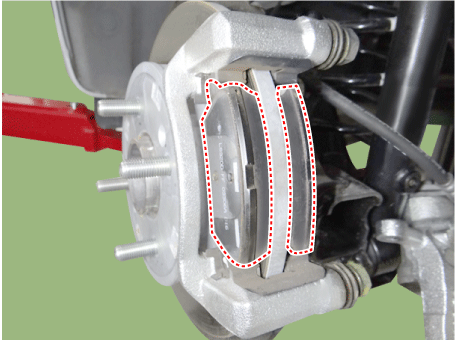
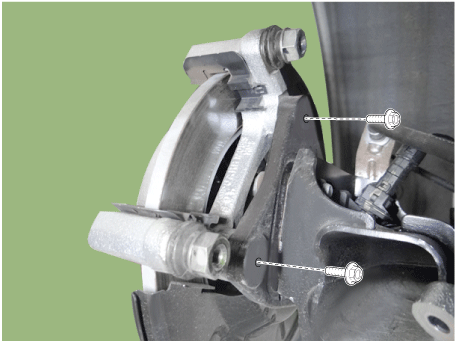
- Loosen the bolt, and then remove the caliper assembly.
Tightening torque: 63.7–74 N·m
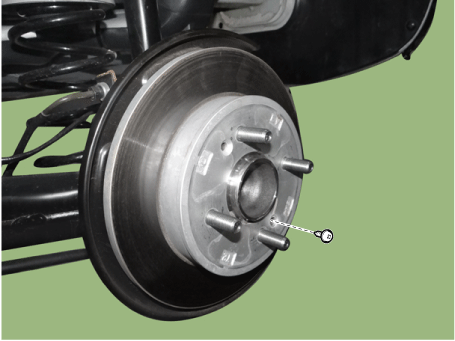
- Loosen the screw and remove the brake disc.
Tightening torque: 4.9–5.9 N·m
- Install in the reverse order of removal.
Replacement
[Brake Pad]- Remove the wheel tire (A).
Tightening torque: 107.9–128 N·m
- Loosen the bolts (A) and remove the rear caliper body.
Tightening Torque: 21.6–31 N·m
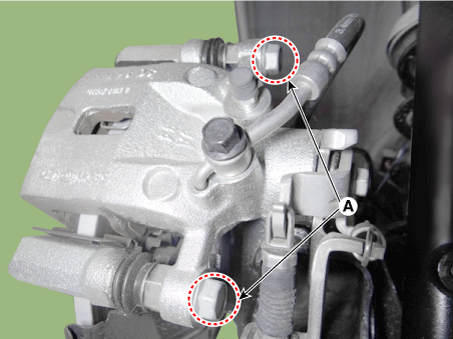
- Remove the return spring and brake pad.
Inspection
Rear brake disc thickness inspection- Inspect the brake pads for wear and discoloration.
- Inspect the brake disc for damage and cracks.
- Remove all rust and contamination from the surface, and measure the disc thickness at 8 points at equal distances (5 mm) from the outer edge of the brake disc. Rear brake disc thickness Standard: 10 mm (0.3937 in.) Maximum Service Limit: 8.4 mm (0.3307 in.) Runout: less than 0.005 mm (0.0002 in.)
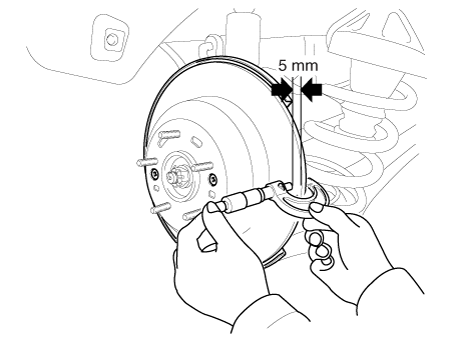
- If the wear exceeds the limit, clean the left and right discs and pads of the vehicle.
- Inspect the pad wear. Measure the pad thickness and replace it if it is less than the specified value. Pad thickness Standard: Service Limit: 2.0 mm (0.0787 in.) Service Limit: 2.0 mm (0.0787 in.)
- Make sure grease is applied to the sliding contact points, and make sure the pad and backing plate are not damaged.
- Position a dial indicator approximately 5 mm (0.2 in.) from the outer edge of the brake disc and measure the disc runout.
Brake disc runout limit: 0.03 mm (0.00118 in.) or less (new)
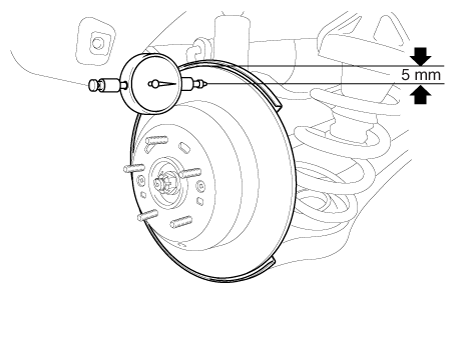
- If brake disc runout exceeds the limit, replace the disc, then measure the runout again.
- If the runout does not exceed the specification limit, install the brake disc by rotating it 180°, and then check the brake disc runout again.
- If runout cannot be corrected by changing the brake disc position, replace the brake disc.
Installation
- Install in the reverse order of removal.
- Turn the caliper piston and press it in the direction of the arrow.
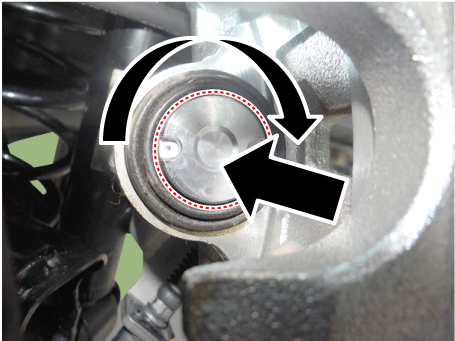
- After installation, bleed the brake system. (Refer to Brake System — "Brake System")
Test yourself
A quick Kia Picanto JA quiz: every answer comes with an explanation and a link to the manual page.
Was this page helpful?