Brake System
Rear Drum Brake
In this manual: Brake System
38steps
~228min
5/5difficulty
Done 0 of 38
Components and Component Location
Components
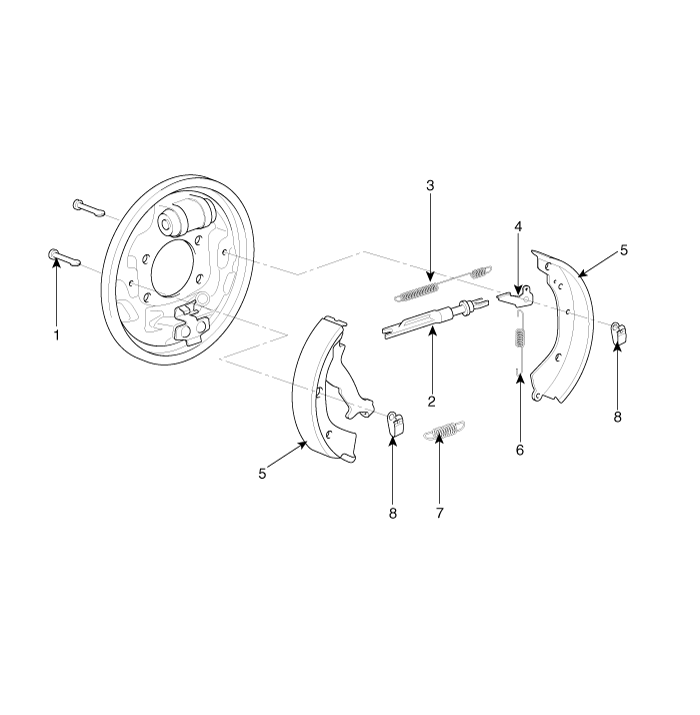
| 1. Shoe hold-down pin 2. Shoe adjuster 3. Upper return spring 4. Adjusting lever |
5. Shoe 6. Adjusting spring 7. Lower return spring 8. Shoe hold-down spring |
Repair Procedures
Removal
- Remove the rear wheel and tire.
Tightening torque: 88.3–108 N·m
- Release the parking brake.
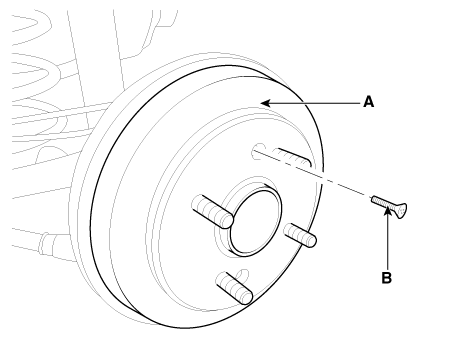
- Loosen the screw (B), and then remove the rear brake drum (A).
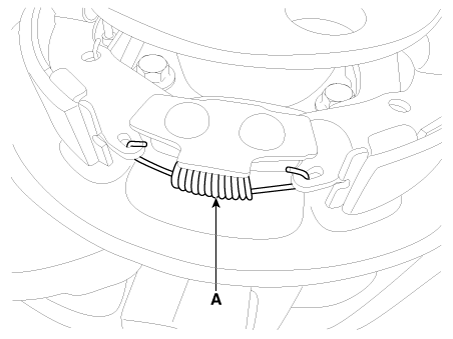
- Remove the lower return spring (A).
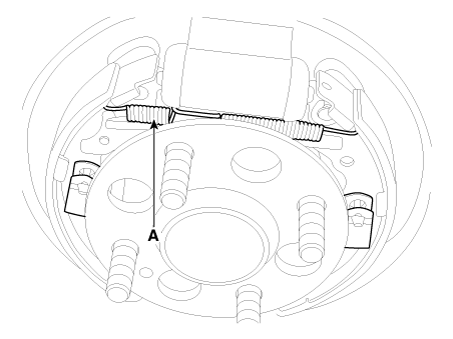
- Remove the upper return spring (A).
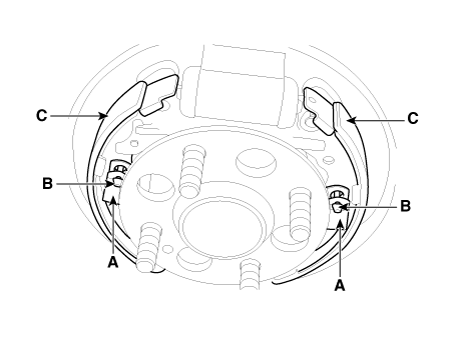
- Remove the shoe hold-down springs (A) and shoe hold-down pins (B), and then remove the brake shoe (C). Be careful not to damage the dust cover on the wheel cylinder.
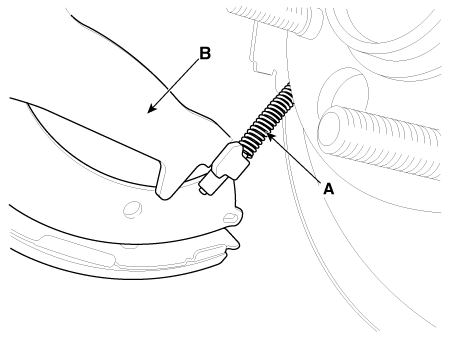
- Remove the parking brake cable (A), then remove the brake shoe (B).
- Remove the rear wheel speed sensor. (Refer to ESC (Electronic Stability Control) System - "Rear Wheel Speed Sensor")
- Disconnect the brake tubes (A) from the wheel cylinder (B).
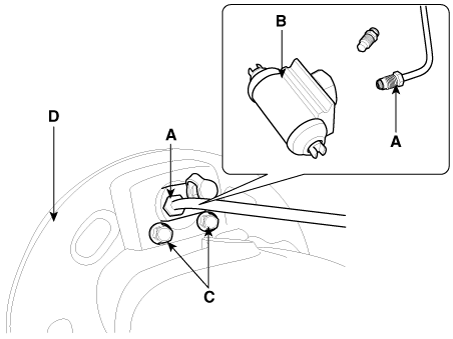
- Remove the bolts (C) and the wheel cylinder (B) from the backing plate (D).
Installation
- Apply sealant between the wheel cylinder (B) and the backing plate (D), and then install the wheel cylinder.
Tightening torque (bolts C): 9.8 - 12.7 N·m
- Connect the brake tubes (A) to the wheel cylinder.
Tightening torque: 12.7 - 16.7 N·m
- Connect the parking brake cable (A) to the brake shoe.
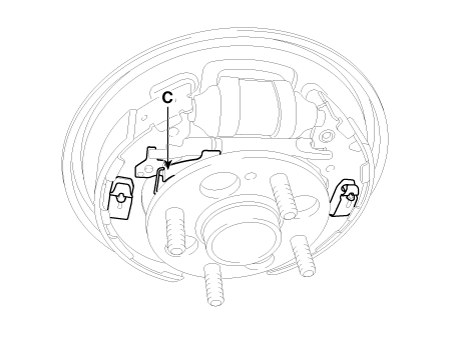
- Install the brake shoes (C) on the backing plate. Be careful not to damage the wheel cylinder dust boots.
- Install the shoe hold-down pins (B) and the shoe hold-down springs (A).
- Clean the threaded parts of the adjusting sleeve (A) and the inner part of the pushrod (B). Apply lithium grease to the threads of the adjuster assembly. To shorten the brake shoes, turn the adjusting bolt (C).
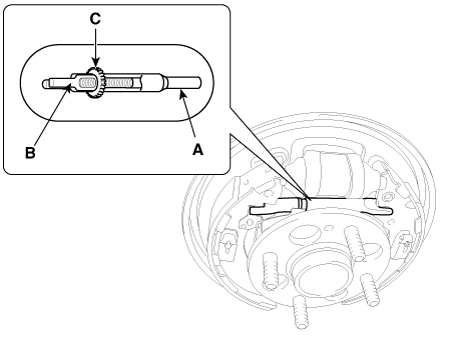
- Hook the shoe adjuster lever (C), then install it on the brake shoe.
- Install the adjuster assembly (B) and upper return spring (A) in the correct direction. Be careful not to damage the dust covers of the wheel cylinders.
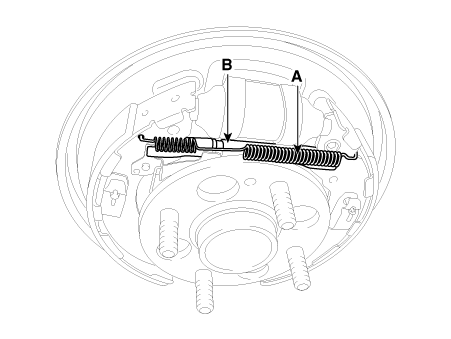
- Install the lower return spring (B).
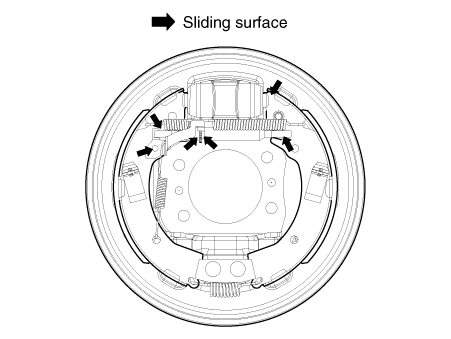
- Apply brake cylinder grease or equivalent rubber lubricant to the sliding surfaces shown. Do not allow grease to contact the brake shoes.
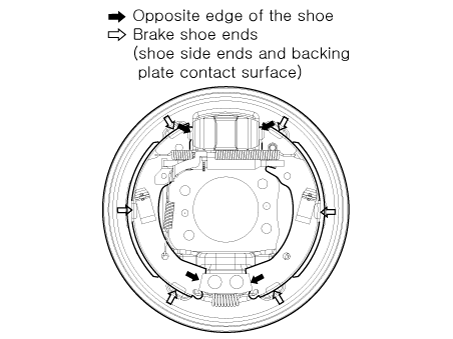
- Apply brake cylinder grease or similar rubber lubricant to the shoe ends and opposite edges as shown. Do not get grease on the brake linings.
- Install the rear brake drum (A).
Tightening torque: 4.9 - 5.9 N·m
- If the wheel cylinder was removed, bleed the brake system.
- Depress the brake pedal several times to activate the self-adjusting brake.
- Adjust the parking brake.
Inspection
- Raise the rear of the vehicle and make sure it is securely supported.
- Release the parking brake and remove the rear brake drum.
- Inspect the wheel cylinder (A) for leaks.
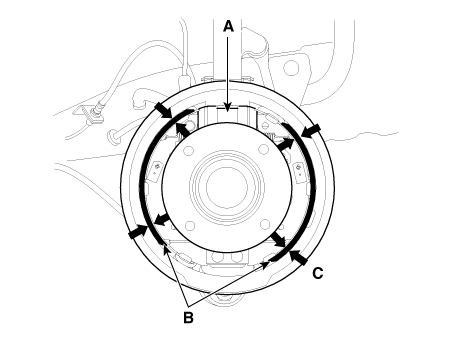
- Inspect the brake shoes (B) for cracks, glazing, wear and contamination.
- Measure the thickness of the brake lining (C). The measurement does not include the thickness of the brake shoe. Brake lining thickness Standard: 4.0 - 4.7 mm (0.1575 - 0.1850 in.) Service Limit: 1.0 mm (0.039 in.)
- If the brake lining thickness is less than the service limit, replace the brake shoes as a set.
- Check the bearings in the hub assembly for smooth rotation. If necessary, replace them.
- Measure the inner diameter of the brake drum with a caliper. Drum inner diameter Standard: 180 mm (7.087 in.) Service Limit: 182 mm (7.165 in.) Drum out-of-round Maximum Service Limit: 0.06 mm (0.00236 in.)
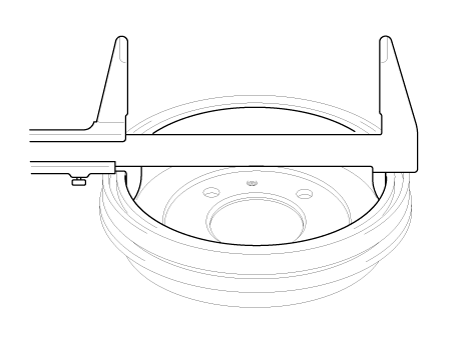
- If the brake drum inside diameter exceeds the service limit, replace the brake drum.
- Inspect the brake drum for scoring, grooves and cracks.
- Inspect the brake shoe and drum for proper contact.
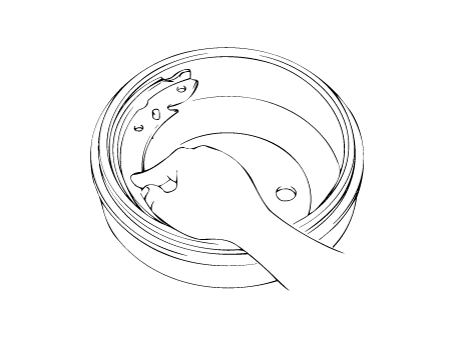
- Inspect the outside of the wheel cylinder for excessive wear and damage.
- Inspect the backing plate for wear or damage.
Test yourself
A quick Kia Picanto JA quiz: every answer comes with an explanation and a link to the manual page.
Was this page helpful?