Clutch Release Cylinder
Components and Component Location
Components
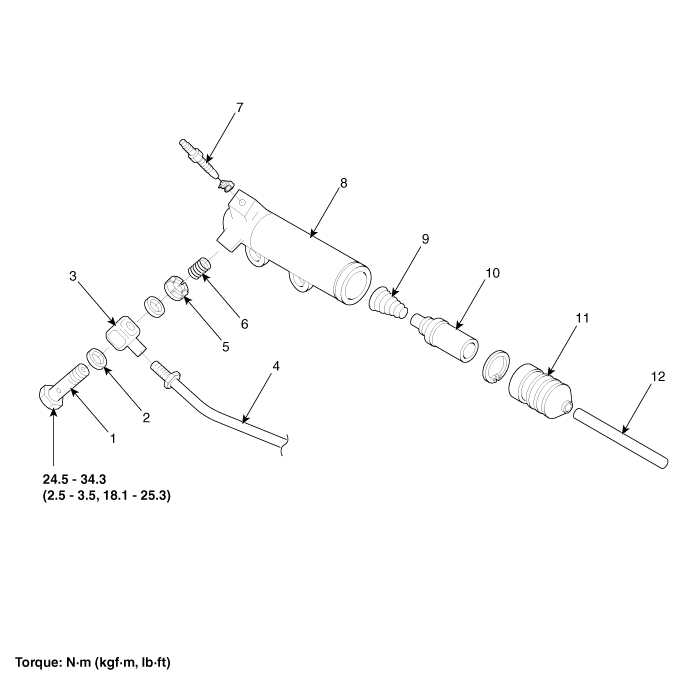
| 1. Connecting bolt 2. Gasket 3. Tube joint 4. Clutch tube 5. Valve plate 6. Valve spring |
7. Bleeder screw 8. Release cylinder 9. Return spring 10. Piston 11. Boot 12. Push rod |
Repair Procedures
Removal
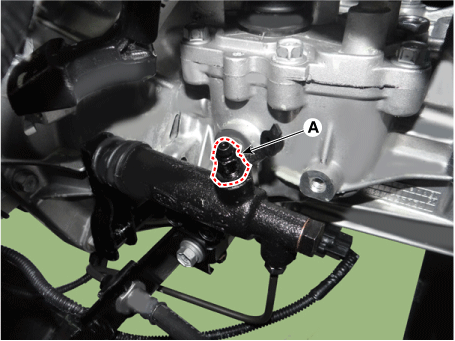
[Gasoline 1.2]
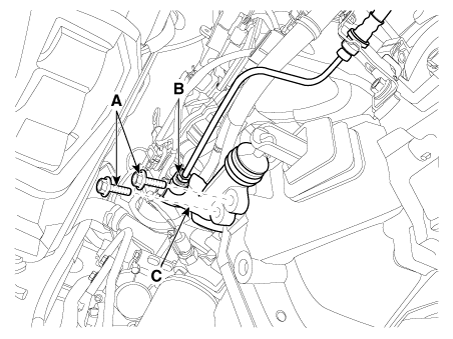
Drain the brake fluid through the bleeder plug (A).
Loosen the release cylinder bolts (A), then the clutch tube nut (B) after removing the release cylinder assembly (C).
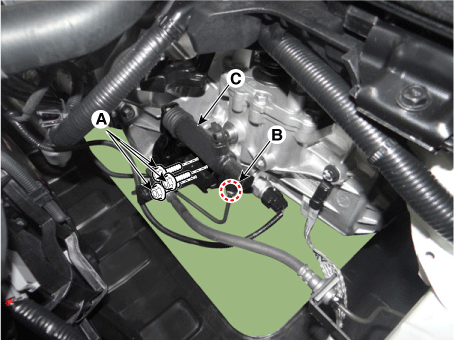
[Gasoline 1.0 T-GDI, 1.4, Diesel 1.4]
Drain the brake fluid through the bleeder plug (A).
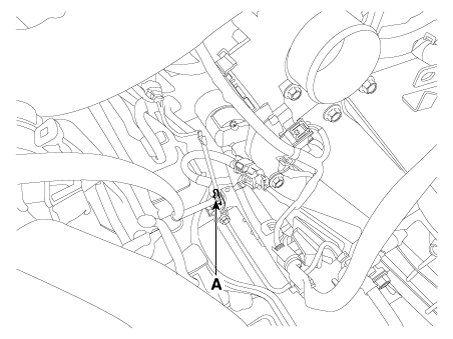
Loosen the release cylinder bolts (A), then the clutch tube nut (B) after removing the release cylinder assembly (C).
Installation
Install in the reverse order of removal.
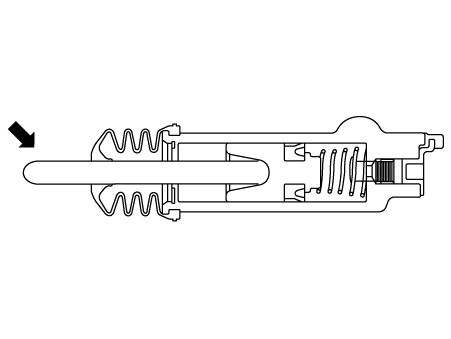
Recommended lubricant: CASMOLY L9508. Quantity: 0.4 - 0.8 g
Inspection
Check the clutch release cylinder for fluid leakage.
Check the clutch release cylinder dust boot for damage.
Adjustment
Clutch Release Cylinder Air Bleeding Procedure
After removing the cap from the clutch release cylinder bleeder, install a vinyl hose onto the bleeder.
Fill the clutch master cylinder with the specified fluid.
Specified fluid: SAE J1703 (DOT 3 or DOT 4)
Loosen the bleeder screw, then depress and release the clutch pedal approximately 10 times.
Tighten the bleeder (A) while the clutch pedal is depressed. Then release the pedal.
Depress the clutch pedal 3 times, then loosen the bleeder (A) and retighten it with the pedal depressed. Then release the pedal.
Tightening torque: 6.8–9.8 N·m
Repeat step 4 two or three times.
(until no air bubbles remain in the fluid)
[Gasoline 1.2]
[Gasoline 1.0 T-GDI, 1.4, Diesel 1.4]
Fill the clutch master cylinder with the specified fluid.
Test yourself
A quick Kia Rio YB quiz: every answer comes with an explanation and a link to the manual page.