Control valve body installation
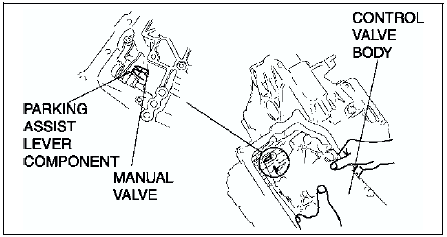
- Be sure to align the parking rod and the manual valve.
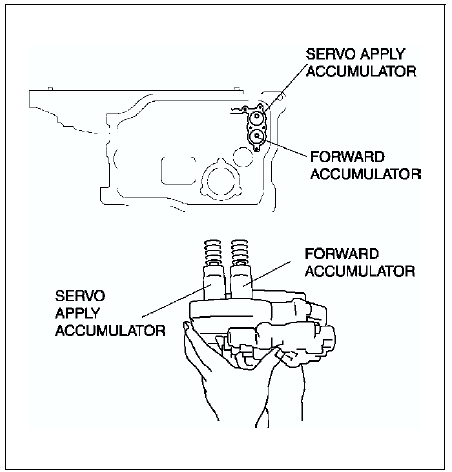
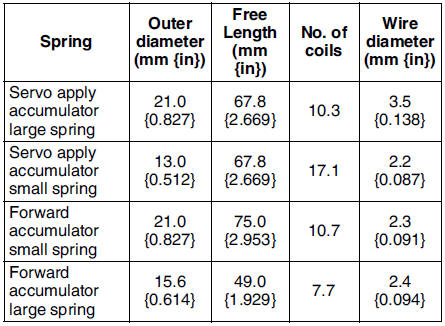
1. Install the accumulator springs and accumulators into the transaxle case.
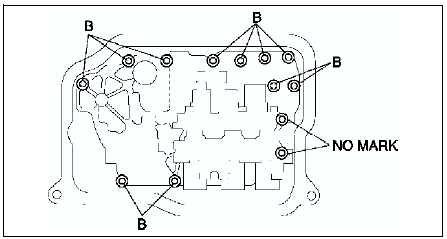
2. Install the control valve body component.
Tightening torque 7.8-10.8 N·m
{80-110 kgf·cm, 70-95 in·lbf} Bolt length (measured from below the head) B: 40 mm {1.575 in}
No mark: 70 mm {2.756 in}
3. Install the oil strainer.
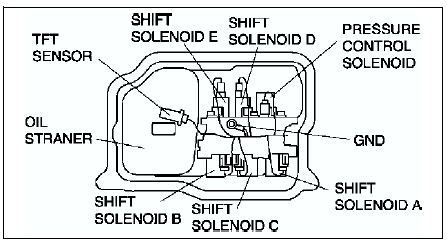
4. Match the harness colors, then connect the solenoid connector and TFTsensor connector.
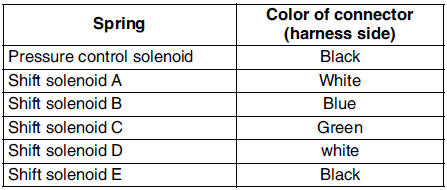
5. Install the ground.
Tightening torque 7.8-10.8 N·m {80-110 kgf·cm, 70-95 in·lbf}
6. Apply a light coat of silicon sealant to the contact surfaces of the oil pan and transaxle case.
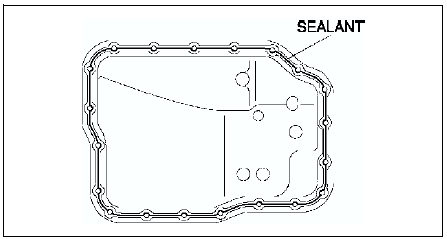
7. Install the oil pan.
Tightening torque 6-8 N·m {62-81 kgf·cm, 53-70 in·lbf}
8. Install the crossmember. (See FRONT CROSSMEMBER REMOVAL/INSTALLATION.)
9. Install the front tires and splash shield.
10. Install the under cover.
11. Connect the negative battery cable.
12. Add ATF and with the engine idling, inspect the ATF level. (See AUTOMATIC TRANSAXLE FLUID (ATF) REPLACEMENT.)
13. Carry out the mechanical system test. (See MECHANICAL SYSTEM TEST.)
14. Carry out the road test. (See ROAD TEST.)
Test yourself
A quick Mazda 6 quiz: every answer comes with an explanation and a link to the manual page.