Charge air cooler
Exploded View
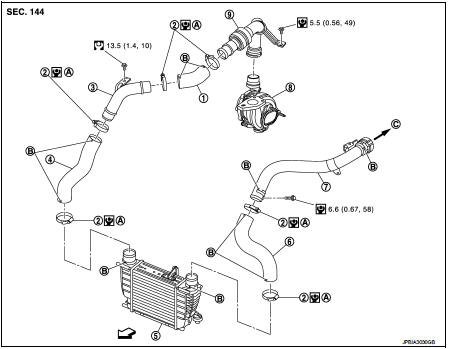
1. Air inlet hose
2. Clamp
3. Air inlet tube
4. Air inlet hose
5. Charge air cooler
6. Air inlet hose
7. Air inlet tube
8. Turbocharger
9. Air inlet tube assembly
A. 1st step: 5 N·m 2nd step: 7 N·m B. Paint mark
C. To electric throttle control actuator
 : Vehicle front
 : N·m (kg-m, ft-lb)
 : N·m (kg-m, in-lb)
Removal and Installation
REMOVAL
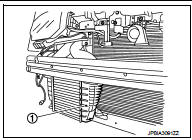
1. Remove front bumper. Refer to EXT-12, "Exploded View". 2. Remove air guide (RH). 3. Remove air inlet hose between air inlet tube and charge air cooler.4. Remove charge air cooler (1).
CAUTION:• Avoid interference between the charge air cooler and radiator.
• When removing charge air cooler, close opening on turbo charger and intake manifold with shop cloth or other suitable material
.
INSTALLATION
Install in the reverse order of removal paying attention to the following points:• Apply a neutral detergent (fluid) to the joint between hoses and pipes (oil is not permissible). • Pay attention to identification mark and direction.
• When installing air inlet hoses and tubes. Refer to EM-281, "Removal and Installation".
Inspection
INSPECTION AFTER REMOVAL
1. Check that the charge air cooler is not full of oil. In that case, clean it with cleaning agent and then let it dry.2. Check air passages of charge air cooler core and fins for clogging, leaks or deformation. Clean or replace charge air cooler in necessary.
• Be careful not to deform core fins.• For cleaning procedure of charge air cooler core, refer to CO-59, "Inspection".