Oil pan
Exploded View
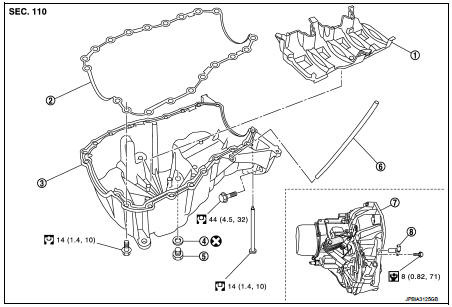
1. Baffle plate
2. Gasket
3. Oil pan
4. O-ring
5. Drain plug
6. Oil level gauge guide 7. Transaxle
8. Crankshaft position sensor (POS)
 : N·m (kg-m, ft-lb)
 : N·m (kg-m, in-lb)
 : Always replace after every
disassembly.
Removal and Installation
REMOVAL
CAUTION:Never drain engine oil when the engine is hot to avoid the danger of being scalded. 1. Remove engine under cover. 2. Remove RH front wheel. Refer to WT-7, "Exploded View". 3. Remove fender protector RH. Refer to EXT-22, "Exploded View". 4. Remove engine mounting bracket. Refer to EM-326, "Exploded View".
5. Remove center bearing bracket as shown.
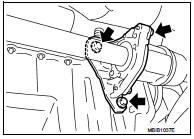
6. Remove A/C compressor bracket mounting bolt as shown.
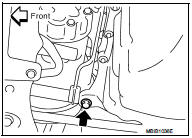
7. Remove oil level gauge guide.
8. Drain engine oil. Refer to LU-34, "Draining".
CAUTION:Perform when engine is cold.
9. Remove oil pan and transaxle joint bolts.
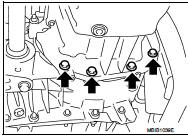
10. Support the engine bottom of the oil pan with a transmission jack etc.
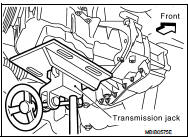
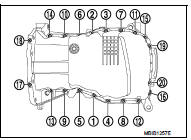
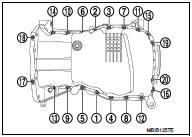
11. Remove oil pan bolt reverse order as shown.
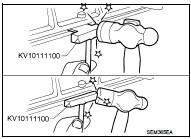
• Insert seal cutter (special service tool) between upper oil pan and cylinder block. Slide tool by tapping on the side of the tool with a hammer.
CAUTION:Exercise care not to damage mating surface.
12. Remove oil pan and baffle plate.
INSTALLATION
• Install in the reverse order of removal paying attention to the following.
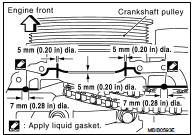
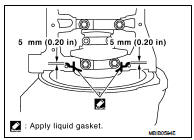
1. Apply liquid gasket as shown.
• Use Genuine Liquid Gasket or equivalent.
2. Install baffle plate.
3. Install oil pan.
• Tighten the mounting bolts of oil pan on the clutch housing without locking.• Tighten the bolts in the numerical order shown in the figure.
 : 14 N·m
• Tighten the mounting bolts of oil pan on the clutch housing.
 : 44 N·m
4. At least 30 minutes after oil pan is installed, pour engine oil.
Inspection
INSPECTION AFTER REMOVAL
Clean oil pump assembly if any object attached.
INSPECTION AFTER INSTALLATION
• Inspection the engine oil level. Refer to LU-33, "Inspection".• Start the engine, and make sure there is no leak of engine oil. Refer to LU-33, "Inspection".