Axle Shaft Overhaul and Boot Replacement
OUTER CV JOINT
PROCEDURE
1. Remove the axle shaft.
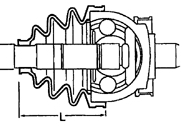
2. Measure the length (L) of the boot in the assembled state.
3. Remove the clamps and slide the boot toward the center of the axle shaft.
4. If the CV joint is not being replaced, make alignment marks on the joint relative to the axle shaft.
5. Clamp the axle shaft in a vise.
6. Screw the nut onto the axle shaft and use a puller to remove the CV joint, taking care not to damage the threads. The CV joint can also be removed by tapping with a hammer, driving the snap ring into the groove.
7. Remove the boot and take out the snap ring.
8. Wash the CV joint in kerosene and dry thoroughly.
9. If there is any sign of wear, replace the CV joint assembly.
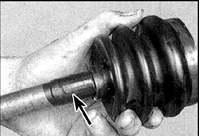
10. During assembly, wrap the splines of the axle shaft with tape.
11. Slide the clamp and boot onto the axle shaft.
12. Remove the tape and install a new snap ring on the axle shaft.
13. Install the CV joint, aligning the marks made during removal (if the CV joint is not being replaced).
14. Screw on the nut, clamp the axle shaft in a vise, and lightly tap the CV joint into place so that the snap ring snaps into the groove.
15. Pack the boot with special grease, twist the boot so that the grease works into the folds.
16. Distribute all excess grease inside the boot.
17. Install the boot onto the CV joint and install a new clamp.
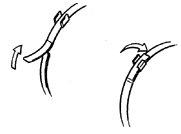
18. Bend the end of the clamp and secure it with the ears.
19. Position the boot so that the length measured during disassembly is maintained.
20. Make sure the edge of the boot is seated in the groove of the axle shaft.
21. Secure the boot with the small clamp.
22. Install the axle shaft.
Inner CV Joint, Ball Type CV Joint
PROCEDURE
1. Perform steps 1 to 18.
18. Note that the CV joint is removed only by tapping with a hammer on a drift; a slide hammer is not used.
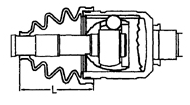
2. Check the length (L) of the boot.
TRIPOD CV JOINT
PROCEDURE
1. Remove the axle shaft.
2. Measure the length of the boot in the assembled state.
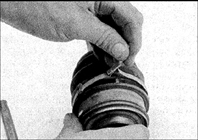
3. Remove the clamps and slide the boot toward the center of the axle shaft.
4. If the CV joint is not being replaced, make alignment marks on the joint housing relative to the axle shaft.
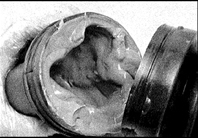
5. Remove the joint housing so that the rollers remain on the tripod.
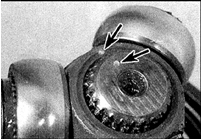
6. Make marks on the tripod and on the axle shaft.
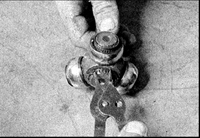
7. Remove the snap ring.
8. Remove the tripod.
9. Wash the CV joint in kerosene and dry thoroughly.
10. Carefully inspect the joint.
11. If there is any sign of wear, replace the CV joint.
12. Select the new CV joint using the marking on the side surface of the joint being replaced.
13. Wrap the splines of the axle shaft with tape.
14. Slide the clamp and boot onto the axle shaft.
15. Remove the tape and install the tripod, aligning the marks made during removal (if the CV joint is not being replaced).
15. Secure the joint with a new snap ring.
16. Pack the joint housing with special grease (supplied with the new joint), distributing the grease around the rollers.
17. Install the joint housing onto the tripod, aligning the marks on the housing and the axle shaft (if the CV joint is not being replaced).
18. Install the boot onto the joint housing and install a new clamp.
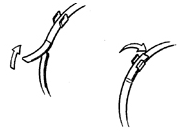
19. Tighten the clamp, bend the end of the clamp, and secure it with the ears.
20. Position the boot so that the length measured during disassembly is maintained.
21. Make sure the edge of the boot is seated in the groove of the axle shaft.
22. Secure the boot with the small clamp.
23. Install the axle shaft.
Test yourself
A quick Nissan Sunny quiz: every answer comes with an explanation and a link to the manual page.