Front end panel
Replacing the front end panel is a complementary operation to replacing the bonnet and front bumper for a frontal collision.
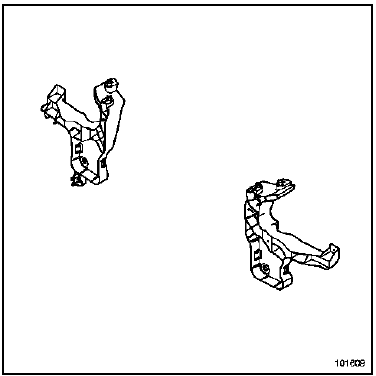
Replacing the side sections of this part is a complementary operation to replacing the front bumper.
The method below covers the following operations:
- removal - refitting of the side sections
- removal - refitting of the upper crossmember
The side sections are removable structural components made of SMC composite material.
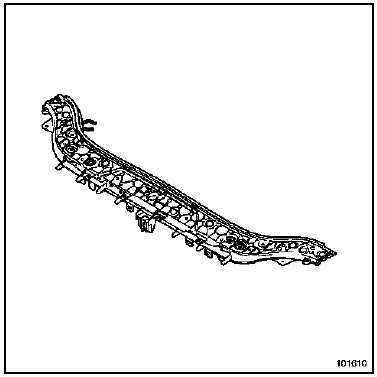
The upper crossmember is a two-part component (steel and SMC) moulded onto each other.
Information on related parts is covered in their respective sections (see contents).
REPLACEMENT PART CONTENTS
Parts supplied individually and available separately.
Side sections
Upper crossmember
1-SIDE SECTIONS
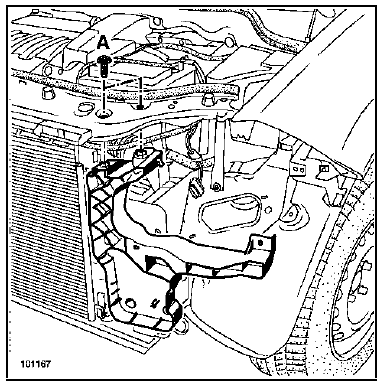
REMOVAL
To access the fixings of the front side section, the following must be removed first:
- the splash guards,
- the front bumper,
- the headlamp units,
- the front bumper beam,
- the wiring harnesses,
- the various mechanical components attached to the crossmember.
Right-hand side specific
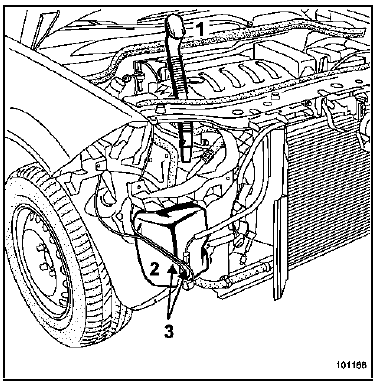
Removal of the complete windscreen washer reservoir is required.
Disconnect the filler hose (1).
Disconnect the hoses (3) from the pump, and release the reservoir (2) by pulling it firmly forward.
Drain the reservoir if necessary.
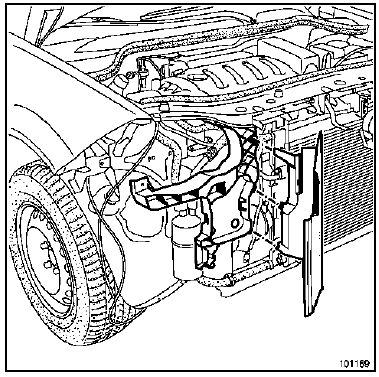
Unclip the radiator air deflector.
Remove the screws (A) (see previous page).
INSTALLATION
Refit in the reverse order of removal.
2-UPPER CROSSMEMBER
REMOVAL
Carry out the removal operations in the order below.
Remove:
- the bonnet release cable
- the radiator location pegs
- the upper crossmember harness
- the upper crossmember
a. Removing the bonnet release cable
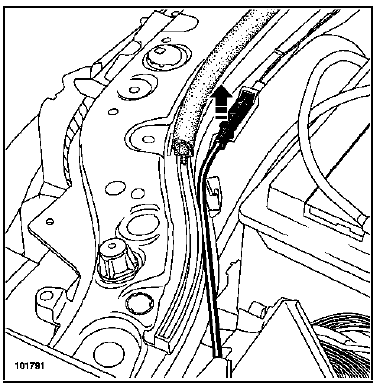
Unclip the upper part of the plastic connector and release the cable.
b. Removing the radiator location pegs.
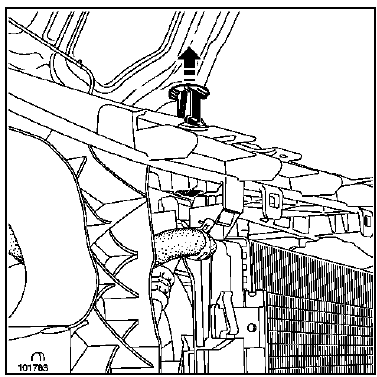
Using a screwdriver, unclip the radiator location pegs.
c. Removing the upper crossmember harness
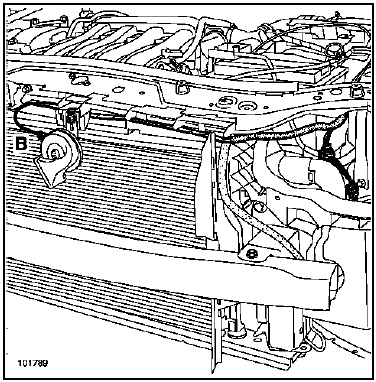
Disconnect the horn connector (B).
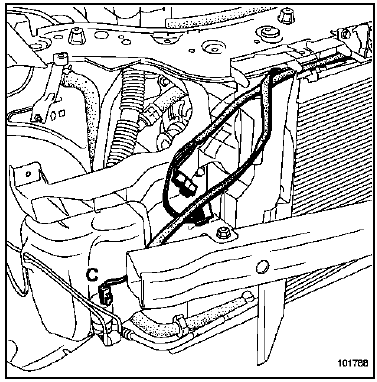
Disconnect the windscreen washer reservoir connector (C).
Release the harness.
d. Removing the upper crossmember
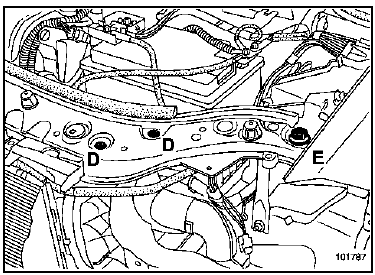
Remove the two screws (D) and the screw (E).
Release the upper crossmember.
INSTALLATION
Refit in the reverse order of removal.
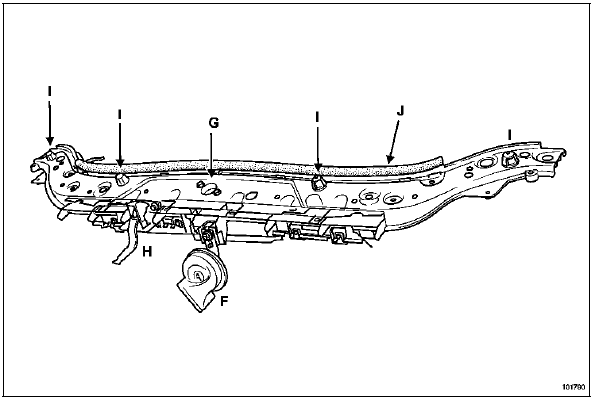
Remove:
- the horn (F),
- the lock (G),
- the safety catch (H),
- the four bonnet stops (I),
- the sealing gasket (J).
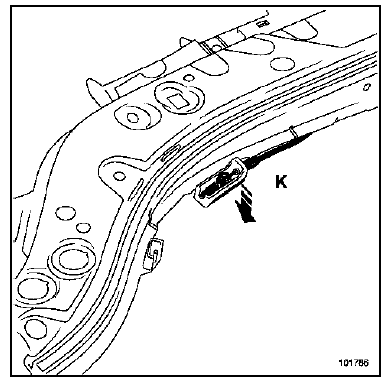
Remove the lock cable (K).
INSTALLATION
Refit in the reverse order of removal.
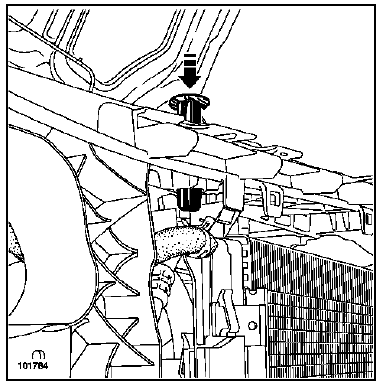
Check that the radiator location pegs are correctly clipped.
Test yourself
A quick Renault Megane quiz: every answer comes with an explanation and a link to the manual page.