Dashboard crossmember
Replacing this part is in addition to replacing the front pillar and the front pillar reinforcement and inner panel, for a side impact or body replacement.
Note: In the event of a frontal impact with airbag deployment, check the connection area between the two diameters of the beam (area A). Any deformation visible to the naked eye requires replacement of this part. Replacing it requires removal of the instrument panel.Information on related parts is covered in their respective sections (see contents).
REPLACEMENT PART CONTENTS
Supplied as an assembly with:
Left-hand crossmember bracket
Right-hand crossmember bracket
Left-hand side flange
Right-hand side flange
Left-hand gusset
Right-hand gusset
Driver tube
Passenger tube
Steering column support
Tube connecting flange
Heating and ventilation air distributor mounting tab
Wiring harness mounting tab
Storage tray support
Instrument panel mounting tab
Heating and ventilation air distributor support
Passenger compartment control unit support
Pedal box impactor
Tie rod support
Welded earth stud
Pin
Threaded pin
Nut
Anti-stress tab
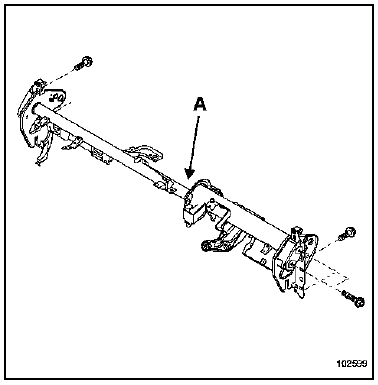
DASHBOARD CROSSMEMBER
This part has a special feature at its side fixings: it is fitted with nuts with a reverse thread, which eliminate play between the beam and the body front pillars.
During chain assembly, the side fixing screw is coated with thread locker, which drives the play take-up nut (reverse thread) by friction.
To remove and refit the dashboard crossmember during repair, a special tool (Car 1673) must be used to ensure the system works correctly (see detailed explanations in the procedure).
Tool description
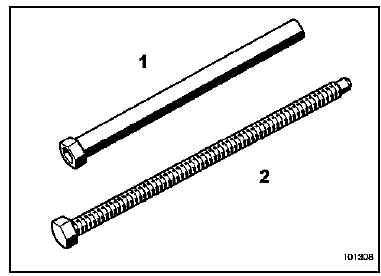
- Tool body
- Rod
REMOVAL
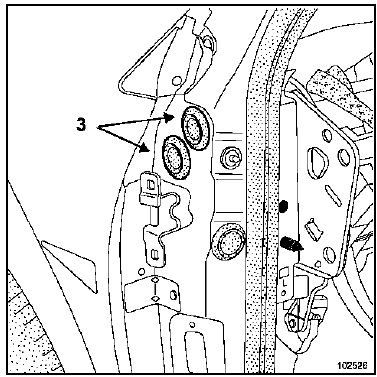
Remove the blanking plugs (3).
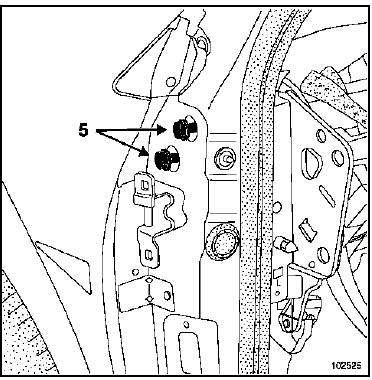
Remove the side fixing screws (5).
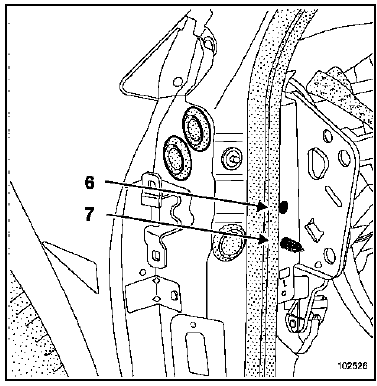
Remove the fixing screw (6).
Loosen the locating pin (7).
This is so that the holes in the front pillar inner panel can be aligned with the locknuts on the dashboard crossmember.
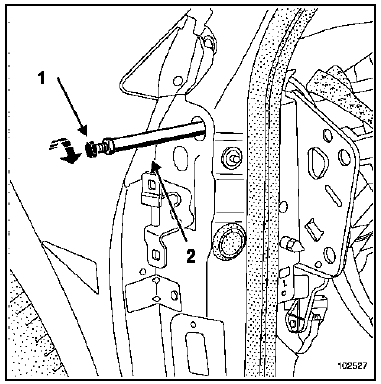
Screw the rod (1) onto the body (2) until it stops, then tighten lightly.
Insert the assembly into the front pillar, then screw it into the beam until it stops.
Firmly hold the tool body (2) against the dashboard crossmember nut as a locknut, while holding the hexagonal socket of the rod (1).
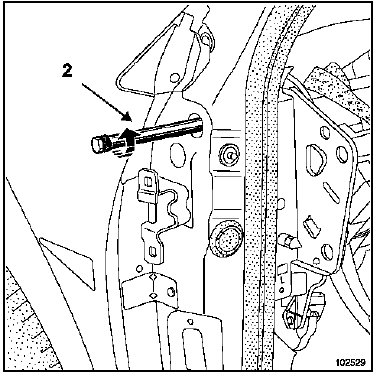
Unscrew the tool by the hexagonal socket of the body (2) until it stops, then tighten lightly.
During this operation, the beam nut, which has a reverse thread, screws into the beam and releases it from the front pillar.
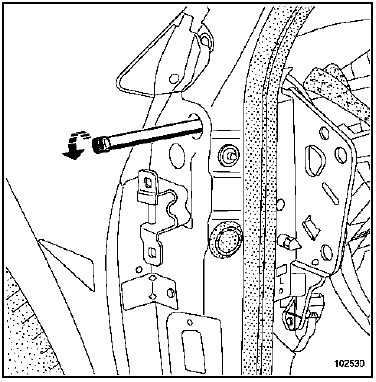
Hold the tool body (2) and loosen the rod (1) as a locknut.
Unscrew the rod (1) from the dashboard crossmember to remove the tool.
Repeat the operation for the second screw.
The dashboard crossmember is now released from the front pillar.
WARNINGTo keep the dash crossmember adjustment and make refitting easier, loosen the lock nuts on one side only.
INSTALLATION
Screw the locknut (left-hand thread) fully onto the beam.
Position the beam with the hole in the front pillar.
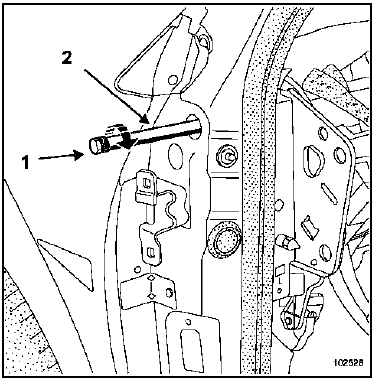
As for removal, prepare the tool, screw it fully into the beam nut, then lock the tool body (2) against the beam nut (nut and lock nut).
Screw the tool rod (1) and body (2) together until they stop, tightening lightly.
Hold the tool body (2) and loosen the rod (1) like a lock nut, then remove the tool.
WARNINGWhen removing the dash crossmember, the lock nuts may come out of adjustment on both sides. In this case, refit the dash panel to set its clearances with the windshield pillar trims and the door trims.
Note: It is possible to adjust the instrument panel once refitted to the vehicle, by removing the side trim panel of the instrument panel to access the fixing screw and the dashboard crossmember locating pin.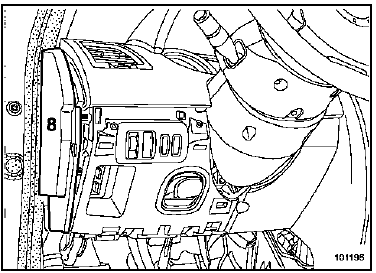
Test yourself
A quick Renault Megane quiz: every answer comes with an explanation and a link to the manual page.