Transmission Control Cable
Adjustment
ADJUSTMENT
PROCEDURE
1. SECURE VEHICLE
(a) Fully apply the parking brake and chock a wheel.
CAUTION:
- Make sure to apply the parking brake and chock a wheel before performing this procedure.
- If the vehicle is not secure and the shift lever is moved to N, the vehicle may suddenly move, possibly resulting in an accident or serious injury.
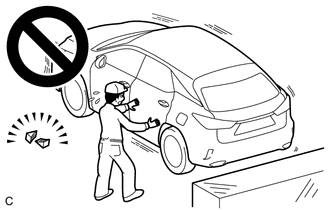
2. REMOVE CONSOLE BOX ASSEMBLY
Click here 
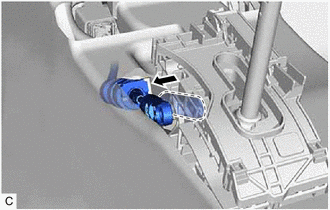
3. ADJUST SHIFT LEVER POSITION
NOTICE:
Before adjusting the transmission control cable assembly, check that the shift lever position sensor and shift lever are in N.
(a) Disconnect the transmission control cable assembly from the transmission floor shift assembly. |
 |
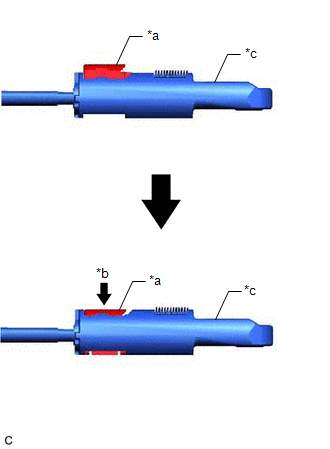
(b) Slide the slider of the transmission control cable assembly in the direction indicated by the arrow in the illustration and pull the lock piece outward. |
|
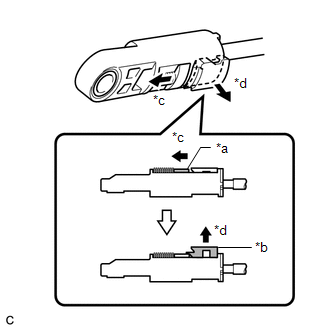
(c) Connect the transmission control cable assembly to the transmission floor shift assembly. NOTICE:
|
|
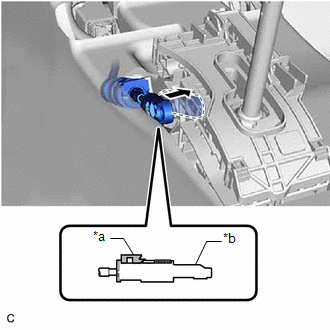
(d) Push the lock piece into the adjuster case. NOTICE:
|
|
(e) After adjusting the shift lever position, check the position and operation of the shift lever. If there is a problem, adjust the shift lever position again.
4. INSTALL CONSOLE BOX ASSEMBLY
Click here
Components
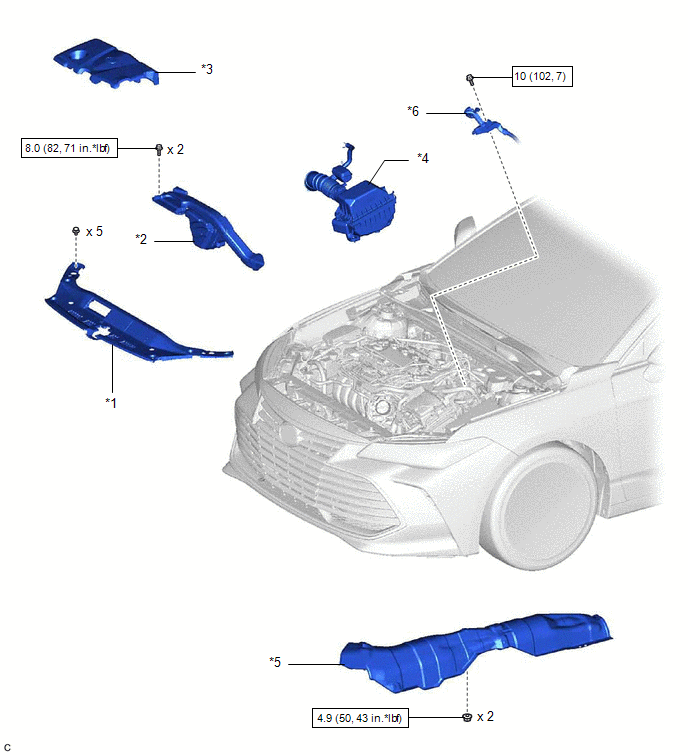
COMPONENTS
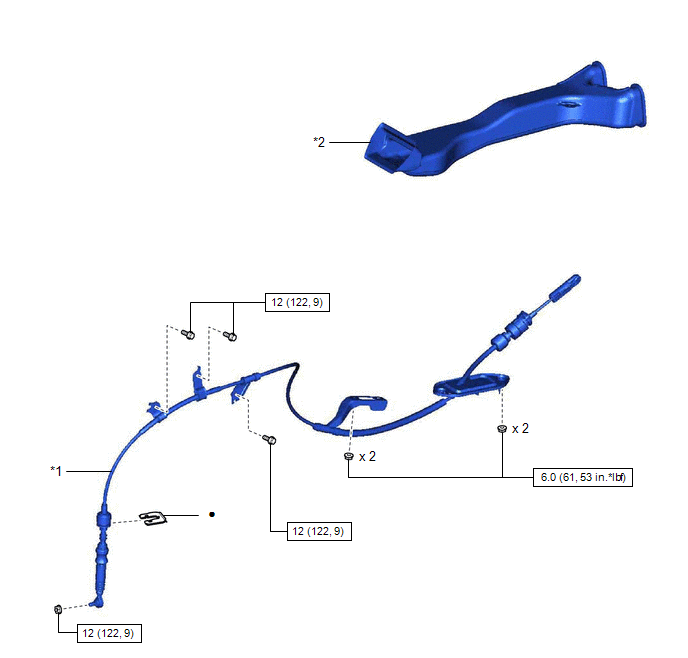
ILLUSTRATION
*1 |
COOL AIR INTAKE DUCT SEAL |
*2 |
INLET AIR CLEANER ASSEMBLY |
*3 |
NO. 1 ENGINE COVER SUB-ASSEMBLY |
*4 |
AIR CLEANER ASSEMBLY WITH AIR CLEANER HOSE |
*5 |
FRONT LOWER NO. 1 FLOOR HEAT INSULATOR |
*6 |
ENGINE ROOM MAIN WIRE |
 |
N*m (kgf*cm, ft.*lbf): Specified torque |
- |
- |
ILLUSTRATION
*1 |
TRANSMISSION CONTROL CABLE ASSEMBLY |
*2 |
NO. 1 CONSOLE BOX DUCT |
|
N*m (kgf*cm, ft.*lbf): Specified torque |
● |
Non-reusable part |
Installation
INSTALLATION
PROCEDURE
1. INSTALL TRANSMISSION CONTROL CABLE ASSEMBLY
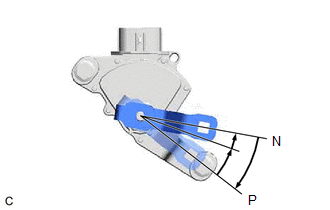
(a) Turn the control shaft lever clockwise until it stops, then turn it counterclockwise 2 notches. |
 |
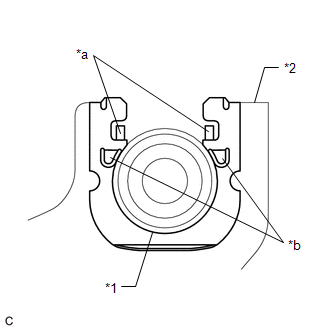
(b) Engage the 2 claws to install a new clip to the transmission control cable assembly.
(c) Using a screwdriver, engage the 4 claws and install the transmission control cable assembly to the No. 1 transmission control cable bracket. NOTICE:
|
|
(d) Connect the transmission control cable assembly to the control shaft lever with the nut.
Torque:
12 N·m {122 kgf·cm, 9 ft·lbf}
NOTICE:
Before installing the transmission control cable assembly, check that the shift lever position sensor and the shift lever are in N.
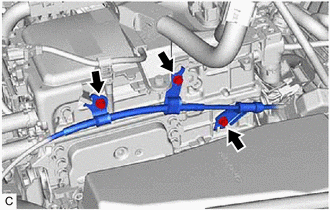
(e) Connect the transmission control cable assembly to the inverter with converter assembly with the 3 bolts.
Torque:
12 N·m {122 kgf·cm, 9 ft·lbf}
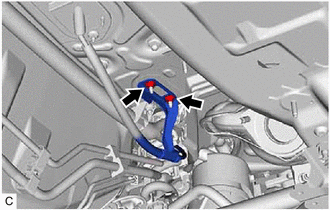
(f) Connect the transmission control cable assembly to the vehicle body with the 2 nuts.
Torque:
6 N·m {61 kgf·cm, 53 in·lbf}
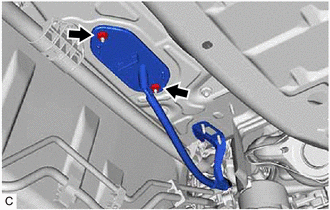
(g) Pass the transmission control cable assembly into the vehicle and install the transmission control cable assembly to the vehicle body with the 2 nuts.
Torque:
6 N·m {61 kgf·cm, 53 in·lbf}
2. CONNECT ENGINE ROOM MAIN WIRE
Click here 
3. INSTALL NO. 1 CONSOLE BOX DUCT
(a) Install the No. 1 console box duct.
4. INSTALL TRANSMISSION FLOOR SHIFT ASSEMBLY
Click here
5. INSTALL FRONT LOWER NO. 1 FLOOR HEAT INSULATOR
(a) Install the front lower No. 1 floor heat insulator to the vehicle body with the 2 nuts.
Torque:
4,9 N·m {50 kgf·cm, 43 in·lbf}
6. INSTALL FRONT EXHAUST PIPE ASSEMBLY
Click here
7. INSTALL AIR CLEANER ASSEMBLY WITH AIR CLEANER HOSE
Click here
8. INSTALL NO. 1 ENGINE COVER SUB-ASSEMBLY
Click here
9. INSTALL INLET AIR CLEANER ASSEMBLY
Click here
10. INSTALL COOL AIR INTAKE DUCT SEAL
Click here
11. INSPECT SHIFT LEVER POSITION
Click here
12. ADJUST SHIFT LEVER POSITION
Click here
Removal
REMOVAL
The necessary procedures (adjustment, calibration, initialization or registration) that must be performed after parts are removed and installed, or replaced during transmission control cable assembly removal/installation are shown below.
Necessary Procedures After Parts Removed/Installed/ReplacedReplaced Part or Performed Procedure | Necessary Procedure | Effect/Inoperative Function when Necessary Procedure not Performed | Link |
|---|---|---|---|
|
Inspection After Repair |
|
 |
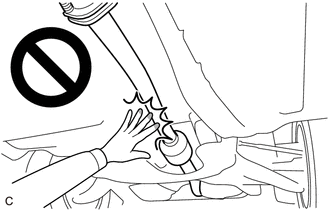
CAUTION:
To prevent burns, do not touch the engine, exhaust pipe or other high temperature components while the engine is hot.
PROCEDURE
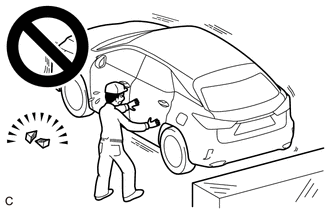
1. SECURE VEHICLE
(a) Fully apply the parking brake and chock a wheel.
CAUTION:
- Make sure to apply the parking brake and chock a wheel before performing this procedure.
- If the vehicle is not secure and the shift lever is moved to N, the vehicle may suddenly move, possibly resulting in an accident or serious injury.
2. REMOVE COOL AIR INTAKE DUCT SEAL
Click here
3. REMOVE INLET AIR CLEANER ASSEMBLY
Click here
4. REMOVE NO. 1 ENGINE COVER SUB-ASSEMBLY
Click here
5. REMOVE AIR CLEANER ASSEMBLY WITH AIR CLEANER HOSE
Click here
6. REMOVE FRONT EXHAUST PIPE ASSEMBLY
Click here
7. REMOVE FRONT LOWER NO. 1 FLOOR HEAT INSULATOR
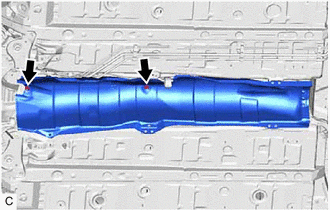
(a) Remove the 2 nuts and front lower No. 1 floor heat insulator from the vehicle body. |
 |
8. REMOVE TRANSMISSION FLOOR SHIFT ASSEMBLY
Click here
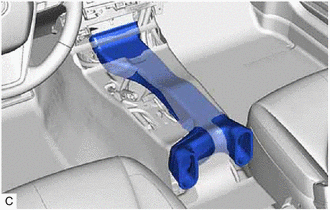
9. REMOVE NO. 1 CONSOLE BOX DUCT
(a) Remove the No. 1 console box duct. |
 |
10. DISCONNECT ENGINE ROOM MAIN WIRE
Click here
11. REMOVE TRANSMISSION CONTROL CABLE ASSEMBLY
(a) Move the shift lever to N.
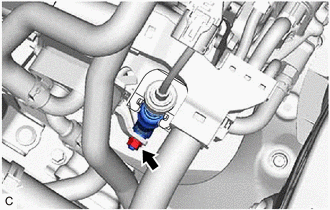
(b) Remove the nut and disconnect the transmission control cable assembly from the control shaft lever. |
 |
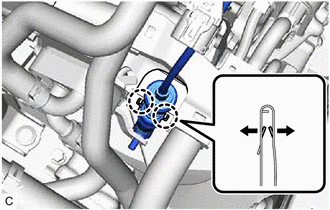
(c) Using a screwdriver, disengage the 4 claws and disconnect the transmission control cable assembly with the clip from the No. 1 transmission control cable bracket. |
 |
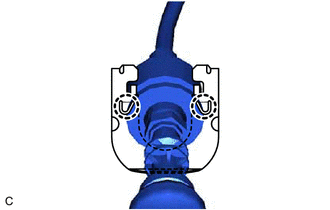
(d) Using a screwdriver, disengage the 2 claws and remove the clip from the transmission control cable assembly. |
 |
(e) Remove the 3 bolts and disconnect the transmission control cable assembly from the inverter with converter assembly. |
 |
(f) Remove the 2 nuts and disconnect the transmission control cable assembly from the vehicle body. |
 |
(g) Remove the 2 nuts and then remove the transmission control cable assembly from the vehicle body. |
 |