Shift Cable
Removal and installation
PROCEDURE
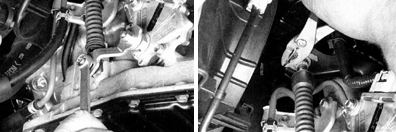
1. Disconnect the cable from the shift lever on the transaxle by removing the nut (photo on the left). Then remove the shift cable from the bracket located on the front of the transaxle by removing the clip (photo on the right).
2. Remove the center console.
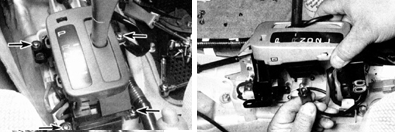
3. Remove the shift lever indicator panel mounting screws (indicated by the arrows in the photo on the left), lift the panel, and remove the light bulb (photo on the right). Tie the panel to the shift lever so that it does not interfere with your work.
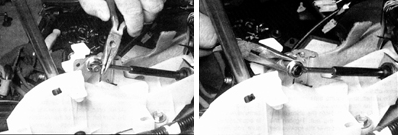
4. Remove the cotter pin (photo on the left) and disconnect the cable from the shift lever (photo on the right).
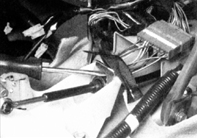
5. Remove the retaining clip from the front edge of the shift lever base.
6. Pull the cable through the grommet in the body panel.
7. Installation is the reverse of removal.
8. After installation is complete, adjust the cable.
Adjustment
PROCEDURE
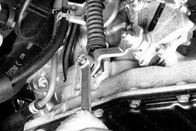
1. Loosen the nut on the transaxle shift lever.
2. Move the lever fully to the right, then return it two detents back to the neutral position.
3. Move the shift lever in the vehicle to the neutral position.
4. Apply light pressure to the lever toward the reverse gear side and securely tighten the nut.
5. Check transaxle operation by moving the shift lever through all positions (try to start the engine in various gears; the starter should operate only in Park or Neutral).
Test yourself
A quick Toyota Corolla quiz: every answer comes with an explanation and a link to the manual page.