Body Electrical
Disassembly
In this manual: Body Electrical
~1min read
1. REMOVE REAR DRIP CHANNEL
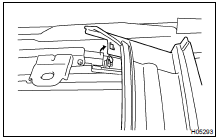
(a) Using a screwdriver, remove the front side of rear drip channel.
HINT: Tape the screwdriver tip before use.
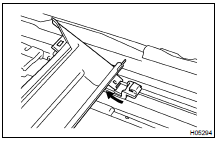
(b) Remove the rear drip channel as shown in the illustration.
2. REMOVE SLIDING ROOF PANEL STOPPERS
Remove the 2 screws and 2 stoppers.
3. REMOVE SUNSHADE TRIM
4. REMOVE DRIVE CABLE

(b) Slide the drive cable rearward, then remove it.
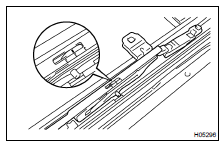
HINT: At the time of reassembly, please refer to the following items.
- Adjust the drive cable to a closed and tilted down position.
- Slide the cable forward or backward to align the 2 marks as shown.
- Slide the cable to the forefront with your hand.
(c) Employ the same manner described above to the other side.
5. REMOVE WIND DEFLECTOR PANEL
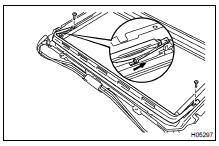
Remove the 2 screws and wind deflector panel as shown in the illustration.
6. REMOVE GUIDE BLOCK
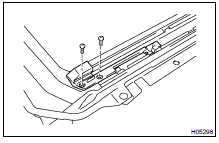
(b) Employ the same manner described above to the other side.
7. REMOVE SLIDING ROOF HOUSING
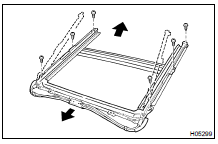
Remove the 6 screws and sliding roof housing.
8. REMOVE CABLE GUIDE CASING
INSTALLATION
Installation is in the reverse order of removal
Test yourself
A quick Toyota Land Cruiser quiz: every answer comes with an explanation and a link to the manual page.
Was this page helpful?