Removing and installing control unit and hydraulic unit, RHD vehicles
In this manual: Brake system (hybrid)
~4min read
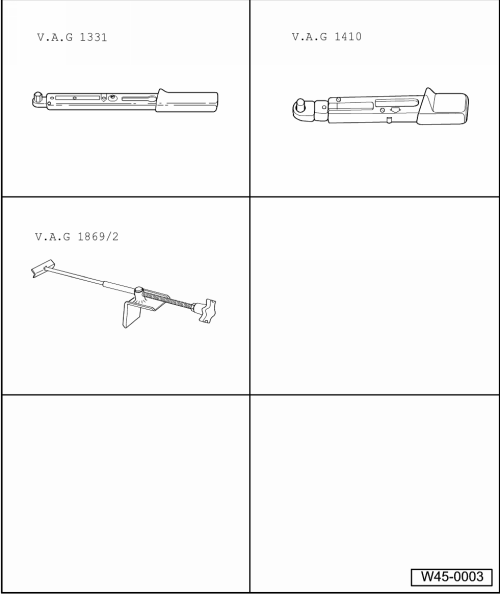
Special tools and workshop equipment required
Torque wrench -V.A.G 1331-
Torque wrench -V.A.G 1410-
Brake pedal depressor -V.A.G 1869/2-
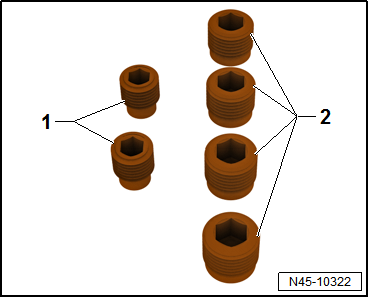
Sealing plugs, assembly part no. 5Q0 698 311
1 -
Sealing plug M10
2 -
Sealing plug M12
Location:
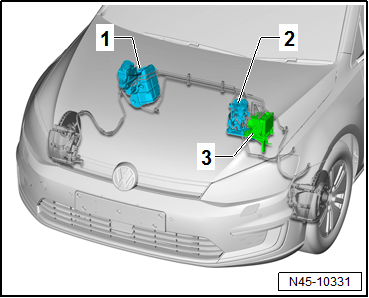
The ABS control unit -J104- is bolted to the ABS hydraulic unit -N55- and is located on the left of the engine compartment.
1 -
Brake servo and brake master cylinder
2 -
Brake system pressure accumulator -VX70-
3 -
ABS control unit -J104- with ABS hydraulic unit -N55-
Removing
Do not bend the brake lines in the area of the hydraulic unit!
Read out and note the existing control unit code.
If vehicle has a coded radio, note radio code or, if necessary, request it.
Observe safety precautions when working on the high-voltage system → Chapter.
Observe the risk classification of the high-voltage system → Electric drive; Rep. gr.00.
Danger to life due to high voltage.Risk of severe or fatal injury due to electric shock.The high-voltage system must be de-energised by a suitably qualified technician.
De-energise high-voltage system now → Electric drive; Rep. gr.93.
Remove brake system pressure accumulator -VX70- → Chapter.
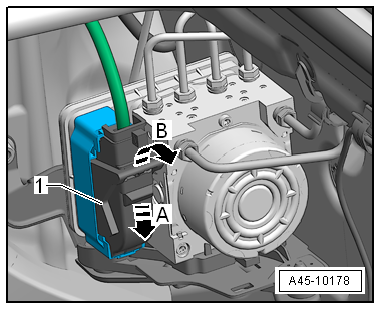
Press down retainer catch -arrow A-.
Release electrical connector -arrow B-.
Pull off electrical connector -1-.
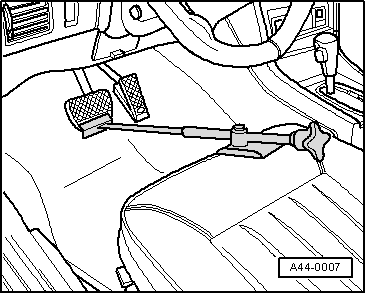
Apply brake pedal depressor -V.A.G 1869/2-.
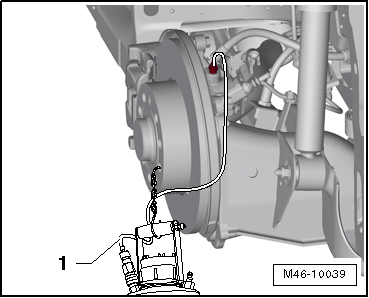
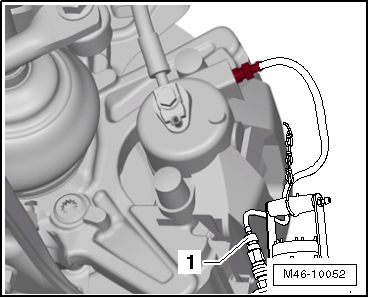
Connect hose of bleeder bottle -1- to bleeder valve of front left brake caliper.
Open bleeder valve.
Connect hose of bleeder bottle -1- to bleeder valve of rear left brake caliper.
Open bleeder valve.
Depress brake pedal at least 60 mm using brake pedal depressor -V.A.G 1869/2-.
Close front left and rear left bleeder valves.
Do not remove brake pedal depressor -V.A.G 1869/2-.
Place sufficiently lint-free cloths under ABS control unit -J104- and ABS hydraulic unit -N55-.
Note Make sure no brake fluid gets onto electrical contacts on ABS control unit -J104-.
Unclip brake lines from plenum chamber bulkhead.
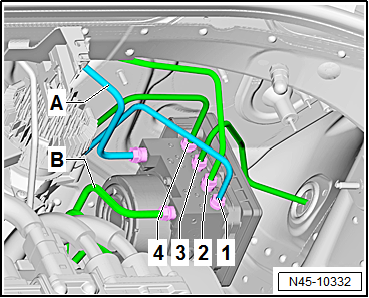
First, mark the two brake lines -A- and -B- coming from brake master cylinder.
Unscrew both brake lines -A- and -B- from ABS hydraulic unit -N55-.
Seal threaded holes immediately using sealing plugs from the assembly part kit, part no. 5Q0 698 311.
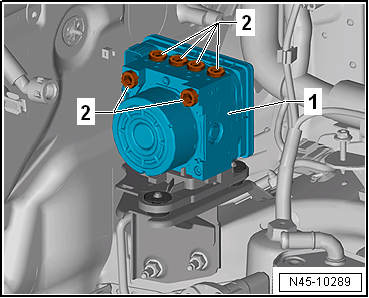
Mark, unscrew and seal threaded holes -2- of remaining brake lines (brake calipers).
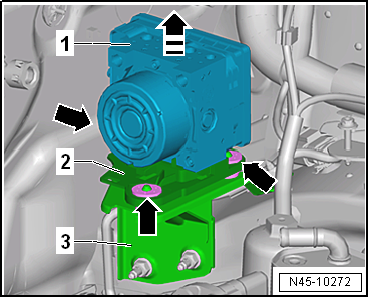
Pull off ABS hydraulic unit -N55--1- together with bracket -2- in -direction of arrow-.
The rubber dampers -arrows- will be pulled off the studs of bracket -3- while doing so.
Guide hydraulic unit out of vehicle.
Installing
Install in reverse order. Note the following when doing this:
Note Remove sealing plugs from new hydraulic unit only when the corresponding brake line is to be fitted. If sealing plugs are removed too early from the hydraulic unit, brake fluid can escape, and it can then no longer be guaranteed that the unit can be sufficiently filled and bled.
Do not bend the brake lines in the area of the ABS hydraulic unit -N55-
Ensure that rubber dampers of retainer are not pressed out of bracket when installing. After installation, check that the ABS hydraulic unit -N55- is firmly seated, or malfunction can occur.
Tightening sequence of brake lines:
First, attach and tighten brake lines in sequence -4- to -1-.
Then, attach and tighten brake lines in sequence -A- to -B-.
Remove brake pedal depressor -V.A.G 1869/2-.
Bleed brake system → Chapter.
Code radio.
Code control unit -J104- using → Vehicle diagnostic tester in "Guided Fault Finding".
To do this, carry out basic setting of the steering angle sender -G85-, the lateral acceleration sender -G200-, the longitudinal acceleration sender -G251- and the brake pressure sender -G201-.
Specified torques
→ Chapter
Battery → Electrical system; Rep. gr.27
Noise insulation → General body repairs, exterior; Rep. gr.66.
Front bleeder valves → Chapter „Assembly overview - front brake caliper“
Danger to life due to high voltage.Risk of severe or fatal injury due to electric shock.The high-voltage system must be brought into operation by a suitably qualified technician.
?
Test yourself
A quick Volkswagen Golf quiz: every answer comes with an explanation and a link to the manual page.
 Note Make sure no brake fluid gets onto electrical contacts on ABS control unit -J104-.